Yearly Archive November 19, 2024

Bytrace

the devil’s fire pdf

Dive into the gripping world of The Devil’s Fire, a captivating tale of love, danger, and identity set against the treacherous Caribbean seas. Explore the dark mafia underbelly through the eyes of Althaia and Damiano in this enthralling narrative by Mariam El-Hafi and Matt Tomerlin.

1.1 Overview of the Novel’s Popularity

The Devil’s Fire has garnered significant attention for its gripping mafia storyline and complex character dynamics. Readers praise its dark, immersive world and emotional depth, making it a standout in the romance and young adult genres. The novel’s popularity stems from its ability to blend intense drama with personal growth, resonating with fans of intense, character-driven narratives. Its success is further highlighted by discussions on platforms like Reddit, where readers actively share their thoughts and theories.

Plot Summary

Set against the Caribbean seas, The Devil’s Fire follows Althaia, a sheltered young woman, and Damiano, a ruthless mafia boss, entangled in a forbidden relationship and secrets.

2.1 Main Plot Elements and Setting

The Devil’s Fire unfolds in the treacherous Caribbean seas, blending mafia intrigue with personal journeys. Althaia, sheltered yet curious, navigates a dark world of secrets and danger. Damiano, the ruthless mafia boss, embodies power and fear. Their forbidden relationship drives the plot, exploring themes of identity and love amidst a backdrop of piracy and betrayal, creating a thrilling adventure of self-discovery and moral dilemmas.

Authors Behind the Novel

Mariam El-Hafi and Matt Tomerlin collaborate masterfully in The Devil’s Fire, blending their unique storytelling styles to craft a compelling narrative of love, power, and identity.

3.1 Mariam El-Hafi’s Contribution

Mariam El-Hafi brings a visionary touch to The Devil’s Fire, weaving intricate characters and emotional depth. Her debut work showcases her passion for storytelling, capturing readers with a rich, immersive world that explores themes of identity and forbidden love. El-Hafi’s unique voice and creative vision set the tone for the novel, making it a standout in young adult fiction.

3.2 Matt Tomerlin’s Role in Shaping the Story

Matt Tomerlin’s collaboration with Mariam El-Hafi brought depth and complexity to The Devil’s Fire. His expertise in crafting compelling narratives enriched the plot, particularly in exploring themes of forbidden love and power dynamics. Tomerlin’s ability to weave intricate relationships and high-stakes scenarios added layers to the story, making it a gripping tale of love, danger, and self-discovery. His contribution was pivotal in shaping the novel’s emotional and dramatic arcs.

Themes Explored in the Book

The Devil’s Fire delves into identity, forbidden love, and personal growth, exploring the human capacity to adapt in chaotic worlds, blending romance with dark, intense drama.

4.1 Identity and Personal Growth

Althaia’s journey in The Devil’s Fire is a poignant exploration of self-discovery, as she navigates a sheltered upbringing and the harsh realities of the mafia world. Her transformation from innocence to resilience highlights the struggle to define oneself amidst external pressures. This theme resonates deeply, offering a relatable narrative of finding strength and purpose in unexpected circumstances. The novel masterfully portrays how personal growth often emerges from confronting life’s darkest challenges.

4.2 Love and Forbidden Relationships

At the heart of The Devil’s Fire lies a tumultuous love story between Althaia and Damiano Bellavia, a ruthless mafia boss. Their relationship, marked by danger and societal taboos, explores the complexities of forbidden love. Althaia, once sheltered, finds herself drawn to the darkness Damiano embodies, challenging her identity and morals. This intense dynamic delves into the human capacity for love despite overwhelming obstacles, creating a narrative that captivates readers with its emotional depth and moral ambiguity.

Key Characters in The Devil’s Fire

Meet Althaia, a sheltered protagonist, and Damiano Bellavia, the ruthless mafia boss, in The Devil’s Fire. Their complex, forbidden relationship explores themes of danger, loyalty, and identity, driving the story’s dark, intense narrative.

5.1 Althaia’s Journey

Althaia’s journey in The Devil’s Fire is marked by her transformation from a sheltered existence to a world of danger and forbidden love. As she navigates the treacherous mafia landscape, she uncovers secrets about her past and her connection to the enigmatic Damiano Bellavia. Her story is one of resilience and self-discovery, as she grapples with the darkness surrounding her while seeking her own path amidst the chaos.

5.2 Damiano Bellavia: The Ruthless Mafia Boss

Damiano Bellavia, the formidable mafia boss, is a central figure in The Devil’s Fire, exuding power and ruthlessness. His reign is marked by fear and control, shaping the dark world Althaia enters. Despite his terrifying reputation, glimpses of complexity emerge, revealing a man driven by both ambition and hidden vulnerabilities. His role in the story intertwines danger, loyalty, and forbidden connections, making him a compelling and enigmatic character.

Book Cover and Design

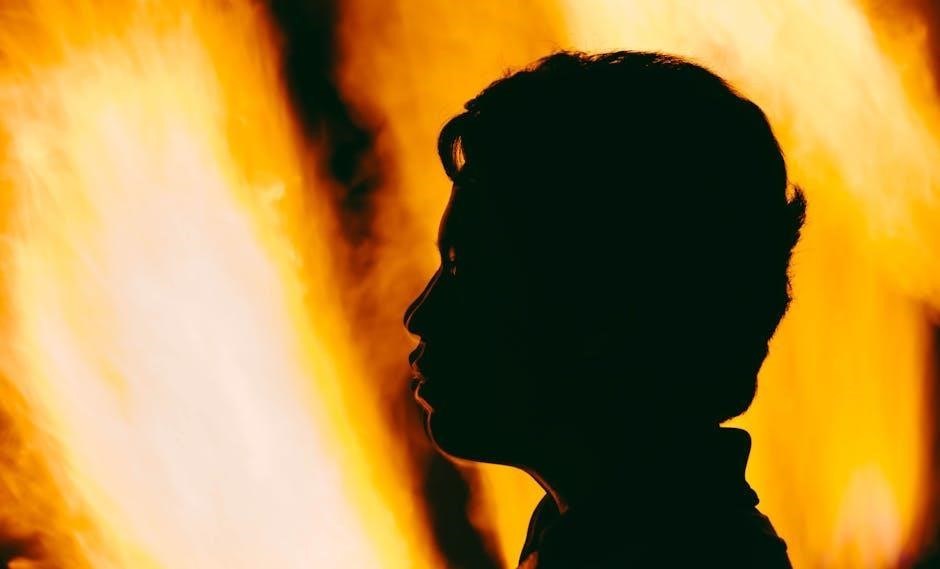
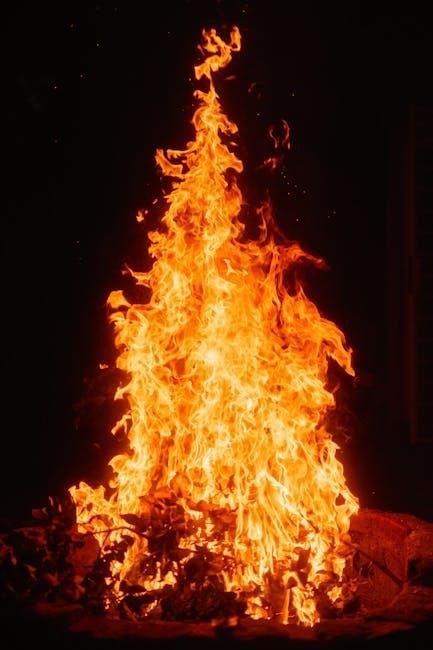
Mariam El-Hafi’s cover art for The Devil’s Fire captivates with its dark, fiery aesthetic, reflecting the novel’s intense themes. The design draws readers in, hinting at the story’s depth.

6.1 Mariam El-Hafi’s Cover Art

Mariam El-Hafi’s cover art for The Devil’s Fire is a striking blend of dark, fiery imagery and subtle elegance. The design captures the novel’s essence, featuring bold, contrasting colors that evoke themes of forbidden love and danger. The fiery motif symbolizes passion and conflict, while the dark undertones hint at the mafia’s ruthless world. El-Hafi’s artistic vision perfectly encapsulates the story’s intensity, making the cover a compelling visual representation of the narrative within.

6.2 Variations in Editions

The Devil’s Fire is available in multiple editions, each offering a unique reading experience. The hardcover edition features a matte finish, while the paperback is designed for portability. Digital versions, including PDF, provide convenience and accessibility across devices. Some editions include exclusive content, such as behind-the-scenes insights or interviews with the authors. Fans can also find a special collector’s edition with enhanced artwork. Whether in print or digital format, each edition ensures readers immerse themselves in the captivating world of The Devil’s Fire.

Reviews and Reception

Readers praise The Devil’s Fire for its gripping narrative and strong character development. Critics note the need for improved world-building to enhance the story’s depth and engagement.

7.1 Positive Feedback from Readers

Readers have praised The Devil’s Fire for its gripping narrative and strong character development. Many highlight the dynamic between Althaia and Damiano, calling it intense and compelling. Fans appreciate the emotional depth and the way the story explores themes of identity and forbidden love. The mafia backdrop and Caribbean setting add a unique twist, keeping readers engaged. The novel’s ability to balance dark themes with moments of tenderness has resonated widely, making it a favorite among fans of romance and drama.

7.2 Criticisms and Areas for Improvement

Some readers noted that The Devil’s Fire could benefit from more detailed world-building, particularly in fleshing out the mafia dynamics and Caribbean setting. While the story captivates with its emotional depth, a few critics felt certain plot points were rushed, leaving unanswered questions; Additionally, some readers desired more backstory for secondary characters to enhance the narrative’s complexity. Expanding on these elements could elevate the story and provide a more immersive experience for readers.

Historical and Cultural Context

The Devil’s Fire draws inspiration from the Caribbean’s rich history and the secretive world of organized crime, blending fictional narratives with real-life mafia dynamics and cultural influences.

8.1 Inspiration from Real-Life Events

The Devil’s Fire draws heavily from historical Caribbean piracy and mafia dynamics, blending fictional narratives with real-life events. The ruthless mafia boss, Damiano Bellavia, mirrors infamous crime lords, while Althaia’s journey reflects struggles of identity in culturally rich yet turbulent settings. The novel’s dark, secretive world is inspired by true accounts of organized crime, adding depth and authenticity to its gripping storyline.

Cultural and Social Impact

The Devil’s Fire has significantly influenced young adult fiction, resonating with readers through its exploration of identity and personal growth, setting a new standard in the genre.

9.1 Influence on Young Adult Fiction

The Devil’s Fire has carved a niche in young adult fiction, blending romance with mafia drama. Its exploration of identity and personal growth resonates deeply, making it a benchmark for contemporary YA storytelling. The novel’s themes of forbidden love and self-discovery have inspired a new wave of writers, encouraging deeper emotional and psychological exploration in the genre, thus leaving a lasting impact on its audience.

Availability and Access

The Devil’s Fire PDF is readily accessible online, offering readers an easy way to immerse themselves in this gripping tale from various digital platforms in English.

10.1 Where to Find The Devil’s Fire PDF

The Devil’s Fire PDF is widely available across popular digital platforms, including Amazon Kindle, Google Books, and online libraries. Readers can easily download or purchase the PDF version in English for a seamless reading experience.

  • Amazon Kindle offers a direct download option.
  • Google Books provides a preview and purchase link.
  • Independent online libraries may host the PDF for free.

The Devil’s Fire captivates readers with its exploration of identity, love, and personal growth, leaving a lasting impact through its intense narrative and emotional depth.

11.1 Final Thoughts on the Novel’s Significance

The Devil’s Fire stands out as a compelling tale of identity, love, and personal growth, offering readers a deep exploration of human resilience. With its rich characters and intense mafia backdrop, the novel captivates audiences, leaving a lasting impression. Mariam El-Hafi and Matt Tomerlin’s collaboration brings forth a story that resonates emotionally, making it a memorable read in the young adult fiction genre. Its significance lies in its ability to blend dark themes with heartfelt moments, creating a truly unforgettable experience.

The Meaning Behind the Title

The Devil’s Fire symbolizes the destructive yet transformative power of passion and danger, reflecting Damiano’s ruthless nature and Althaia’s fiery journey through a dark, forbidden world.

12.1 Symbolism and Significance of “The Devil’s Fire”

The title, The Devil’s Fire, symbolizes the destructive yet transformative power of passion and danger, reflecting Damiano’s ruthless nature and Althaia’s fiery journey through a dark, forbidden world. It embodies the dual nature of fire—both purifying and annihilating—mirroring the characters’ internal struggles and the explosive conflicts they face. The phrase also hints at the inferno of secrets, desires, and betrayals that fuel the story, set against the treacherous backdrop of the Caribbean seas and the mafia underworld.

Bytrace

ghana visa application form new york pdf

Navigating the Ghana visa application process in New York requires careful preparation. The Consulate General guides applicants through necessary steps‚ ensuring all documents meet specific requirements for approval. Timely submission and adherence to guidelines are essential to avoid delays.

Overview of the Ghana Consulate General in New York

The Ghana Consulate General in New York serves as the official representative of the Government of Ghana in the United States. Located at 19 East 47th Street‚ New York‚ NY 10017‚ the consulate facilitates various services‚ including visa applications‚ passport renewals‚ and biometric enrollment. It plays a crucial role in fostering diplomatic relations and assisting Ghanaian nationals and U.S. citizens with travel-related matters. The consulate also provides guidance on visa requirements‚ ensuring applicants comply with Ghana’s immigration regulations. Their support is essential for smooth processing of visa applications‚ making travel to Ghana seamless and efficient for all applicants.

Downloading the Ghana Visa Application Form (PDF)

Access the Ghana visa application form online via the Consulate General’s official website. Eliminate scanning and printing by using digital tools to fill out and eSign the document.

Locating the Official Ghana Consulate Website

To locate the official Ghana Consulate website‚ visit https://www.ghanaconsulateny.com. This is the verified platform for visa applications and related services. Ensure you avoid fake sites by verifying the URL carefully. The website provides direct access to the visa application form‚ guidelines‚ and contact information. Navigate to the “Useful Links” section for quick access to essential resources. For assistance‚ contact the consulate at +1-212-832-1300 or visit their office at 19 East 47th Street‚ New York‚ NY 10017. Always verify the website’s authenticity to prevent scams.

Accessing the Visa Application Form

To access the Ghana visa application form‚ visit the official Ghana Consulate General website at https://www.ghanaconsulateny.com. Navigate to the “Visa Application” or “Downloads” section. The form is available as a PDF and can be downloaded directly. Ensure you use the official form to avoid issues with your application. If you encounter difficulties‚ contact the consulate at +1-212-832-1300 or via email for assistance. Always verify the website’s authenticity to prevent scams and ensure a smooth application process.

Understanding the Visa Application Requirements

A valid passport‚ recent passport-sized photos‚ and accurate information are essential. Ensure all details match your documents to avoid rejection. Check the consulate’s website for the latest requirements.

Required Documents for Visa Application

To apply for a Ghanaian visa in New York‚ you must submit specific documents. These include a valid passport with at least six months’ validity‚ recent passport-sized photos‚ a completed visa application form‚ and proof of payment. Additionally‚ travelers may need to provide flight itineraries‚ hotel reservations‚ or an invitation letter from a host in Ghana. For business visits‚ a letter from your employer or an invitation from a Ghanaian company is required. Ensure all documents are accurate and up-to-date to avoid processing delays. A yellow fever vaccination certificate may also be necessary for entry.

Visa Fees and Payment Methods

Visa fees for Ghana vary based on the type and duration of stay. Single-entry visas typically cost around $60‚ while multiple-entry visas range from $100 to $200. Payments must be made via money order or cashier’s check payable to the Ghana Consulate General in New York. Cash and personal checks are not accepted. Ensure the payment matches the visa type to avoid rejection. Processing times vary‚ so submit applications well in advance. Additional fees may apply for expedited services or administrative costs. Confirm current fees on the official consulate website before submitting your application to avoid discrepancies.

Filling Out the Visa Application Form

Filling out the Ghana visa application form requires attention to detail and accuracy. Utilize digital tools like pdfFiller for a seamless experience and to avoid delays.

Step-by-Step Instructions for Completing the Form

Download the Ghana visa application form from the official consulate website.
Fill in personal details‚ including surname‚ name‚ date of birth‚ and passport information.
Provide travel details‚ such as purpose of visit and intended duration of stay.
Complete the sponsor/host section with accurate contact information.
Double-check all entries for accuracy and completeness.
Use online tools like pdfFiller for efficient form filling and e-signing.
Ensure adherence to the consulate’s instructions to avoid rejection.

Common Mistakes to Avoid

Ensure all sections of the form are fully completed to avoid rejection.
Double-check for spelling and factual errors in personal and travel details.
Missing or incorrect passport numbers and expiration dates are frequent issues.
Failure to sign the form or include the required fee can delay processing.
Make sure to use the most recent version of the form from the official consulate website.
Lastly‚ avoid submitting incomplete or unsigned documents‚ as this often leads to application denial.

Submitting the Application

Applications can be submitted in person at the consulate or via mail. Ensure all documents are complete and fees are paid. Processing times vary‚ so plan accordingly.

In-Person Submission at the Consulate

Submitting your Ghana visa application in person at the Consulate General in New York ensures direct handling and immediate verification of documents. Applicants must visit the consulate located at 19 East 47th Street‚ New York‚ NY 10017‚ during business hours. Bring the completed application form‚ passport‚ recent passport-sized photos‚ and all required supporting documents. Payment receipts for visa fees must also be presented. Arrive early to allow sufficient time for processing. Ensure all details are accurate to avoid delays. After submission‚ track your application status through the consulate’s provided channels or follow up via phone or email for updates.

Mail-In Submission Process

For mail-in submissions‚ send your completed application to the Consulate General of Ghana in New York at 19 East 47th Street‚ NY 10017. Enclose the filled visa application form‚ passport‚ photos‚ and required documents in a secure envelope. Include a prepaid return envelope for tracking. Ensure all documents are neatly organized and meet the specified requirements. Attach the payment receipt for visa fees. clearly label the envelope as “Visa Application” to avoid processing delays. Track your package to confirm delivery and follow up with the consulate if necessary for status updates. This method is convenient for those unable to submit in person.

Additional Resources and Support

Explore online visa application services and contact the Ghana Consulate in New York for support. Utilize available resources for a smooth application process.

Online Visa Application Services

Several online platforms offer streamlined services for completing and submitting the Ghana visa application form. These services provide step-by-step guides‚ eSign capabilities‚ and real-time tracking. Platforms like pdfFiller allow users to fill out forms digitally and print or submit them online. Additionally‚ some services assist with document preparation‚ ensuring accuracy and compliance with Consulate requirements. While these tools simplify the process‚ it’s crucial to verify their legitimacy to avoid scams. Always cross-check with official sources to ensure secure and reliable submissions. Online visa services can save time but require careful review to maintain the integrity of your application.

Contact Information for the Consulate

The Consulate General of Ghana in New York is located at 19 East 47th Street‚ New York‚ NY 10017; Applicants can contact the consulate via telephone at (212) 832-1300 for inquiries and assistance. The consulate’s official website provides detailed information‚ application forms‚ and updated guidelines. Operating hours are typically Monday through Friday‚ 9:00 AM to 3:00 PM‚ but it’s advisable to confirm before visiting. For visa-related questions‚ email or phone support is available to help navigate the application process smoothly. Ensure to verify contact details on the official website to avoid any discrepancies.

Bytrace

genesis study guide pdf

The Book of Genesis, the Bible’s first book, explores creation, humanity’s origins, and foundational theological concepts. Study guides like Genesis 1-3 Study Guide offer structured workbooks for personal, family, or group study, aiding deeper understanding of its themes and relevance today.

Importance of Studying Genesis

The study of Genesis is foundational for understanding the Bible and Christian theology. It provides insights into the origins of the world, humanity, and God’s relationship with His creation. Genesis addresses fundamental questions about existence, sin, and redemption, offering a framework for interpreting life’s purpose. Its themes, such as creation, covenant, and faith, are central to biblical theology. By studying Genesis, readers gain a deeper understanding of God’s character, humanity’s condition, and the unfolding of His plan. It also equips believers to articulate their faith, as 1 Peter 3:15 encourages. With resources like the Genesis 1-3 Study Guide, individuals and groups can engage deeply with the text, applying its truths to modern life and fostering spiritual growth. This book’s relevance extends beyond history, shaping how we view God, humanity, and the world today.

Overview of the Book’s Structure

The Book of Genesis is structured to reveal God’s plan progressively. It begins with the creation narrative (Genesis 1-3), establishing the foundation of the world and humanity. The early chapters (Genesis 4-11) describe the spread of sin and God’s judgment, culminating in the Tower of Babel. The remainder of the book focuses on the patriarchs: Abraham (Genesis 12-25), Isaac (Genesis 26-28), Jacob (Genesis 29-36), and Joseph (Genesis 37-50). These sections highlight God’s covenant promises and the formation of the Israelites. The book concludes with Joseph’s leadership in Egypt, setting the stage for Israel’s future. Study guides like Genesis 1-3 Study Guide and others provide detailed analyses of these sections, helping readers navigate the book’s flow and identify key events. This structure underscores the transition from creation to the emergence of a chosen people, emphasizing God’s sovereignty and grace throughout history.

Target Audience for the Study Guide

The study guide is designed for a wide audience, including individuals, small groups, and Bible classes. It is particularly suited for teenagers and adults seeking to deepen their understanding of Genesis; The workbook format makes it accessible for personal study, family discussions, or structured group sessions. Additionally, the guide is ideal for those new to biblical studies, as it provides clear explanations and structured lessons. Its versatility allows it to cater to diverse learning needs, ensuring that both beginners and experienced students of Scripture can benefit. The content is tailored to inspire reflection, foster discussion, and enrich one’s spiritual journey through the book of Genesis.

Key Events and Themes in Genesis

Genesis explores creation, humanity’s origins, and pivotal events like the Fall, flood, and early patriarchal narratives. Themes include God’s sovereignty, human rebellion, and divine grace, shaping foundational theological concepts.

The Creation Story (Genesis 1-3)

The creation story in Genesis 1-3 is foundational to understanding the origins of the world and humanity. It describes God as the sovereign Creator who brought order out of chaos through His spoken word. The account highlights the uniqueness of humanity, created in God’s image, and the special relationship between God and His creation. The narrative also introduces themes of obedience, sin, and redemption, as seen in the Fall of Adam and Eve. Study guides, such as the Genesis 1-3 Study Guide, emphasize the theological significance of these chapters, exploring the nature of God, the role of humanity, and the consequences of sin. These themes are central to the biblical worldview and provide a framework for understanding the rest of Scripture. The creation story remains a vital topic for personal and group Bible study, offering insights into God’s plan and humanity’s purpose.

Major Events and Their Theological Significance

Genesis is filled with pivotal events that shape the theological narrative of the Bible. Key moments include the creation of the world, the Fall of humanity, and the early history of humankind. These events establish foundational truths about God’s nature, humanity’s condition, and the divine plan for redemption. The creation story highlights God’s sovereignty and humanity’s unique role as image-bearers of God. The Fall introduces sin and its consequences, setting the stage for the need for redemption. Other significant events, such as the flood and the tower of Babel, reveal God’s judgment and mercy, as well as humanity’s tendency toward rebellion. These narratives are not just historical accounts but carry deep theological meaning, shaping the reader’s understanding of God’s character and humanity’s relationship with Him. Study guides like the Genesis Study Guide PDF provide tools to explore these events and their profound implications for faith and life.

Genealogy and Its Role in the Narrative

Genealogy plays a crucial role in the Book of Genesis, serving as more than just a list of names. It functions to trace the lineage of key figures, emphasizing God’s covenant promises and the continuity of His plan. For instance, the genealogies of Adam’s descendants highlight the progression from creation to the early spread of humanity. Similarly, the patriarchal genealogies focus on Abraham, Isaac, and Jacob, underscoring their roles as recipients of God’s promises. These lists also illustrate the theme of divine election, showing how God’s purposes are fulfilled through specific families and individuals. Furthermore, genealogies provide historical and theological context, connecting major events and reinforcing the narrative’s coherence. Study guides, such as the Genesis Study Guide PDF, often include charts and explanations to help readers analyze these genealogies, revealing their significance in understanding the Bible’s overarching story. They are not merely genealogical records but theological tools that deepen the reader’s appreciation of God’s redemptive plan.

In-Depth Analysis of Selected Chapters

This section dives into pivotal chapters like Genesis 22, exploring Abraham’s faith and its theological implications. Study guides provide detailed commentary, helping readers uncover deeper meanings and apply these lessons personally.

The Faith of Abraham (Genesis 22)

Genesis 22 presents a profound test of Abraham’s faith, as God commands him to sacrifice his son Isaac. This chapter is a cornerstone of theological study, illustrating unwavering trust in divine promises. Study guides highlight Abraham’s obedience and its significance, offering insights into faith’s transformative power. Through this narrative, readers explore themes of sacrifice, trust, and God’s provision, making it a pivotal moment in biblical history. The story not only shapes Abraham’s legacy but also serves as a model for believers, emphasizing the importance of faith in uncertain circumstances. By examining this chapter, students gain a deeper understanding of Abraham’s character and the broader theological implications of his actions.

Prophecy and Key Concepts in Genesis

Genesis lays the foundation for many prophetic themes and key concepts that resonate throughout the Bible; Study guides emphasize the importance of understanding these elements, as they provide a framework for interpreting later biblical prophecy. Central themes include the creation narrative, the covenant with Abraham, and the promise of a messiah. These concepts are not only historical but also prophetic, as they foreshadow events and figures in the New Testament. For instance, the promise of a savior in Genesis 3:15 sets the stage for the coming of Christ. Additionally, the stories of Noah and the flood illustrate divine judgment and redemption, themes that recur in prophetic literature. By examining these key concepts, students gain a deeper appreciation for how Genesis shapes the broader biblical narrative and informs Christian theology.

Modern Relevance and Application

Despite being an ancient text, the Book of Genesis holds profound relevance for modern life. Its themes of creation, morality, and divine purpose continue to shape contemporary discussions on ethics, environmental stewardship, and human identity. Study guides highlight how Genesis addresses universal questions about life’s meaning and humanity’s role in the world. For instance, the concept of stewardship in Genesis 1:28 encourages responsible care for the environment, a pressing modern issue. Additionally, the narrative of Cain and Abel (Genesis 4) explores themes of jealousy, violence, and accountability, offering insights into human behavior and conflict resolution. By studying Genesis, individuals can apply its timeless lessons to navigate modern challenges, fostering personal growth and a deeper understanding of their place in the world. This makes Genesis not just a historical text but a living guide for contemporary faith and life.

Bytrace

california fire code pdf

The California Fire Code (CFC) outlines regulations to safeguard life, property, and public welfare from fire hazards. Adopted by California, it is based on the International Fire Code (IFC) but tailored to address the state’s unique fire risks and conditions. The CFC is regularly updated to reflect evolving safety standards and practices, ensuring compliance with modern fire prevention and suppression techniques. It serves as a critical resource for architects, builders, and safety officials, providing a comprehensive framework for fire safety in both residential and commercial settings. The code is accessible online, offering a downloadable PDF version for easy reference.

1.1 Historical Background and Purpose

The California Fire Code (CFC) was established to address fire hazards and ensure public safety. Its origins date back to early fire safety regulations in the 20th century, evolving to meet California’s unique risks, such as wildfires and urban fire threats. The CFC aims to safeguard life, property, and the environment by standardizing fire prevention and suppression practices. It incorporates nationally recognized standards while tailoring provisions to California’s specific needs. The code’s purpose is to provide a uniform framework for fire safety, ensuring consistency across the state. Its guidelines are updated periodically to reflect advancements in fire science and technology.

1.2 Scope and Application

The California Fire Code (CFC) applies to all occupancies, buildings, and premises within the state, ensuring fire safety through standardized regulations. It addresses materials, designs, and practices to minimize fire risks and hazards. The code is enforceable by CAL FIRE and local authorities, providing a uniform framework for fire prevention and suppression. Its scope includes both new and existing structures, outlining requirements for fire-resistant materials, suppression systems, and emergency access. The CFC also covers outdoor activities, such as fireworks and burning, to protect communities from fire-related dangers. Compliance is mandatory, ensuring public safety and property protection statewide.

Structure of the California Fire Code

The California Fire Code is organized into chapters, covering administrative provisions, general safety measures, and specific fire safety requirements. It ensures a logical framework for fire safety implementation statewide.

2.1 Administrative Chapters (Chapter 1-2)

Chapters 1 and 2 of the California Fire Code (CFC) provide the administrative framework and definitions essential for understanding and implementing the code. Chapter 1 outlines the scope, purpose, and application of the CFC, establishing its authority and jurisdiction. It also details enforcement procedures, permits, and penalties for non-compliance. Chapter 2 offers a comprehensive list of definitions for terms used throughout the code, ensuring clarity and consistency. These chapters serve as the foundation for interpreting the rest of the CFC, making them indispensable for stakeholders, including architects, builders, and fire safety officials. The code is available as a downloadable PDF for easy access.

2.2 General Safety Provisions (Part II)

Part II of the California Fire Code (CFC) focuses on general safety provisions that apply to various occupancies and fire hazards. It includes regulations for fuel-fired appliances, hot water heaters, and emergency systems. Key provisions address fire alarm systems, smoke detectors, and carbon monoxide detectors, ensuring early warning systems are in place. Additionally, it covers requirements for fire extinguishers, sprinkler systems, and proper storage of flammable materials. Provisions also outline safety measures for specific hazards like cooking equipment and electrical systems. These standards aim to minimize fire risks and ensure safe evacuation procedures. Compliance with these provisions is mandatory for all buildings and structures in California.

2.3 Specific Fire Safety Requirements

The California Fire Code (CFC) outlines specific fire safety requirements tailored to particular hazards and occupancies. These include detailed standards for fire-resistant materials, fire suppression systems, and means of egress. Specific provisions address high-rise buildings, assembly occupancies, and hazardous materials storage. Fire-resistant construction materials are mandated in wildfire-prone areas to protect against ignition from embers. Additionally, the code specifies requirements for fire alarm systems, smoke barriers, and emergency lighting. Compliance ensures that buildings are designed and maintained to minimize fire risks and facilitate safe evacuation. These requirements are enforceable and essential for safeguarding lives and property in diverse settings across California.

Key Provisions of the California Fire Code

The CFC includes provisions for fire hazard severity zones, fire-resistant materials, suppression systems, and emergency evacuation plans. It ensures compliance with safety standards to protect lives and property.

3.1 Fire Hazard Severity Zones and Mapping

The California Fire Code establishes Fire Hazard Severity Zones, which are mapped areas categorized by their risk of wildfire. These zones are determined based on factors like vegetation, topography, and weather patterns. The mapping helps guide development, land use, and fire safety practices. By identifying high-risk areas, the CFC ensures targeted fire prevention measures are implemented. This system aids in resource allocation, emergency planning, and enforcing stricter building codes in vulnerable regions. Regular updates to the maps reflect changing environmental conditions, ensuring effective risk management and public safety across California.

3.2 Fire-Resistant Materials and Construction

The California Fire Code mandates the use of fire-resistant materials and construction methods to minimize fire risks. Buildings in high-risk areas must use materials classified by their fire resistance ratings, ensuring they can withstand ignition and spread. Techniques like fire-retardant-treated wood and non-combustible assemblies are required in specific zones. These standards apply to both new constructions and renovations, ensuring compliance with fire safety protocols. The CFC also outlines testing methods for materials to verify their fire resistance. By enforcing these requirements, the code aims to protect lives, property, and communities from the devastating effects of fires.

3.3 Fire Suppression and Alarm Systems

The California Fire Code (CFC) mandates the installation and maintenance of fire suppression and alarm systems to ensure timely detection and control of fires. These systems must meet specific standards outlined in the code, including sprinkler systems, smoke detectors, and alarm panels. Regular inspections and testing are required to maintain functionality. The CFC also specifies the integration of these systems with local fire departments and emergency response plans. Proper installation and maintenance are critical to prevent fire-related hazards and ensure public safety. Non-compliance with these requirements can result in penalties, emphasizing the importance of adherence to the code’s guidelines.

Enforcement and Implementation

Enforcement of the California Fire Code is managed by CAL FIRE and local authorities. Regular inspections ensure compliance, while penalties address violations, maintaining public safety standards effectively.

4.1 Role of CAL FIRE and Local Authorities

CAL FIRE plays a pivotal role in enforcing the California Fire Code (CFC), ensuring fire prevention and suppression standards are met statewide. Local authorities collaborate with CAL FIRE to implement regulations, conducting inspections to verify compliance with fire safety requirements. CAL FIRE also develops and updates fire hazard severity maps, which guide local enforcement efforts. Together, these entities work to protect communities from fire risks, ensuring public safety through consistent and rigorous enforcement of the CFC. Their coordinated efforts are essential for maintaining fire safety standards across California.

4.2 Inspection and Compliance Requirements

Regular inspections are mandated by the California Fire Code to ensure compliance with fire safety standards. CAL FIRE and local authorities conduct these inspections to verify adherence to fire suppression systems, building materials, and emergency access requirements. Compliance involves maintaining fire-resistant construction, proper signage, and operational fire alarms. Inspections may occur annually or as dictated by local regulations. Failure to comply can result in penalties, emphasizing the importance of proactive measures. The CFC outlines specific criteria for each inspection type, ensuring a uniform approach to fire safety enforcement across California.

4.3 Penalties for Non-Compliance

Non-compliance with the California Fire Code can result in significant penalties, including fines and legal action. Violations are categorized based on severity, with repeat offenses leading to higher penalties. CAL FIRE and local enforcement agencies impose these sanctions to ensure public safety. Failure to address fire hazards or implement required safety measures can result in daily fines until compliance is achieved. In severe cases, legal action may be taken, potentially halting operations or leading to criminal charges. Compliance is critical to avoid financial and operational repercussions, emphasizing the importance of adhering to CFC regulations.

Resources for Understanding the CFC

Official publications, training workshops, and online platforms provide access to the California Fire Code PDF. CAL FIRE’s website offers detailed resources and updates.

5.1 Official Publications and Websites

The California Fire Code (CFC) is published in Title 8 of the California Code of Regulations. Official publications, including the CFC 2022 edition, are accessible via the California Building Standards Commission (CBSC) website. CAL FIRE also provides resources and updates on fire safety regulations. The California Department of Housing and Community Development (HCD) and local fire authorities offer additional guidance. These official sources ensure compliance with state fire safety standards. They provide detailed information on fire hazard severity zones, construction requirements, and enforcement procedures. Accessing these resources helps stakeholders stay informed and adhere to the latest fire code regulations.

5.2 Training and Workshops

Various training programs and workshops are available to help professionals understand and comply with the California Fire Code. Organizations like CAL FIRE, the California Building Standards Commission (CBSC), and local fire departments offer these resources. Workshops cover topics such as fire hazard severity zones, construction requirements, and enforcement procedures. These sessions are designed for architects, builders, and safety officials to ensure they are well-versed in the CFC. Many of these training opportunities are listed on official websites, making it easier for stakeholders to find and attend relevant programs. Regular updates and expert-led sessions ensure participants stay informed about the latest fire safety regulations and best practices.

5.3 Accessing the California Fire Code PDF

The California Fire Code (CFC) is readily available in PDF format for professionals and stakeholders. The official state website and the California Building Standards Commission (CBSC) provide access to the document. While the PDF is not free, it can be purchased through authorized sources, ensuring compliance with the latest updates. Additionally, CAL FIRE and local fire departments often provide links to the CFC PDF on their websites; Accessing the PDF is essential for architects, builders, and safety officials to ensure adherence to fire safety regulations. Regular updates and annotations make the PDF a valuable resource for staying informed on fire safety standards in California.

Bytrace

longboard size guide

Understanding Longboard Size Factors

Longboard size significantly impacts stability, maneuverability, and overall performance. Deck length, width, and wheel size are critical factors to consider for optimal riding comfort and control.

1.1 Deck Length and Width

Deck length and width are essential factors in determining a longboard’s performance. Longer decks (32-42 inches) offer stability for cruising, while shorter ones enable tighter turns. Wider decks (8-10 inches) provide better stability and accommodate larger foot sizes, enhancing comfort and control during rides. Narrower decks improve maneuverability but may feel less stable for beginners. The right deck size ensures optimal balance between agility and stability, catering to individual riding styles and preferences.

1.2 Wheel Size and Placement

Wheel size and placement play a crucial role in a longboard’s handling and speed. Larger wheels (70-100mm) provide faster acceleration and smoother rides over rough terrain, making them ideal for downhill and long-distance rides. Smaller wheels (50-70mm) enhance maneuverability and are better suited for carving and tight spaces. Proper wheel placement ensures balance and stability, with wider setups offering more control during high-speed turns. Choosing the right wheel size and placement ensures an optimal riding experience tailored to your style and terrain preferences.

Rider Height and Weight Considerations

Rider height and weight significantly influence longboard size selection. Taller or heavier riders often prefer larger boards for stability, while shorter or lighter riders may opt for smaller, more maneuverable options.

2.1 Height-Based Size Recommendations

For riders up to 5’10”, longboards between 32-40 inches are ideal, offering a balance of stability and agility. Taller riders, above 5’10”, benefit from longer boards, typically 40 inches or more, which provide enhanced stability at higher speeds. Proper board size ensures optimal control and comfort, making the riding experience more enjoyable and efficient for all height ranges. This recommendation aligns with common sizing guidelines to match rider height with appropriate longboard dimensions for various skating styles.

2.2 Weight and Stability Factors

A rider’s weight significantly influences longboard stability, with heavier riders often requiring wider decks for better balance. A wider deck provides more foot space, enhancing stability and control. For instance, riders weighing over 150 lbs may prefer decks 9.5 inches or wider, while lighter riders (under 150 lbs) can opt for narrower options. Proper weight distribution and deck width ensure a smoother, more stable ride, especially at higher speeds or during carving maneuvers. This balance is crucial for maintaining control and enjoying a comfortable skating experience.

Riding Style and Its Impact on Size

Riding style influences longboard size; cruisers prefer medium lengths, downhill riders opt for larger, stiffer boards, while freestyle requires shorter, maneuverable decks.

3.1 Cruising and Carving

Cruising and carving styles benefit from medium-length decks (32-40 inches) for balance and agility. Wider decks (9-10 inches) provide stability, while narrower widths enhance maneuverability. These dimensions suit both casual rides and dynamic turns, ensuring a smooth, responsive experience for riders of all levels.

3;2 Downhill and Freestyle

Downhill and freestyle riding require longer decks (35-42 inches) for stability at high speeds. Wider decks (9.5-10.5 inches) improve control and balance, essential for sharp turns and tricks. These dimensions are tailored to experienced riders seeking precision and durability, ensuring optimal performance in demanding conditions.

3.3 Commuting and Long-Distance Riding

For commuting and long-distance riding, a medium-length deck (32-40 inches) offers the perfect balance between agility and stability. A slightly narrower width (8-9.5 inches) enhances portability and ease of maneuverability, making it ideal for navigating urban environments. These dimensions ensure a smooth and efficient ride, allowing riders to cover distances comfortably while maintaining control.

Beginner’s Guide to Choosing the Right Size

Beginners should opt for a smaller longboard (32-38 inches) for better stability and ease of control, ensuring a comfortable and confidence-building riding experience.

4.1 Ideal Size for Beginners

For beginners, the ideal longboard size is typically between 28-32 inches in length and 8-10 inches in width. This smaller size provides better stability and control, making it easier to handle. A narrower deck width also allows for a more comfortable stance, reducing the learning curve. Opting for a board with smaller wheels (around 60-70mm) can further enhance stability and maneuverability. This setup is perfect for practicing basic skills like balancing and turning before progressing to more advanced techniques or larger boards.

4.2 Height and Riding Style for Newbies

For new riders, height and riding style play a crucial role in selecting the right longboard size. Taller riders (over 5’10”) may prefer longer boards (40+ inches) for stability, while shorter riders (under 5’6″) benefit from shorter boards (28-32 inches) for better control. Cruising and carving styles suit smaller boards, offering agility and ease of maneuverability. Downhill and freestyle riders may opt for slightly longer boards for stability at higher speeds. Balancing height and style ensures a comfortable and enjoyable riding experience for beginners. Always consider personal comfort and ease of handling when choosing a size.

Foot Size and Deck Width

Foot size directly impacts deck width selection for comfort and control. Riders with larger feet (10.5+ US shoe size) benefit from wider decks (9.5-10.5+ inches), while smaller feet (5-6.5 US shoe size) suit narrower decks (8.5 inches or less). Proper fit ensures stability and ease of movement.

5.1 Measuring Your Foot Size

To ensure the best fit, measure your foot length while standing upright with your foot flat on the ground. Use a ruler or shoe size chart to determine your exact size. Generally, foot sizes correspond to deck widths as follows: smaller feet (5-6.5 US shoe size) pair well with narrower decks (8.5 inches or less), while larger feet (10.5+ US shoe size) require wider decks (9.5-10.5+ inches). Proper alignment ensures stability, control, and comfort while riding. Size accurately to avoid discomfort or performance issues.

5.2 Deck Width Recommendations

Deck width should align with your foot size for optimal comfort and control. Riders with smaller feet (5-6.5 US shoe size) benefit from narrower decks (8.5 inches or less). For medium-sized feet (7-8.5), decks between 8.5-9 inches are ideal; Larger feet (9-10) pair well with decks from 9-9.5 inches, while extra-large feet (10.5+) require wider decks (9.5-10.5+ inches). Proper deck width ensures stability, ease of maneuverability, and prevents foot overlap with trucks. Wider decks generally offer better stability, making them suitable for cruising and commuting.

Longboard Size Chart

A longboard size chart is essential for matching rider height, weight, and style. It provides recommended board sizes for cruising, downhill, freestyle, and commuting, ensuring the best fit.

6.1 Size Chart Based on Height and Style

A size chart based on height and style helps riders select the ideal longboard. For cruising, smaller riders (under 5’10”) prefer 32-40″ boards, while taller riders (over 5’10”) opt for 40″ or more. Downhill riders choose 35-42″ for stability. Freestyle and commuting riders often select medium sizes (33-38″) for versatility. The chart aligns board length with rider height and style, ensuring optimal stability, maneuverability, and control. Personal preference may adjust these standards slightly, but the chart provides a reliable starting point for most riders.

6.2 Adjusting Size for Personal Preference

While size charts provide a foundation, personal preference plays a significant role in fine-tuning your longboard size. Riders with larger feet may prefer wider decks for comfort, while those prioritizing portability might opt for shorter boards. Experienced riders often adjust size based on their style evolution, such as favoring shorter boards for tricks or longer ones for commuting. Ultimately, the right size is a balance of chart recommendations and individual needs, ensuring the board feels natural and enjoyable to ride.

How to Choose the Right Size

Selecting the right longboard size involves considering your height, weight, riding style, and personal comfort. Use size charts to guide your choice, ensuring optimal balance and control for your needs.

7.1 Step-by-Step Selection Process

Determine your riding style: cruising, downhill, freestyle, or commuting. Each style requires specific board dimensions.
Measure your height and weight to align with size recommendations.
Consider deck width relative to your shoe size for comfort and control.
Refer to a longboard size chart to narrow down options.
Test ride if possible to ensure the board feels right.
Adjust based on personal preference for stability or maneuverability.

7.2 Common Mistakes to Avoid

  • Ignoring your riding style when selecting a size can lead to poor performance.
  • Not considering your height and weight may result in instability.
  • Overlooking foot size when choosing deck width can cause discomfort.
  • Skipping the test ride before purchase can lead to a poorly fitting board.
  • Prioritizing price over proper fit may compromise your riding experience.

Selecting the right longboard size is crucial for a comfortable and enjoyable riding experience. By considering factors like deck length, width, and your personal riding style, you can ensure stability, control, and performance. Avoid common mistakes such as ignoring your height or foot size, and always test a board before purchasing. Taking the time to choose wisely will enhance your skills and make every ride more enjoyable. Remember, the perfect fit is key to mastering the sport and enjoying the freedom of longboarding.

Bytrace

extra academy survival guide novel

Ed Rothstaylor‚ a third-rate villain‚ is transmigrated into a game world‚ disowned by his noble family‚ and expelled from his dormitory for his misdeeds. His journey begins as he navigates the challenges of Silvenia Academy‚ relying on his wits and determination to survive.

1.1. Ed’s Background and Transmigration

Ed Rothstaylor’s journey begins with his transmigration into a game world‚ where he assumes the role of a third-rate villain. Originally from a noble family‚ Ed is disowned and expelled from his dormitory due to his troublesome actions. His newfound reality forces him to adapt quickly‚ relying on his knowledge of the game’s storyline to survive. Despite his misdeeds‚ Ed’s determination to thrive in this unfamiliar world drives his decisions. His expulsion sets the stage for his adventures‚ particularly in navigating the perilous Northern Forest‚ a key setting for his survival and growth.

1.2. Ed’s Role as a Third-Rate Villain

As a third-rate villain‚ Ed Rothstaylor faces expulsion from his noble family and dormitory due to his misdeeds. His transmigration into this role grants him awareness of the game’s storyline‚ unlike typical protagonists. This knowledge allows him to navigate challenges strategically. Despite his troublesome past‚ Ed’s determination to survive and thrive in Silvenia Academy drives his actions. His role as a villain positions him uniquely‚ forcing him to rely on wit and cunning rather than traditional heroism. This dynamic sets him apart in a world where villains often follow predictable paths‚ making his journey unpredictable and compelling.

Survival Strategies in Silvenia Academy

Ed relies on his awareness of the game’s plot to navigate challenges‚ avoiding death flags and leveraging the academy’s class system to stay ahead of potential threats silently;

2.1. Navigating the Northern Forest

The Northern Forest‚ a perilous region of Silvenia Academy‚ poses significant challenges for Ed. Filled with hidden dangers and unpredictable encounters‚ it demands constant vigilance. Ed uses his prior knowledge of the game’s plot to anticipate threats‚ avoiding death flags and deviations. He employs stealth and caution‚ leveraging the forest’s terrain to evade stronger enemies. The academy’s class system indirectly aids his navigation‚ as higher-ranking students often patrol specific areas‚ creating patterns Ed can exploit. His ability to blend into the background‚ despite his villainous role‚ proves crucial in surviving this treacherous environment undetected.

2.2. Avoiding Death Flags and Plot Deviations

Ed’s survival hinges on avoiding death flags and adhering to the original plot. His prior knowledge of the game’s storyline allows him to anticipate critical events and steer clear of actions that would trigger his demise. By observing character behaviors and maintaining a low profile‚ Ed minimizes risks. He avoids confrontations with key characters and refrains from actions that could alter the narrative‚ ensuring his role remains consistent with the game’s script. This cautious approach not only prolongs his survival but also enables him to navigate the academy’s challenges without deviating from the established storyline‚ showcasing his adaptability and strategic thinking.

The Plot Structure and Story Progression

The story unfolds in Silvenia Academy‚ a game-like world where Ed‚ as an extra‚ must navigate challenges and avoid deviations to survive‚ blending strategy with progression.

3.1. The Game-Like Elements of the Academy

Silvenia Academy is structured with game-like elements‚ where progression and survival depend on navigating challenges‚ avoiding plot deviations‚ and adhering to the storyline. Ed’s journey mirrors a game‚ requiring strategic decisions to avoid death flags and maintain his role as an extra. The academy’s environment‚ with its Northern Forest and combat training‚ introduces RPG-like obstacles‚ testing Ed’s ability to adapt and survive without disrupting the main narrative. These elements create a unique blend of strategy and storytelling‚ central to Ed’s quest to graduate and thrive in this unconventional world. The academy’s design forces Ed to think critically‚ leveraging his knowledge of the plot to overcome adversity and ensure his survival. By understanding and exploiting these game-like mechanics‚ Ed navigates the academy’s challenges with precision and determination‚ always mindful of the consequences of his actions. The interplay between the academy’s structure and Ed’s strategic mindset forms the core of his survival strategy‚ making every decision impactful and crucial to his progression. Through this lens‚ the academy becomes both a battleground and a testing ground‚ where Ed’s wit and foresight are constantly challenged. The game-like elements not only define the academy’s environment but also shape Ed’s approach to overcoming obstacles‚ ensuring that each move is calculated and purposeful. In this intricate dance between strategy and storytelling‚ Ed must remain vigilant‚ using the academy’s game-like nature to his advantage in order to survive and ultimately succeed. The integration of these elements creates a dynamic and unpredictable setting‚ where Ed’s every action has the potential to alter his trajectory within the academy’s structured yet volatile world. As Ed navigates this complex landscape‚ the game-like elements of the academy serve as both a framework and a constant reminder of the challenges he must overcome to achieve his goals. The academy’s design‚ with its clear objectives and hidden dangers‚ pushes Ed to innovate and adapt‚ ensuring that his journey is as unpredictable as it is engaging. By embracing the game-like aspects of his surroundings‚ Ed is able to turn potential obstacles into opportunities‚ showcasing his resilience and resourcefulness in the face of adversity. Ultimately‚ the academy’s game-like elements are not just a backdrop but an integral part of Ed’s survival strategy‚ influencing every decision he makes and shaping his overall experience within the academy’s walls. The blend of strategic gameplay and narrative progression creates a unique and captivating environment‚ where Ed’s survival depends on his ability to master the academy’s rules and exploit its structure to his advantage. Through this approach‚ the academy becomes a living‚ breathing entity that challenges Ed at every turn‚ requiring him to stay alert and adaptive if he hopes to survive and thrive in this game-like world. The interplay between the academy’s elements and Ed’s strategic mindset ensures that each chapter of his journey is filled with tension‚ opportunity‚ and the constant need for innovation. As Ed progresses‚ the academy’s game-like nature evolves‚ presenting new challenges and requiring him to refine his strategies‚ keeping the narrative fresh and engaging. The academy’s structure‚ with its clear progression system and hidden pitfalls‚ serves as both a guide and a test‚ pushing Ed to his limits and beyond. In this dynamic and ever-changing environment‚ Ed must remain focused‚ using the academy’s game-like elements to his advantage in order to navigate its complexities and emerge victorious. The academy’s design‚ with its emphasis on strategy and adaptation‚ creates a compelling narrative where Ed’s survival is a testament to his wit and determination. By mastering the game-like aspects of the academy‚ Ed is able to turn the odds in his favor‚ ensuring that his journey is one of growth‚ challenge‚ and ultimate triumph. The integration of these elements ensures that the academy is not just a setting but an active participant in Ed’s story‚ shaping his experiences and driving the plot forward with each decision and action. As Ed continues to navigate the academy’s game-like world‚ he must remain ever-vigilant‚ using his knowledge and skills to overcome the obstacles that stand in his way and achieve his goals. The academy’s structure‚ with its blend of strategy and storytelling‚ creates a unique and engaging environment that challenges Ed at every turn‚ ensuring that his journey is as thrilling as it is unpredictable. By embracing the game-like elements of the academy‚ Ed is able to transform challenges into opportunities‚ showcasing his resilience and ingenuity in the face of adversity. The academy’s design‚ with its clear objectives and hidden dangers‚ pushes Ed to innovate and adapt‚ ensuring that his journey is as unpredictable as it is engaging. By mastering the game-like aspects of his surroundings‚ Ed is able to turn potential obstacles into opportunities‚ showcasing his resilience and resourcefulness in the face of adversity. Ultimately‚ the academy’s game-like elements are not just a backdrop but an integral part of Ed’s survival strategy‚ influencing every decision he makes and shaping his overall experience within the academy’s walls. The blend of strategic gameplay and narrative progression creates a unique and captivating environment‚ where Ed’s survival depends on his ability to master the academy’s rules and exploit its structure to his advantage. Through this approach‚ the academy becomes a living‚ breathing entity that challenges Ed at every turn‚ requiring him to stay alert and adaptive if he hopes to survive and thrive in this game-like world. The interplay between the academy’s elements and Ed’s strategic mindset ensures that each chapter of his journey is filled with tension‚ opportunity‚ and the constant need for innovation. As Ed progresses‚ the academy’s game-like nature evolves‚ presenting new challenges and requiring him to refine his strategies‚ keeping the narrative fresh and engaging. The academy’s structure‚ with its clear progression system and hidden pitfalls‚ serves as both a guide and a test‚ pushing Ed to his limits and beyond. In this dynamic and ever-changing environment‚ Ed must remain focused‚ using the academy’s game-like elements to his advantage in order to navigate its complexities and emerge victorious. The academy’s design‚ with its emphasis on strategy and adaptation‚ creates a compelling narrative where Ed’s survival is a testament to his wit and determination. By mastering the game-like aspects of the academy‚ Ed is able to turn the odds in his favor‚ ensuring that his journey is one of growth‚ challenge‚ and ultimate triumph. The integration of these elements ensures that the academy is not just a setting but an active participant in Ed’s story‚ shaping his experiences and driving the plot forward with each decision and action. As Ed continues to navigate the academy’s game-like world‚ he must remain ever-vigilant‚ using his knowledge and skills to overcome the obstacles that stand in his way and achieve his goals. The academy’s structure‚ with its blend of strategy and storytelling‚ creates a unique and engaging environment that challenges Ed at every turn‚ ensuring that his journey is as thrilling as it is unpredictable. By embracing the game-like elements of the academy‚ Ed is able to transform challenges into opportunities‚ showcasing his resilience and ingenuity in the face of adversity. The academy’s design‚ with its clear objectives and hidden dangers‚ pushes Ed to innovate and adapt‚ ensuring that his journey is as unpredictable as it is engaging. By mastering the game-like aspects of his surroundings‚ Ed is able to turn potential obstacles into opportunities‚ showcasing his resilience and resourcefulness in the face of adversity. Ultimately‚ the academy’s game-like elements are not just a backdrop but an integral part of Ed’s survival strategy‚ influencing every decision he makes and shaping his overall experience within the academy’s walls. The blend of strategic gameplay and narrative progression creates a unique and captivating environment‚ where Ed’s survival depends on his ability to master the academy’s rules and exploit its structure to his advantage. Through this approach‚ the academy becomes a living‚ breathing entity that challenges Ed at every turn‚ requiring him to stay alert and adaptive if he hopes to survive and thrive in this game-like world. The interplay between the academy’s elements and Ed’s strategic mindset ensures that each chapter of his journey is filled with tension‚ opportunity‚ and the constant need for innovation. As Ed progresses‚ the academy’s game-like nature evolves‚ presenting new challenges and requiring him to refine his strategies‚ keeping the narrative fresh and engaging. The academy’s structure‚ with its clear progression system and hidden pitfalls‚ serves as both a guide and a test‚ pushing Ed to his limits and beyond. In this dynamic and ever-changing environment‚ Ed must remain focused‚ using the academy’s game-like elements to his advantage in order to navigate its complexities and emerge victorious. The academy’s design‚ with its emphasis on strategy and adaptation‚ creates a compelling narrative where Ed’s survival is a testament to his wit and determination. By mastering the game-like aspects of the academy‚ Ed is able to turn the odds in his favor‚ ensuring that his journey is one of growth‚ challenge‚ and ultimate triumph. The integration of these elements ensures that the academy is not just a setting but an active participant in Ed’s story‚ shaping his experiences and driving the plot forward with each decision and action. As Ed continues to navigate the academy’s game-like world‚ he must remain ever-vigilant‚ using his knowledge and skills to overcome the obstacles that stand in his way and achieve his goals. The academy’s structure‚ with its blend of strategy and storytelling‚ creates a unique and engaging environment that challenges Ed at every turn‚ ensuring that his journey is as thrilling as it is unpredictable. By embracing the game-like elements of the academy‚ Ed is able to transform challenges into opportunities‚ showcasing his resilience and ingenuity in the face of adversity. The academy’s design‚ with its clear objectives and hidden dangers‚ pushes Ed to innovate and adapt‚ ensuring that his journey is as unpredictable as it is engaging. By mastering the game-like aspects of his surroundings‚ Ed is able to turn potential obstacles into opportunities‚ showcasing his resilience and resourcefulness in the face of adversity. Ultimately‚ the academy’s game-like elements are not just a backdrop but an integral part of Ed’s survival strategy‚ influencing every decision he makes and shaping his overall experience within the academy’s walls. The blend of strategic gameplay and narrative progression creates a unique and

3.2. Key Events and Turning Points

Several pivotal moments shape Ed’s journey in Silvenia Academy. His expulsion from the noble family sets the stage for his struggle. Surviving the Northern Forest proves crucial for his progression‚ while avoiding death flags and plot deviations becomes essential to maintaining his role. A significant turning point occurs when Ed encounters Lucy‚ whose support aids him in navigating challenges. Additionally‚ his decision to defy certain narrative expectations marks a shift in his approach to survival. These events collectively define Ed’s path‚ showcasing his resilience and strategic thinking as he strives to succeed in the academy’s treacherous environment.

Character Relationships and Dynamics

Ed’s relationships with Lucy and other characters form a cornerstone of his survival. Lucy‚ though small‚ plays a vital role‚ offering unexpected support and insight‚ while romantic dynamics subtly emerge‚ hinting at deeper connections.

4.1. Romantic Relationships and Spoilers

Romantic dynamics in the novel unfold subtly‚ with Ed forming unexpected connections. While specific pairings remain under wraps‚ hints suggest a slow-burn relationship‚ possibly involving key female characters like Lucy‚ whose influence on Ed grows as the story progresses. The narrative avoids overt romantic clichés‚ instead focusing on organic development. Spoilers indicate that Ed’s relationships are deeply intertwined with his survival‚ offering both emotional support and strategic advantages. These connections add depth to his journey‚ blending personal growth with plot progression.

Reception and Future of the Novel

4.2. The Role of Lucy and Other Supporting Characters

Lucy‚ a petite and unusually light character‚ plays a pivotal role in Ed’s journey‚ offering guidance and moral support. Her unique traits make her a standout figure‚ aiding Ed in navigating the academy’s complexities. Other supporting characters‚ such as classmates and mentors‚ provide crucial assistance‚ helping Ed avoid death flags and stay aligned with the plot. These interactions not only shape Ed’s survival strategies but also contribute to his personal growth‚ adding layers to the story’s dynamics and depth. Their roles are essential in balancing Ed’s villainous persona with unexpected alliances and friendships.

Bytrace

ankle fracture exercises pdf

Ankle fractures are common injuries that significantly impact mobility and quality of life. They occur when one or more bones in the ankle joint break, often due to twists, falls, or high-impact trauma. Proper treatment, including surgical or non-surgical approaches, is essential for healing. Rehabilitation plays a critical role in restoring strength, flexibility, and function. A structured exercise program, tailored to the severity of the fracture, helps patients regain mobility and prevent long-term complications. Early intervention and adherence to a rehabilitation plan are vital for a successful recovery.

Understanding the Anatomy and Common Causes

The ankle joint consists of three bones: the tibia, fibula, and talus, held together by ligaments that provide stability. Ankle fractures occur when one or more of these bones break, often due to twisting injuries, falls, or high-impact trauma. Common causes include sports injuries, accidents, or osteoporosis, which weakens bones. The severity of the fracture depends on the force applied and the bones involved. Understanding the anatomy helps identify how the injury affects mobility and stability, guiding appropriate treatment and rehabilitation strategies to restore function and prevent further complications.

Importance of Early Rehabilitation and Exercise

Early rehabilitation and exercise are crucial for recovering from ankle fractures. They help restore range of motion, strength, and flexibility, reducing the risk of long-term stiffness or chronic pain. Delaying rehabilitation can lead to prolonged recovery and limited mobility. A structured exercise program, including ankle circles and stretching, promotes healing and prevents complications like arthritis. Studies show that supervised physical therapy improves outcomes, enhancing functional recovery and quality of life. Consistency in exercises ensures faster return to daily activities and sports, making early intervention a cornerstone of effective ankle fracture management.

Immediate Care and Recovery Phase

Immediate care after an ankle fracture involves immobilization and pain management to allow proper healing. Early intervention ensures the fracture stabilizes correctly, preventing complications and promoting recovery. Consistency in following a structured care plan is essential for optimal outcomes and faster return to normal activities. Proper wound care and monitoring are vital to avoid infections and ensure the fracture heals as expected. A well-managed recovery phase sets the foundation for successful rehabilitation, allowing patients to regain strength and mobility effectively. Adherence to medical advice during this phase is crucial for achieving full recovery and minimizing long-term issues.

RICE Therapy (Rest, Ice, Compression, Elevation)

RICE therapy is a cornerstone of acute ankle fracture management. Rest prevents further injury by avoiding weight-bearing and stress on the fractured area. Ice reduces swelling and pain by constricting blood vessels, typically applied for 15-20 minutes every 1-2 hours. Compression, using bandages or wraps, minimizes edema and supports the ankle. Elevation involves keeping the ankle above heart level to decrease swelling and promote blood flow. Together, these steps create an optimal environment for healing, reducing inflammation, and accelerating recovery. Consistent application of RICE therapy during the initial phase significantly improves outcomes and prepares the ankle for subsequent rehabilitation exercises.

Non-Weight Bearing and Immobilization

Non-weight bearing and immobilization are critical during the initial recovery phase of an ankle fracture. This approach prevents further injury and allows the bone to heal properly. Immobilization, often achieved with casts, braces, or boots, restricts movement and stabilizes the fracture. Non-weight bearing ensures no stress or pressure is applied to the affected ankle, typically requiring the use of crutches or a walker. This phase is essential for fracture alignment and healing, reducing the risk of complications. Strict adherence to immobilization and non-weight bearing guidelines ensures a stable foundation for subsequent rehabilitation and weight-bearing progression.

Rehabilitation Process

The rehabilitation process for ankle fractures involves restoring function, strength, and mobility through structured phases. It addresses pain, swelling, and limited movement, ensuring gradual recovery and stability.

Phase 1: Pain Reduction and Mobility Restoration

Phase 1 focuses on reducing pain and swelling while restoring basic ankle mobility. Gentle exercises like ankle circles and stretching are introduced to improve range of motion. Patients often use assistive devices to avoid weight-bearing initially. Ice therapy and compression are applied to minimize swelling. The goal is to create a foundation for more advanced movements in later phases. Early mobilization helps prevent stiffness and promotes healing. This phase typically lasts 2-4 weeks, with gradual progression based on individual recovery.

Phase 2: Strengthening and Weight-Bearing Progression

Phase 2 focuses on strengthening the muscles around the ankle and gradually introducing weight-bearing activities. Patients begin with resistance exercises using bands or light weights to improve muscle strength. Activities like toe raises and heel slides are common. Weight-bearing starts with partial load and progresses to full weight as pain and strength allow. This phase also incorporates balance exercises to enhance stability. The goal is to restore functional mobility and prepare for more dynamic movements. Strengthening exercises are typically done 2-3 times daily, with gradual increases in resistance and weight-bearing over 4-6 weeks. Consistency is key to rebuilding ankle stability.

Phase 3: Advanced Exercises and Return to Activity

Phase 3 involves advanced exercises to restore pre-injury function and facilitate a safe return to activity. Patients progress to agility drills, plyometric exercises, and sport-specific movements. Activities like single-leg balance, lateral hops, and figure-eight running are introduced to improve dynamic stability. Resistance training is advanced, and functional exercises mimic real-life or sport-specific demands. Gradual progression ensures the ankle can handle increased stress without reinjury. Patients are encouraged to practice on uneven surfaces and incorporate proprioceptive exercises. The goal is to restore confidence and enable a full return to daily activities or sports, ensuring long-term durability and functionality of the ankle joint.

Key Exercises for Ankle Fracture Recovery

Ankle circles, point-and-flex stretches, and resistance exercises are essential for restoring strength and mobility. These exercises promote healing, improve flexibility, and prepare the ankle for weight-bearing activities.

Ankle Circles and Range of Motion Exercises

Ankle circles are a foundational exercise for recovering ankle mobility. Sit or lie down, lift the leg, and draw circles with the foot—first clockwise, then counterclockwise. Perform 5-10 repetitions in each direction, 2-3 times daily. Range of motion exercises, like pointing toes and flexing the foot, help restore movement. Start gently, gradually increasing the range as comfort allows. These exercises prevent stiffness and promote healing. They are typically done in the early stages of recovery, often while non-weight-bearing, and are essential for preparing the ankle for more advanced movements later in the rehabilitation process.

Stretching and Flexibility Exercises

Stretching is vital for restoring ankle flexibility post-fracture. Common exercises include calf stretches, plantar fascia stretches, and Achilles tendon stretches. Sit or stand, extend the heel, and gently stretch the calf for 20-30 seconds. Repeat 2-3 times daily. Plantar fascia stretches involve pulling the toes back toward the shin, holding for 30 seconds. Achilles tendon stretches target the back of the heel, improving ankle dorsiflexion. These exercises prevent stiffness and enhance mobility. They are typically introduced after initial pain subsides, often during the weight-bearing phase, to prepare the ankle for daily activities and sports. Consistency is key for optimal results.

Resistance and Strengthening Exercises

Resistance and strengthening exercises are essential for rebuilding ankle stability and muscle strength post-fracture. Exercises like ankle circles, pointing and flexing the foot, and using resistance bands target key muscle groups. Progress to weight-bearing exercises, such as single-leg balances or heel raises, to enhance stability. Resistance bands can be used for dorsiflexion, plantarflexion, inversion, and eversion exercises. These exercises improve muscle balance, reduce the risk of reinjury, and restore functional strength. They are typically introduced in Phase 2 of rehabilitation, once pain is managed and mobility is restored. Consistency and gradual progression are crucial for optimal outcomes.

Weight-Bearing Progression

Weight-bearing progression involves gradually introducing stress on the ankle post-fracture, tailored to the injury’s severity. It starts with partial weight-bearing using aids and progresses to full weight-bearing, restoring normal gait and strength predictably without reinjury.

Guidelines for Safe Weight-Bearing Activities

Safe weight-bearing progression after an ankle fracture begins with non-weight-bearing or partial weight-bearing using crutches or assistive devices. Gradually increase load tolerance, avoiding pain exacerbation. Start with short sessions of standing or walking on flat surfaces, then progress to uneven terrain. Use orthopedic shoes or braces if recommended. Monitor for swelling or discomfort, adjusting activity levels accordingly. Avoid high-impact activities until full strength and stability are restored. Always follow a healthcare provider’s or physical therapist’s guidance to ensure proper healing and prevent reinjury. Consistency and patience are key to achieving a safe and effective return to normal weight-bearing activities.

Pain Management and Swelling Reduction

Effective pain management and swelling reduction after an ankle fracture involve RICE therapy (Rest, Ice, Compression, Elevation). Ice packs reduce inflammation, while compression and elevation minimize swelling.

Use of Ice Therapy and Compression

Ice therapy is a cornerstone in managing pain and swelling after an ankle fracture. Applying ice packs wrapped in cloth to the affected area for 15-20 minutes, several times daily, helps reduce inflammation. Compression, using elastic bandages or sleeves, minimizes swelling by preventing fluid buildup. Elevation, part of the RICE method, further aids in reducing swelling. Ice therapy should be used cautiously to avoid skin damage, while compression should be snug but not restrictive. These methods, combined with rest, form the initial phase of recovery, promoting healing and preparing the ankle for subsequent rehabilitation exercises.

When to Consult a Professional

Consult a professional if experiencing severe pain, swelling, or inability to bear weight. Seek immediate medical attention for numbness, misalignment, or worsening symptoms. Delayed healing requires expert evaluation.

Signs of Complications or Delayed Healing

Signs of complications or delayed healing in ankle fractures include persistent pain, swelling, or limited mobility beyond expected timelines. Numbness, tingling, or discoloration may indicate nerve damage or poor circulation. If the fracture fails to align properly or shows no improvement on radiographs, further intervention is needed. Increased warmth or redness around the ankle could signal infection. Additionally, failure to regain strength or range of motion despite rehabilitation efforts may indicate delayed healing. Monitoring these symptoms and consulting a professional promptly is crucial to address potential complications early and ensure proper recovery.

Consistency in rehabilitation exercises and therapy is crucial for restoring ankle function. A structured recovery plan ensures gradual strength and mobility improvement, promoting long-term healing and stability.

Importance of Consistency in Rehabilitation

Consistency is key to successful ankle fracture recovery. Regular exercises and therapy prevent stiffness and muscle atrophy, ensuring gradual strength and mobility restoration. Adhering to a structured plan reduces complications and supports proper healing. Over time, consistent effort enhances joint stability, allowing patients to return to normal activities confidently.

Final Tips for a Successful Recovery

Adherence to a structured rehabilitation plan is crucial for optimal recovery from an ankle fracture. Regularly performing prescribed exercises ensures proper healing and restores strength, flexibility, and mobility. Monitoring progress and adjusting the routine as needed helps tailor the recovery process. Consulting with healthcare professionals for guidance and support is essential to address any concerns or complications. Maintaining a positive mindset and staying committed to the program can significantly enhance recovery outcomes. By diligently following through with recommended exercises and therapies, individuals can effectively regain functionality and confidently return to their daily activities and hobbies.

Bytrace

the communication book pdf

The Communication Book by Mikael Krogerus and Roman Tschäppeler offers a fresh perspective on enhancing daily interactions through 44 actionable ideas and engaging illustrations.

1.1 Overview of the Book and Its Authors

The Communication Book‚ authored by Mikael Krogerus and Roman Tschäppeler‚ is a comprehensive guide offering 44 practical ideas to enhance daily conversations; The book is designed for accessibility‚ featuring color-coded sections and bite-sized chapters. Its engaging approach‚ supported by illustrations‚ makes complex communication concepts relatable and easy to apply in various real-world scenarios.

1.2 Key Themes and Objectives

The Communication Book focuses on fostering meaningful connections through empathy‚ active listening‚ and clarity. Its primary objective is to equip readers with practical tools to navigate conversations effectively. By addressing real-world challenges‚ the book aims to enhance communication skills‚ making interactions more productive and fulfilling in both personal and professional settings.

Core Communication Concepts Explored in the Book

The Communication Book explores essential concepts like understanding emotions‚ empathy‚ and active listening. It emphasizes clarity and the importance of recognizing intentions behind information to foster deeper connections.

2.1 The Importance of Empathy in Communication

Empathy is crucial in communication as it allows individuals to understand and share the emotions of others. This fosters deeper connections‚ helping to de-escalate conflicts and create a more productive dialogue. By demonstrating empathy‚ one can address misunderstandings effectively and build trust‚ making conversations more meaningful and impactful.

2.2 Active Listening and Its Role in Effective Dialogue

Active listening is a cornerstone of effective communication‚ involving full engagement with the speaker. It requires clarifying messages‚ asking questions to confirm understanding‚ and addressing misunderstandings promptly. This proactive approach ensures clear dialogue‚ builds trust‚ and fosters mutual respect‚ making conversations more productive and meaningful.

Practical Strategies for Better Conversations

This section offers practical strategies for improving conversations‚ including 44 actionable ideas and proven tips for handling difficult dialogues with checklists and techniques.

3.1 44 Ideas for Enhancing Daily Interactions

The book presents 44 actionable ideas to enhance daily interactions‚ offering practical strategies for small talk‚ active listening‚ and conflict resolution. These ideas are designed to make conversations more engaging and meaningful‚ providing readers with tools to navigate various social and professional scenarios effectively. The concepts are supported by illustrations‚ making them easy to understand and apply in real-life situations.

3.2 Tips for Handling Difficult Conversations

The book provides actionable strategies for navigating tough discussions‚ emphasizing empathy and proactive approaches. It offers techniques to de-escalate conflicts‚ clarify intentions‚ and address misunderstandings. Practical checklists and conversation starters are included to help readers manage challenging interactions with confidence‚ ensuring productive outcomes and stronger relationships. These tips empower individuals to approach difficult conversations with clarity and composure.

The Structure and Organization of the Book

The Communication Book is organized into three color-coded sections with numbered tabs‚ ensuring easy navigation. Its intuitive design makes the content accessible and user-friendly for readers.

4.1 Color-Coded Sections for Easy Navigation

The book features color-coded sections with numbered tabs‚ making it visually intuitive. Each color represents a distinct theme‚ allowing readers to quickly locate topics. This design enhances accessibility‚ ensuring a seamless learning experience. The vibrant organization caters to visual learners‚ making complex concepts easy to navigate and understand at a glance.

4.2 Bite-Sized Chapters forAccessible Learning

4.2 Bite-Sized Chapters for Accessible Learning

The book is structured into concise‚ bite-sized chapters‚ designed for easy digestion. Each section focuses on a single concept‚ making it perfect for quick reading sessions. This format ensures accessibility‚ allowing readers to absorb information effortlessly. The authors’ approach caters to busy individuals‚ offering practical advice without overwhelming complexity‚ making learning enjoyable and stress-free.

Real-World Applications of the Book’s Concepts

The book offers practical strategies for improving workplace communication and enhancing personal relationships. Its concepts help navigate small talk‚ resolve conflicts‚ and foster understanding in both professional and personal interactions effectively.

5.1 Improving Workplace Communication

The Communication Book provides actionable strategies to enhance workplace interactions‚ emphasizing clarity‚ active listening‚ and conflict resolution. Its principles‚ such as persuasive communication and effective meeting management‚ help professionals build stronger relationships‚ foster collaboration‚ and make informed decisions‚ ultimately boosting productivity and workplace harmony. The book’s practical advice ensures employees at all levels can communicate more effectively‚ driving success in any organization.

5.2 Enhancing Personal Relationships Through Better Dialogue

The Communication Book offers practical strategies to strengthen personal relationships by fostering empathy‚ understanding‚ and meaningful conversations. Its 44 ideas encourage active listening‚ emotional awareness‚ and conflict resolution‚ helping individuals connect deeper and navigate challenges with grace. By applying these principles‚ readers can build trust‚ resolve misunderstandings‚ and cultivate stronger‚ more fulfilling personal connections in their daily lives.

The Role of Nonverbal Communication

Nonverbal cues‚ such as body language and tone‚ play a vital role in shaping interactions. They convey emotions‚ build trust‚ and significantly influence how messages are perceived and interpreted.

6.1 Understanding Body Language and Tone

Body language and tone significantly influence interactions‚ conveying emotions and intentions beyond words; Understanding these cues helps in interpreting others’ feelings‚ building trust‚ and avoiding misunderstandings. They add depth to communication‚ making it more engaging and effective‚ while also reflecting one’s own attitudes and emotions in subtle yet powerful ways.

6.2 The Impact of Charisma on Communication

Charisma plays a crucial role in communication‚ making even mundane messages seem engaging and impactful. A charismatic person captivates audiences‚ fostering connection and influence. However‚ relying solely on charm can overshadow clear communication‚ emphasizing the importance of balancing charisma with clarity to ensure messages are both compelling and understood effectively.

Communication in the Digital Age

Digital communication introduces unique challenges‚ such as navigating small talk and filter bubbles. Effective online interactions require clarity‚ active listening‚ and proactive approaches to avoid misunderstandings and ensure understanding.

7.1 Navigating Small Talk and Filter Bubbles

Small talk and filter bubbles pose challenges in digital communication. The Communication Book offers insights into overcoming these barriers by fostering meaningful dialogue and broadening perspectives. Practical strategies‚ like conversation checklists‚ help navigate these complexities‚ ensuring interactions remain engaging and inclusive in a world dominated by digital interactions.

7.2 Managing Misunderstandings in Virtual Interactions

Misunderstandings in virtual interactions are common due to missing nonverbal cues. The Communication Book provides tools to address these issues‚ such as proactive clarification and empathy. By encouraging open dialogue and confirming understanding‚ individuals can mitigate conflicts and foster clear communication‚ ensuring virtual exchanges remain effective and constructive.

The Science Behind Effective Communication

The Communication Book explores the science of effective communication‚ including psychological principles like persuasion and the transaction model‚ to provide a deeper understanding of human interaction dynamics.

8.1 Psychological Principles of Persuasion

The Communication Book delves into the psychology of persuasion‚ highlighting six core principles and the role of charisma. It explains how empathy and trust build connections‚ while also addressing potential pitfalls of overusing persuasive tactics. The book provides practical insights into understanding human behavior and leveraging psychological strategies to enhance communication effectiveness in various interactions.

8.2 The Transaction Model of Communication

The Communication Book explores the transaction model‚ emphasizing two-way interaction where both parties send and receive feedback simultaneously. This dynamic approach highlights continuous dialogue and mutual understanding‚ enabling real-time adaptations in conversations. The book illustrates how this model fosters effective communication by addressing the interplay of messages‚ context‚ and participants’ roles in shaping meaningful interactions.

Reviews and Reception of the Book

The Communication Book has received widespread acclaim for its practical insights‚ with experts endorsing its strategies. Readers praise its accessibility‚ making it a top choice for improving communication skills.

9.1 Expert Endorsements and Reader Feedback

The Communication Book has garnered praise from experts‚ who highlight its innovative approach to fostering meaningful conversations. Readers appreciate its practical advice‚ with many noting how the 44 ideas have positively impacted their personal and professional interactions‚ making it a valuable resource for anyone seeking to enhance their communication skills effectively and effortlessly.

9.2 Comparisons to Other Communication Resources

The Communication Book stands out among other resources for its unique blend of brevity and depth. Unlike traditional textbooks‚ its bite-sized chapters make it accessible‚ while its creative illustrations set it apart from typical self-help guides. Readers often compare it favorably to other communication books‚ praising its modern approach and practical relevance in today’s fast-paced world of interactions.

The Communication Book offers transformative insights‚ empowering readers to refine their communication skills and foster meaningful connections in both personal and professional realms‚ inspiring lasting change.

10.1 The Lasting Impact of the Book on Communication Skills

The Communication Book leaves a lasting impact by equipping readers with practical tools to enhance empathy‚ active listening‚ and clarity in daily interactions‚ fostering stronger personal and professional connections and continuous growth in communication proficiency‚ making it a valuable resource for lifelong skill development and meaningful dialogue.

10.2 Encouragement to Apply the Concepts in Daily Life

The Communication Book motivates readers to integrate its 44 strategies into everyday interactions‚ promoting meaningful conversations. By emphasizing empathy and clarity‚ it empowers individuals to enhance personal and professional relationships; The books practical advice encourages applying these concepts to real-life challenges‚ fostering effective communication and nurturing stronger connections across all areas of life for lasting improvement and understanding.

Bytrace

worm factory 360 instruction manual

The Worm Factory 360 Instruction Manual provides a comprehensive guide to setting up and operating your vermicomposting system. It includes detailed steps, tips, and troubleshooting for optimal results.

Overview of the Worm Factory 360 and Its Benefits

The Worm Factory 360 is a highly efficient vermicomposting system designed to recycle organic waste into nutrient-rich compost. Its expandable design allows for vertical growth, making it ideal for small spaces while maintaining high composting capacity. The system is odor-free, easy to maintain, and requires minimal effort. It includes a built-in worm tea collector for liquid fertilizer and a worm ladder to assist worms in moving between trays. Each tray weighs only 12.5 pounds when full, ensuring easy handling. Made from recycled plastic, it supports eco-friendly living and sustainable gardening practices.

Components of the Worm Factory 360

The Worm Factory 360 includes a base with a spigot, multiple stacking trays, a worm ladder, and a built-in worm tea collector for efficient composting.

Understanding the Parts and Their Functions

The Worm Factory 360 consists of a base with a spigot for draining worm tea, multiple stacking trays for composting, and a worm ladder to assist worm movement. Each tray is designed to hold bedding material and organic waste, while the worm ladder helps worms migrate upward as composting progresses. The base also features a built-in worm tea collector, making it easy to harvest this nutrient-rich liquid fertilizer. Understanding these components ensures proper assembly and optimal functionality of the system.

Setting Up the Worm Factory 360

The Worm Factory 360 setup involves placing the base, adding trays, and incorporating bedding material. The system is expandable, allowing easy addition of trays as needed.

Quick Setup Guide for Beginners

Setting up the Worm Factory 360 is straightforward and user-friendly. Start by placing the base in a stable, comfortable location. Add the first tray and fill it with the provided bedding material. Place the worm ladder to assist worms in moving between trays. Add composting worms and introduce organic waste gradually. The system is expandable, allowing you to add trays as needed. Follow the manual’s step-by-step guide for a seamless setup. This quick process ensures a smooth start to your vermicomposting journey.

Step-by-Step Assembly Instructions

The Worm Factory 360 assembles easily by following the manual’s clear instructions. Begin by placing the base on a stable surface and attaching the spigot for worm tea collection. Next, insert the worm ladder to help worms move between trays. Stack the trays on the base, starting with the bottom tray. Add bedding material and worms to the first tray, then place additional trays as needed. Secure all parts tightly to ensure proper function. This step-by-step process ensures a sturdy and functional vermicomposting system.

Adding Worms to the System

Introducing composting worms to the Worm Factory 360 is a straightforward process. Start with one pound of worms and add them to the prepared bedding material in the bottom tray. This step is essential for initiating the vermicomposting cycle.

Composting worms, such as Red Wigglers, are essential for vermicomposting. They efficiently break down organic matter into nutrient-rich compost. These worms thrive in controlled environments like the Worm Factory 360, where they process kitchen scraps and paper waste; The manual provides guidelines for managing their population and maintaining optimal conditions. Proper care ensures they remain healthy and productive, transforming waste into a valuable resource for your garden. This step is crucial for initiating the vermicomposting process effectively.

Guidelines for Adding Worms to the Factory

The Worm Factory 360 manual recommends starting with 1 pound of composting worms, such as Red Wigglers, for optimal results. These worms are highly efficient at breaking down organic matter. When adding them, ensure the bedding material is moist and free of contaminants. Gently place the worms into the first tray, spreading them evenly. Avoid overloading the system initially, as this can stress the worms. Follow the manual’s guidelines for introducing worms to their new environment to ensure a smooth transition and healthy population growth.

Feeding the Worms

The Worm Factory 360 manual recommends feeding worms organic materials like fruits, vegetables, grains, and paper waste. Avoid meats, fats, and bones to maintain a balanced diet.

Recommended Foods for Composting Worms

The Worm Factory 360 manual recommends feeding worms organic materials like fruits, vegetables, grains, and paper waste. Avoid meats, fats, and bones to prevent odors and pests. Composting worms thrive on a balanced diet rich in nitrogen and carbon. Add materials like eggshells, coffee grounds, and cardboard for optimal results. Avoid overfeeding to maintain a healthy environment. This balanced approach ensures efficient composting and supports worm health.

Feeding Guidelines for Optimal Performance

The Worm Factory 360 manual outlines feeding guidelines to ensure optimal worm health and compost production. Start with small amounts of food and gradually increase as the worm population grows. Monitor moisture levels to avoid overfeeding, which can lead to odors. Add food in layers, ensuring it’s covered with bedding to maintain a balanced ecosystem. Avoid overloading the system, as this can stress the worms. Regularly check for uneaten food and adjust portions accordingly. Proper feeding balances nitrogen and carbon for efficient composting.

Maintaining the Worm Factory 360

Regularly check temperature, moisture, and cleanliness to maintain optimal conditions. Ensure proper airflow and monitor worm activity. Keep the system between 40-80°F for best results.

Monitoring Temperature and Moisture Levels

Maintaining proper temperature and moisture is crucial for optimal worm health and composting efficiency. The Worm Factory 360 should be kept in a location with temperatures between 40-80°F (4-27°C). Check moisture levels regularly to ensure the bedding remains damp but not soggy, as excessive moisture can lead to pests and odors. Use a spray bottle to add water if the bedding feels dry. Monitoring these conditions ensures a healthy environment for the worms and high-quality compost production.

Expanding the System for Increased Capacity

The Worm Factory 360 is designed to expand vertically, allowing you to increase composting capacity as needed. Simply add additional trays on top of the existing ones once they are full. This modular design makes it easy to scale your system without taking up extra floor space; Each tray is lightweight, weighing only 12.5 pounds when full, making it easy to lift and arrange. Expanding the system ensures continuous composting and maximizes efficiency while maintaining a compact footprint.

Troubleshooting Common Issues

The manual addresses common issues like pests, odors, and slow composting, providing practical solutions to maintain a healthy worm population and efficient vermicomposting process.

Identifying and Solving Potential Problems

The Worm Factory 360 manual offers practical solutions for common issues like pests, odors, and slow composting. It guides users in identifying problems through observation of worm behavior, moisture levels, and compost quality. Solutions include adjusting bedding, controlling food intake, and ensuring proper airflow. The manual also provides tips for managing pests and maintaining optimal conditions. Regular monitoring and timely interventions can prevent issues from escalating, ensuring a healthy worm population and efficient composting. This section is essential for troubleshooting and maintaining system performance.

Harvesting the Compost

The Worm Factory 360 simplifies compost harvesting with its vertical design. Add new trays to move worms upward, allowing easy collection of nutrient-rich compost below.

When and How to Harvest Compost

The Worm Factory 360 allows for easy compost harvesting once the trays are fully processed, typically every 1-3 months. When the compost is dark and crumbly, it’s ready. Add a new tray to the top, and the worms will migrate upward, leaving the finished compost in the lower tray. Use the spigot to drain worm tea for liquid fertilizer. Harvesting is straightforward, thanks to the system’s vertical design, ensuring a continuous supply of nutrient-rich compost for your plants. Regular harvesting maintains system efficiency and worm health.

Using the Compost for Your Plants

The nutrient-rich compost produced by the Worm Factory 360 is ideal for enhancing soil structure and promoting healthy plant growth. Mix the compost into potting soil, use it as a top dressing, or incorporate it into garden beds. The compost is packed with microbes and nutrients, creating a natural fertilizer that improves soil fertility; Additionally, the worm tea collected from the system can be used as a liquid fertilizer for plants. Regular use of this compost supports sustainable gardening and robust plant health.
The Worm Factory 360 simplifies vermicomposting, making it easy to recycle waste into nutrient-rich fertilizer. Follow the manual for optimal results and a sustainable gardening experience.

Final Tips for Successful Vermicomposting

For a thriving vermicomposting system, maintain optimal temperature (40–80°F) and moisture levels. Feed worms a balanced diet of organic materials, avoiding meats and fats.Monitor their activity regularly and harvest compost when it’s dark and crumbly. Expand the system as needed by adding trays, ensuring enough space for worms to work efficiently. Regularly drain worm tea for plant fertilization and troubleshoot any issues promptly to keep your Worm Factory 360 running smoothly and sustainably.

Bytrace

aero precision adjustable gas block instructions

The Aero Precision Adjustable Gas Block is a durable, precision-engineered component designed for AR-15 systems, offering superior control over gas flow for reduced recoil and improved reliability.

Overview of Aero Precision Adjustable Gas Block

The Aero Precision Adjustable Gas Block is a high-quality, precision-engineered component designed to regulate gas flow in AR-15 systems. Built with durable materials, it ensures reliable performance and reduces recoil. Its adjustable design allows shooters to fine-tune gas flow for optimal functionality, whether shooting suppressed or unsuppressed. The block is easy to install and adjust, featuring a user-friendly mechanism. It aligns perfectly with the gas tube and barrel, ensuring proper function. With its solid construction and versatility, the Aero Precision Adjustable Gas Block is a popular choice among shooters seeking improved accuracy and control.

Importance of Adjustable Gas Blocks in AR-15 Systems

Adjustable gas blocks are crucial for optimizing the performance of AR-15 systems. They allow precise control over gas flow, reducing recoil and improving reliability. Proper gas regulation ensures consistent cycling, minimizing the risk of over-gassing or under-gassing. This customization enhances accuracy and reduces wear on internal components. Shooters can fine-tune their rifles for various shooting conditions, ammunition types, or suppressor use. An adjustable gas block maximizes efficiency, making it essential for both tactical and competitive shooters. Its versatility ensures optimal performance across different configurations, making it a key upgrade for any AR-15 system. This component is vital for achieving peak performance and reliability in modern rifles.

Installation Instructions

Remove the old gas block, clean the barrel, and align the new Aero Precision Adjustable Gas Block. Insert the gas tube, ensure proper alignment, and secure it with a roll pin.

Removing the Old Gas Block

Begin by ensuring the rifle is unloaded and safe. Use a punch or wrench to remove the roll pin securing the old gas block. Gently slide the gas block off the barrel, taking care not to damage the gas tube or barrel. Once removed, inspect and clean the area to prepare for the new installation. This step is crucial for ensuring a proper fit and function of the Aero Precision Adjustable Gas Block.

Preparing the Barrel and Gas Tube

Clean the barrel and gas tube thoroughly using a solvent and dry cloth to remove dirt, oil, or residue. Inspect for any damage or debris that could interfere with installation. Ensure the gas port on the barrel is clear and properly aligned with the gas tube. Use a punch or aligning tool to verify the gas tube’s position and straightness. This step ensures a precise fit and proper function of the Aero Precision Adjustable Gas Block. A clean and well-prepared system is essential for optimal performance and reliability.

Aligning and Sliding the New Gas Block

Align the Aero Precision Adjustable Gas Block with the barrel, ensuring the gas port on the barrel matches the gas block’s opening. Carefully slide the gas block onto the barrel, maintaining proper alignment to avoid damage or misfit. Use a punch or alignment tool to guide the gas tube into place, ensuring it seats correctly within the gas block. Once aligned, gently push the gas block forward until it stops against the barrel’s gas port. This step requires precision to ensure the gas system functions correctly and reliably.

Securing the Gas Tube with a Roll Pin

Once the gas tube is properly aligned within the Aero Precision Adjustable Gas Block, use a 5/64 starter punch to guide the roll pin into position. Gently tap the roll pin into place using a punch and hammer until it is fully seated. Ensure the roll pin aligns perfectly with the gas tube and gas block holes to secure the connection. Double-check the alignment to prevent any damage or misalignment. This step is crucial for ensuring the gas system functions properly and reliably. Properly securing the gas tube with the roll pin is essential for optimal performance of your AR-15 system.

Adjustment Process

Access the adjustment screw using the provided 6/3/32 wrench. Turn the screw clockwise to reduce gas flow or counterclockwise to increase it. Fine-tune the setting for optimal performance and lock the screw securely after adjustments.

Accessing the Adjustment Screw

To access the adjustment screw, ensure the rifle is unloaded and clear of obstructions. Remove any handguards or accessories blocking access. Locate the screw on the side of the gas block. Insert the 6/3/32 wrench into the screw head, ensuring proper alignment. Gently turn the wrench clockwise or counterclockwise to adjust the gas flow. Be careful not to over-tighten or strip the screw. Once adjustments are made, secure the screw firmly to maintain settings. Always follow safety guidelines and ensure the weapon is clear before testing.

Using the 6/3/32 Adjustment Wrench

Insert the 6/3/32 adjustment wrench into the screw head on the Aero Precision Adjustable Gas Block. Ensure the wrench is fully seated to avoid slippage. Turn the wrench clockwise to increase gas flow or counterclockwise to decrease it. Each full rotation corresponds to a noticeable change in gas pressure. Use caution not to over-tighten, as this may restrict functionality. Once desired settings are achieved, remove the wrench and test the rifle to ensure proper cycling. The wrench’s design allows easy access, even with a handguard installed, making adjustments convenient in the field or at the range.

Fine-Tuning Gas Flow for Optimal Performance

Start by firing your rifle to assess its current performance. Adjust the Aero Precision Adjustable Gas Block by turning the adjustment screw with the 6/3/32 wrench. Clockwise increases gas flow, while counterclockwise decreases it. Make small adjustments and test the rifle after each change. Proper tuning ensures reliable cycling, reduced recoil, and minimal gas blowback. Begin with a slightly over-gassed setting and gradually reduce until the rifle functions smoothly. Fine-tune further by firing multiple rounds to confirm consistent performance. This process ensures optimal reliability and accuracy for your AR-15 system.

Locking the Adjustment Screw

Once the desired gas flow setting is achieved, secure the adjustment screw to prevent unintended changes. Use the 6/3/32 wrench to tighten the screw firmly. Ensure it is snug but avoid over-tightening, which could damage the screw or block. After locking, test the rifle by firing a few rounds to confirm consistent performance. Properly securing the adjustment screw ensures reliable operation and prevents setting shifts due to recoil or vibration. Always refer to the Aero Precision instructions for specific torque recommendations to maintain the integrity of your adjustable gas block and overall AR-15 system performance.

Troubleshooting Common Issues

Common issues with the Aero Precision Adjustable Gas Block include over-gassing, under-gassing, or misalignment. Always refer to the instructions for diagnosing and resolving these problems effectively.

Resolving Over-Gassing or Under-Gassing

To address over-gassing or under-gassing, adjust the Aero Precision Adjustable Gas Block using the 6/3/32 wrench. For over-gassing, turn the adjustment screw counterclockwise to reduce gas flow. For under-gassing, turn it clockwise to increase flow. Test the rifle after each adjustment to ensure proper function. Start with small increments and cycle the action to check reliability. If issues persist, consult the installation manual or seek professional guidance to ensure optimal performance and reliability of your AR-15 system.

Fixing Misalignment of the Gas Tube

If the gas tube is misaligned, remove the roll pin and carefully realign the tube with the gas block. Ensure the gas port faces downward and the cross hole aligns with the block’s hole. Reinsert the roll pin using a 5/64 starter punch and roll pin punch. Verify alignment by gently rocking the tube. If misalignment persists, check for barrel or gas block damage. Proper alignment is crucial for reliable function, so take your time and ensure accuracy before finalizing the installation. Consult the manual if issues remain unresolved.

Maintenance Tips for Longevity

Regular cleaning and lubrication are essential to maintain the Aero Precision Adjustable Gas Block’s performance. Use a soft brush and solvent to remove carbon buildup from the gas tube and block. Apply a thin layer of high-quality gun oil to moving parts to prevent corrosion. Inspect the gas tube and block for wear or damage, ensuring proper alignment of the gas port. Clean the adjustment screw and detent regularly to maintain smooth operation. For detailed maintenance, refer to the Aero Precision manual. Proper care will ensure reliable function and extend the lifespan of your adjustable gas block.

The Aero Precision Adjustable Gas Block enhances AR-15 performance by fine-tuning gas flow, reducing recoil, and improving reliability. Proper installation and maintenance ensure optimal functionality and longevity.

Importance of Proper Installation and Adjustment

Proper installation and adjustment of the Aero Precision Adjustable Gas Block are critical for ensuring reliable cycling, reducing wear and tear, and preventing malfunctions. Correct alignment and secure fastening prevent over-gassing or under-gassing, optimizing performance. Fine-tuning the gas flow enhances accuracy and minimizes recoil, while following instructions ensures longevity. Using the correct tools, like the 6/3/32 wrench, guarantees precise adjustments. Neglecting proper installation can lead to reliability issues, making attention to detail essential for maintaining your rifle’s functionality and accuracy.

Final Tips for Maintaining Your Rifle

  • Regularly clean and inspect the gas block and tube to ensure optimal performance.
  • Use the provided 6/3/32 wrench for adjustments to avoid damaging the screw.
  • After installation, test your rifle with various loads to confirm proper function.
  • Store your rifle in a dry environment to prevent corrosion.
  • Refer to Aero Precision’s official manual for detailed maintenance guidance.
  • Inspect the roll pin and alignment periodically to ensure they remain secure.
  • Keep extra adjustment tools handy for quick adjustments in the field.