Monthly Archive May 10, 2025

Bytrace

lopediatec control remoto manual

Lopediatec Control Remoto is a versatile and innovative remote control designed to enhance your experience with smart devices‚ offering seamless functionality and user-friendly interface solutions.

1.1 What is Lopediatec Control Remoto?

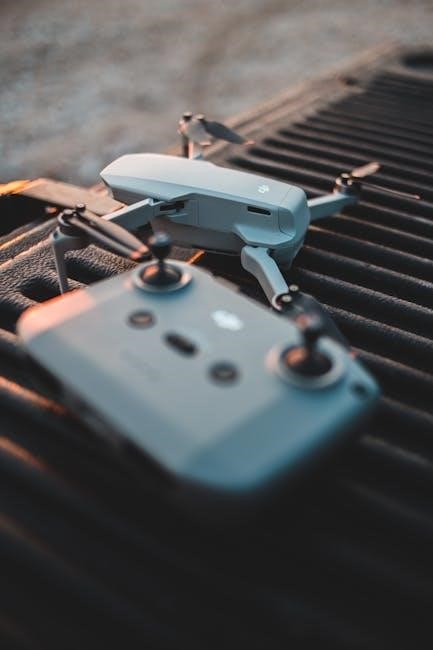
Lopediatec Control Remoto is a universal remote control solution designed to manage various electronic devices seamlessly. It offers compatibility with smart TVs‚ DVD players‚ and more‚ allowing users to transform their smartphones into remote controls via dedicated apps‚ ensuring convenience and ease of use for all smart and non-smart devices.

1.2 Importance of the Manual for Lopediatec Control Remoto

The manual for Lopediatec Control Remoto is essential for understanding its features and operation. It provides step-by-step guides for setup‚ troubleshooting‚ and optimizing device compatibility. The manual ensures users can fully utilize the remote’s capabilities‚ resolve common issues‚ and enhance their overall experience with smart devices. It is available for download via official links‚ ensuring easy access to comprehensive support.

Features of Lopediatec Control Remoto

Lopediatec Control Remoto offers universal compatibility with various devices‚ a user-friendly interface‚ and advanced features like app integration‚ transforming your smartphone into a remote control for enhanced convenience.

2.1 Universal Compatibility with Devices

Lopediatec Control Remoto ensures seamless connectivity across various devices‚ including smart TVs‚ Blu-ray players‚ and DVD systems. Its universal design allows users to control multiple electronics with one remote‚ offering convenience and efficiency for a unified home entertainment experience. This compatibility makes it an ideal solution for modern smart homes‚ simplifying device management.

2.2 Key Features of the Remote Control

Lopediatec Control Remoto boasts an ergonomic design and intuitive interface‚ ensuring ease of use. It supports voice control‚ customizable buttons‚ and compatibility with both smart and non-smart devices. The remote also features long-lasting battery life‚ enhanced signal range‚ and a sleek‚ durable build. Its advanced functionality makes it a versatile tool for seamless control over various electronic devices‚ enhancing user convenience significantly.

Downloading the Lopediatec Control Remoto Manual

Access the manual by visiting the official Lopediatec website or through trusted links provided. Ensure you follow the prompts to download the PDF version seamlessly for easy reference.

3.1 Steps to Download the Manual

  • Open your web browser and navigate to http://bit.ly/3KciqLr.
  • Click on the provided link to access the manual download page.
  • Select the “Download” option to save the PDF file to your device.
  • Ensure your device has sufficient storage space before proceeding.
  • Once downloaded‚ open the manual to view detailed instructions for your Lopediatec Control Remoto.

3.2 Links to Official Resources

Access official resources for the Lopediatec Control Remoto manual through verified links:

  • Manual Download Link ⎼ Direct link to download the PDF manual.
  • Purchase Link (Argentina) ⎼ Official purchase option for residents in Argentina.

Setting Up Lopediatec Control Remoto

Setting up the Lopediatec Control Remoto involves easy-to-follow steps‚ ensuring compatibility with various devices and smooth pairing for optimal functionality and user convenience.

4.1 Initial Setup and Configuration

Begin by downloading the Lopediatec Control Remoto manual from the official link: http://bit.ly/3KciqLr. Follow the guide to unpack and power on the remote. Install the corresponding app on your smartphone or tablet. Ensure your device is connected to a stable internet connection. Open the app and select your device type to start the pairing process. This step ensures seamless integration with your smart devices‚ allowing you to control them effortlessly. Proper configuration is essential for optimal performance and functionality.

4.2 Pairing the Remote with Your Device

After initial setup‚ download the Lopediatec Control Remoto app and ensure your device is connected to Wi-Fi. Open the app‚ select your device type‚ and follow the on-screen pairing instructions. The app will guide you through syncing the remote with your smart TV or other compatible devices. This step ensures a smooth connection and enables full control functionality. Proper pairing is crucial for seamless operation.

Using the Lopediatec Control Remoto App

Launch the Lopediatec Control Remoto app‚ connect your device‚ and navigate the intuitive interface to control your smart devices seamlessly with ease and precision.

5.1 Downloading and Installing the App

To start‚ visit the official Lopediatec website or app store. Search for “Lopediatec Control Remoto” and select the correct app. Download and install it following the prompts. Ensure compatibility with your device. The app is free and designed for easy installation. Once installed‚ open the app to begin setup and connect it to your smart devices for seamless control.

5.2 Navigating the App Interface

Upon launching the Lopediatec Control Remoto app‚ you’ll find an intuitive interface. The home screen displays quick access buttons for device categories like TV‚ AC‚ and music systems. Use the navigation bar to switch between sections. Customize settings by tapping the menu icon. Pair devices easily through the “Add Device” option; The interface is designed for simplicity‚ ensuring smooth and efficient operation of your smart devices.

Troubleshooting Common Issues

Identify connectivity problems by checking Bluetooth or Wi-Fi connections. Restart devices if unresponsive. Test battery health with a simple bounce test to determine if replacement is needed.

6.1 Solving Connectivity Problems

If your Lopediatec remote isn’t connecting‚ restart both the remote and device. Ensure proper pairing via Bluetooth or Wi-Fi. Check for interference from other devices. Update the app or reset the remote to factory settings if issues persist. Consult the manual or contact support for further assistance‚ ensuring seamless connectivity and optimal performance.

6.2 Battery and Hardware Issues

For battery issues‚ replace or recharge them. If the remote still doesn’t function‚ inspect for hardware damage. Clean the sensors and buttons regularly; If problems persist‚ contact customer support or visit an authorized service center for professional assistance‚ ensuring your Lopediatec remote operates smoothly and efficiently at all times.

Purchasing the Lopediatec Control Remoto

Acquire the Lopediatec Control Remoto through official channels or authorized retailers to ensure authenticity and warranty coverage‚ with options for secure payment and reliable delivery services available.

7.1 Where to Buy the Remote

The Lopediatec Control Remoto is available for purchase through official online retailers and authorized stores. Visit the official Lopediatec website or platforms like http://bit.ly/42Kw67q for secure purchasing. Residents in Argentina can also access exclusive purchase links‚ ensuring authenticity and warranty coverage. Always buy from verified sources to avoid counterfeit products and ensure optimal performance.

7.2 Payment and Delivery Options

The Lopediatec Control Remoto offers flexible payment options‚ including credit cards and PayPal‚ ensuring secure transactions. Delivery options include free shipping on eligible orders and express delivery for quicker receipt. Orders are typically dispatched within 24-48 hours‚ with tracking information provided. International shipping is available‚ though delivery times may vary based on location and customs clearance.

Converting Your Smartphone into a Remote Control

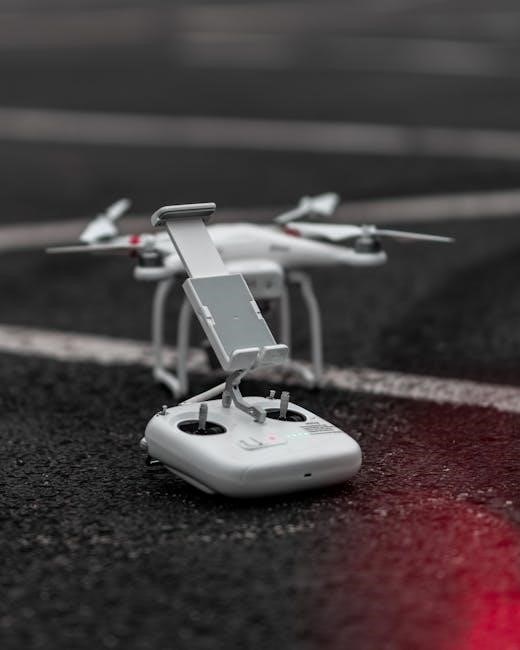
Transform your smartphone into a powerful remote control using the Lopediatec Control Remoto app‚ enabling seamless control of smart TVs and other compatible devices effortlessly anywhere.

8.1 Using Apps to Turn Your Phone into a Remote

Download the Lopediatec Control Remoto app to transform your smartphone into a universal remote. This app offers compatibility with smart TVs‚ enabling easy navigation and control. With features like touchpad navigation and customizable buttons‚ it ensures a seamless experience. Follow the in-app guide to pair your device and enjoy wireless control‚ making your phone an essential tool for managing your entertainment system effortlessly.

8.2 Compatibility with Smart TVs

The Lopediatec Control Remoto seamlessly integrates with various Smart TV brands‚ ensuring easy setup and operation. Compatible with Samsung‚ LG‚ and Sony models‚ it offers intuitive control via infrared or Wi-Fi connectivity. The app’s user-friendly interface allows for smooth navigation and customization‚ enhancing your viewing experience with efficient functionality and convenience at your fingertips.

Tips for Testing Battery Life

Check the battery’s health by observing its bounce; a dead battery bounces higher. Remove batteries when not in use to prevent drain and extend lifespan effectively.

9.1 How to Check if a Battery is Dead

To determine if a battery is dead‚ perform the bounce test: drop it gently on a hard surface. A dead battery will bounce higher due to internal damage. Additionally‚ use a battery tester or insert it into a device to check for power output‚ ensuring accurate results for replacement decisions.

9.2 Optimizing Battery Usage

To optimize battery usage for your Lopediatec Control Remoto‚ ensure proper storage‚ avoid extreme temperatures‚ and use high-quality batteries. Enable power-saving modes and turn off unnecessary features when not in use. Regularly clean battery contacts and replace batteries promptly when they show signs of weakening. Efficient usage habits will extend battery life and maintain optimal performance.

Exploring Lopediatec Control Remoto Videos

Lopediatec Control Remoto videos offer in-depth setup guides‚ troubleshooting tips‚ and feature overviews. Explore tutorials and discover the latest gadgets and technologies to enhance your remote control experience.

10.1 Video Guides for Setup and Usage

Lopediatec Control Remoto video guides provide step-by-step instructions for easy setup and usage. These tutorials cover pairing devices‚ configuring settings‚ and troubleshooting common issues. They also demonstrate how to utilize advanced features‚ ensuring a smooth and intuitive experience. The guides are perfect for both new users and those looking to optimize their remote control functionality.

10.2 Latest Gadgets and Technologies

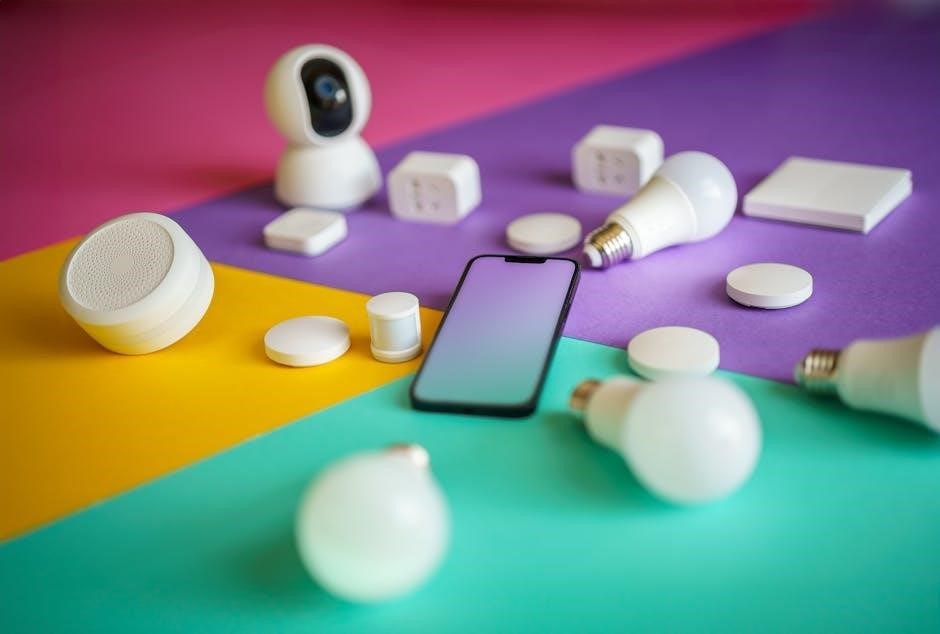
Lopediatec Control Remoto integrates with the latest smart home gadgets‚ offering advanced features like voice control and multi-device management. Stay updated with cutting-edge technologies that enhance remote functionality‚ ensuring compatibility with emerging devices and seamless integration into modern smart ecosystems for a futuristic control experience.

The Best Universal Remote Control Apps

Discover top universal remote apps transforming smartphones into powerful controls for TVs and devices‚ offering seamless connectivity and intuitive interfaces for enhanced smart home experiences.

11.1 Recommended Apps for TV and Devices

For seamless control‚ consider apps like UniMote or IR Universal Remote‚ which support various devices. These apps offer intuitive interfaces‚ multi-device compatibility‚ and advanced features like voice control. They are ideal for smart TVs‚ Blu-ray players‚ and more‚ ensuring a hassle-free experience. Their wide compatibility and user-friendly designs make them top choices for universal remote solutions.

11.2 Transforming Your Phone into a Remote

By downloading apps like UniMote or IR Universal Remote‚ your smartphone can function as a versatile remote control. These apps support various devices‚ including smart and non-smart TVs‚ using infrared or Wi-Fi connectivity. They offer easy setup‚ intuitive interfaces‚ and advanced features‚ making it simple to control your devices seamlessly from your phone.

Lopediatec Control Remoto offers a comprehensive solution for controlling devices‚ with a detailed manual and app features that enhance user experience and simplify device management effectively.

12.1 Final Thoughts on Lopediatec Control Remoto

Lopediatec Control Remoto stands out as a user-friendly solution for managing devices‚ offering a seamless experience with its intuitive design and robust features. The availability of detailed manuals and video guides ensures easy setup and troubleshooting. Its compatibility with smartphones and smart TVs further enhances its versatility‚ making it a must-have accessory for modern home entertainment systems and beyond.

12.2 Future of Remote Control Technology

The future of remote control technology lies in integration with smartphones and AI‚ offering voice commands and gesture controls. Apps like UniMote and Lopediatec’s solutions are paving the way for universal compatibility. Sustainability efforts‚ such as battery optimization‚ will also shape the industry‚ ensuring devices remain eco-friendly while maintaining advanced functionality for smart homes and beyond.

Bytrace

the impact cycle knight pdf

The Impact Cycle, developed by Jim Knight, is a structured approach to professional development in education. It focuses on collaboration between instructional coaches and teachers to enhance teaching practices and student outcomes.

1.1 Overview of the Impact Cycle and Its Significance

The Impact Cycle, developed by Jim Knight, is a three-stage process designed to enhance instructional coaching and teacher collaboration. It focuses on identifying areas for improvement, acquiring knowledge, and implementing changes to achieve measurable results. The cycle emphasizes a partnership approach, fostering trust and shared responsibility between coaches and teachers. By aligning professional development with school goals, the Impact Cycle ensures that efforts are targeted and effective. Its significance lies in its ability to create a structured, iterative process for continuous improvement, ultimately leading to better teaching practices and improved student outcomes. The model is widely recognized for its practicality and effectiveness in educational settings.

1.2 Background and Development of the Impact Cycle by Jim Knight

The Impact Cycle was developed by Jim Knight, a renowned expert in instructional coaching and professional development. Knight, with extensive experience in education, identified the need for a structured approach to improve teaching practices and student outcomes. He drew on research and practical insights to create a model that emphasizes collaboration and evidence-based strategies. The Impact Cycle was first introduced in his book The Impact Cycle (2017), where he outlined the three fundamental phases: Identify, Learn, and Improve. Knight’s approach focuses on fostering a partnership between coaches and teachers, ensuring that professional development is tailored to specific needs. His work addresses the gap between traditional coaching methods and the demand for measurable, data-driven improvements in education. By providing a clear framework, Knight’s Impact Cycle has become a cornerstone for instructional coaching worldwide.

Phases of the Impact Cycle

The Impact Cycle, developed by Jim Knight, consists of three phases: Identify, Learn, and Improve. These stages guide instructional coaches and teachers through assessment, development, and implementation to enhance teaching practices.

2.1 Identify: Assessing Reality and Setting Goals

The Identify phase of the Impact Cycle involves assessing the current teaching practices and student outcomes to establish a clear understanding of the situation. This stage requires collaboration between instructional coaches and teachers to gather data, identify strengths, and pinpoint areas for improvement. By setting specific, measurable, and achievable goals, educators can create a roadmap for professional development. This phase emphasizes the importance of a realistic assessment to ensure that the subsequent steps are tailored to the actual needs of the classroom. Through open dialogue and mutual understanding, the Identify phase lays the foundation for effective coaching and sustainable growth. It is essential to approach this stage with a non-judgmental mindset, focusing on facts and shared objectives to foster a positive and productive environment for change. This collaborative approach ensures that the goals are relevant and aligned with the broader educational mission.

2.2 Learn: Professional Development and Knowledge Acquisition

The Learn phase of the Impact Cycle focuses on acquiring the necessary knowledge and skills to address the gaps identified in the Identify phase. Through professional development opportunities, teachers and instructional coaches explore evidence-based practices and strategies to enhance teaching effectiveness. This phase emphasizes the importance of continuous learning, where educators engage in workshops, peer discussions, and self-study to deepen their understanding of effective instructional methods. The goal is to bridge the gap between current practices and desired outcomes by equipping teachers with actionable tools and techniques. By fostering a culture of learning, the Impact Cycle ensures that educators are well-prepared to implement meaningful changes in the classroom. This collaborative approach not only strengthens individual skills but also promotes a shared commitment to student success and educational excellence. The Learn phase is a critical step in building the capacity needed for sustainable improvement.

2.3 Improve: Implementing Changes and Monitoring Progress

The Improve phase of the Impact Cycle is where the insights and knowledge gained in the previous phases are put into action. This stage focuses on implementing targeted changes in teaching practices, with the goal of improving student outcomes. Instructional coaches work closely with teachers to design and execute these changes, ensuring they align with the identified goals. Regular monitoring and feedback are critical during this phase, as they help assess the effectiveness of the new strategies and identify areas for further refinement. Coaches and teachers collaboratively review data and reflect on progress, making adjustments as needed. This iterative process ensures that the changes are not only implemented but also sustained over time. The Improve phase emphasizes the importance of flexibility and adaptability, recognizing that achieving meaningful results often requires ongoing refinement and a commitment to continuous improvement.

Practical Applications of the Impact Cycle

The Impact Cycle offers practical strategies for instructional coaches and educators to enhance teaching practices. By fostering collaboration, it helps set actionable goals and implement evidence-based methods, leading to improved student outcomes.

3.1 Instructional Coaching and Teacher Collaboration

Instructional coaching within the Impact Cycle emphasizes teacher collaboration as a cornerstone for professional growth. Coaches work closely with educators to identify areas for improvement, set measurable goals, and develop strategies to achieve them. This collaborative approach fosters a supportive environment where teachers feel empowered to refine their practices. By engaging in reflective conversations and sharing best practices, teachers and coaches create a culture of continuous improvement; The cycle’s structured phases—Identify, Learn, and Improve—provide a clear roadmap for this partnership, ensuring that coaching efforts are aligned with student needs and school objectives. Regular feedback and data-driven decisions further enhance the effectiveness of this collaborative process, leading to sustained improvements in teaching and learning outcomes. Ultimately, the Impact Cycle’s focus on collaboration ensures that instructional coaching becomes a powerful tool for educator development and student success.

3.2 Case Studies and Real-World Examples

The Impact Cycle has been successfully implemented in various educational settings, with numerous case studies demonstrating its effectiveness. For instance, a school district in the Midwest used the cycle to enhance teacher practices, resulting in significant improvements in student achievement. Coaches and teachers collaborated to identify challenges, develop targeted strategies, and monitor progress, leading to measurable outcomes. Another example involves a high school where instructional coaches applied the Improve phase to refine teaching methods in STEM subjects, boosting student engagement and performance. These real-world applications highlight the cycle’s adaptability and its ability to drive meaningful change. By examining such case studies, educators can gain practical insights into implementing the Impact Cycle effectively. These examples also underscore the importance of collaboration and continuous improvement in achieving educational goals.

Resources and Further Reading

Recommended resources include The Impact Cycle by Jim Knight and Resources for Instructional Coaching: The Definitive Guide. These texts provide comprehensive insights into instructional coaching and professional development.

4.1 Recommended Literature and Research Papers

For a deeper understanding of the Impact Cycle, key literature includes The Impact Cycle by Jim Knight, which outlines the three-phase process of Identify, Learn, and Improve. Unmistakable Impact by Knight further explores strategies for improving education. Resources for Instructional Coaching: The Definitive Guide provides practical tools for coaches. Additionally, research papers by AW Morris (2019) highlight the effectiveness of instructional coaching in enhancing teacher practices and student outcomes. These resources offer empirical support and real-world applications of the Impact Cycle, making them essential for educators and researchers. They emphasize collaboration, goal-setting, and continuous improvement, aligning with Knight’s vision for transformative education. These texts are indispensable for anyone seeking to implement the Impact Cycle effectively.

Bytrace

duraflame remote control instructions

Discover how to effortlessly operate your Duraflame electric fireplace with our comprehensive guide. Learn to adjust heat, flame effects, and thermostat settings for optimal comfort and convenience.

Overview of Duraflame Remote Control Functionality

The Duraflame remote control offers seamless operation of your electric fireplace, enabling easy adjustment of heat settings, flame effects, and brightness. It also allows you to toggle the power, set timers, and regulate the thermostat for precise temperature control. Designed for convenience, the remote provides intuitive buttons for navigating through various features, ensuring a user-friendly experience. With this remote, you can customize your fireplace settings effortlessly, enhancing comfort and ambiance in your space.

Initial Setup and Pairing

Begin by installing batteries in the remote and ensuring it pairs with your Duraflame electric fireplace. Follow the manual for proper activation and syncing procedures.

How to Pair the Remote Control with Your Duraflame Electric Fireplace

To pair the remote control with your Duraflame electric fireplace, first ensure the fireplace is turned off. Insert the provided AAA batteries into the remote, making sure they are securely seated and the terminals are clean. Next, locate the pairing button on the fireplace, typically found near the control panel. Press and hold this button for 3-5 seconds until the indicator light flashes, signaling pairing mode. With the remote, press the power button once and release it. The remote will now sync with the fireplace, allowing you to control all functions seamlessly. If pairing fails, repeat the process or consult the user manual for additional troubleshooting steps.

Battery Installation and Remote Activation

Install two AAA batteries into the remote control, ensuring they are properly seated and the terminals are clean. Align the positive and negative signs correctly to avoid damage. Once batteries are inserted, press the power button to activate the remote. If the remote does not respond, check the battery installation or replace the batteries. Properly functioning batteries ensure smooth operation of your Duraflame electric fireplace, enabling you to control heat, flame effects, and other features effortlessly.

Basic Operations

Master essential functions like turning the fireplace on/off, adjusting heat levels, and customizing flame effects. These controls ensure a seamless and personalized experience for users.

Using the Power Button to Turn On/Off the Fireplace

Operating your Duraflame electric fireplace is straightforward. The power button, located on both the remote and the control panel, allows you to turn the unit on or off with a single press. For the remote, ensure batteries are installed correctly. Press the power button firmly but gently to activate or deactivate the fireplace. LED indicators will confirm the status. Avoid rapid presses, as this may cause malfunctions. Always refer to the manual for specific model instructions.

Adjusting Heat Settings with the Remote Control

Effortlessly manage your comfort with the Duraflame remote control. To adjust heat settings, press the HEAT button on the remote to cycle through available modes. Use the UP and DOWN arrows to increase or decrease the temperature. The thermostat will maintain your desired setting. Ensure smooth operation by pressing buttons gently and avoiding rapid presses. Refer to your specific model’s manual for detailed instructions on heat mode options and thermostat functionality.

Controlling Flame Effects and Brightness

Elevate your fireplace experience by adjusting flame effects and brightness with ease. Use the remote’s flame adjustment button to choose from various flame height settings. Press the brightness button to customize the intensity of the LED flames. Features like 3D flame effects enhance visual realism. For optimal performance, operate the remote at a steady pace and avoid rapid button presses. These controls allow you to tailor the ambiance of your Duraflame electric fireplace to suit any setting or mood.

Advanced Features

Explore advanced functionalities like thermostat settings, timer operations, and flame customization. These features enhance comfort and convenience, ensuring a tailored experience for your Duraflame electric fireplace.

Understanding Thermostat and Temperature Settings

The Duraflame remote control allows you to easily adjust the thermostat and temperature settings for your electric fireplace. Using the remote, you can set your preferred temperature, and the thermostat will maintain it by regulating the heating element. The temperature range typically spans from 60°F to 90°F, ensuring a cozy environment. The thermostat also prevents overheating, providing safe and energy-efficient operation. Proper use of these settings optimizes comfort and energy savings, making your Duraflame fireplace a practical and enjoyable heating solution for any room.

Setting the Timer Function for Automated Operation

The Duraflame remote control offers a convenient timer function, allowing you to schedule automated operation. Press the Timer button on the remote, then use the + or ― buttons to set the desired duration (1 to 8 hours). The timer display will show the remaining time. Once set, the fireplace will automatically turn off after the selected period. This feature enhances convenience and energy efficiency, ensuring your fireplace operates safely and as intended without constant monitoring. Use this function to enjoy a cozy ambiance without worrying about turning it off manually.

Adjusting Flame Height and Speed

To customize your Duraflame electric fireplace experience, use the remote control to adjust the flame height and speed. Press the flame symbol button to cycle through different flame effects. Use the plus (+) and minus (-) buttons to increase or decrease the flame height and speed. For precise adjustments, select a numbered preset (e.g., 1 for low and 5 for high) to achieve your desired flame appearance. This feature allows you to tailor the visual experience to your preference, enhancing the ambiance of your space with ease and convenience.

Troubleshooting Common Issues

If the remote stops working, check batteries or connections. For heating issues, ensure proper thermostat settings and power supply. Consult the manual or contact support for unresolved problems.

What to Do If the Remote Control Stops Working

If your Duraflame remote stops working, first check the batteries. Ensure they are correctly installed and not expired. If issues persist, reset the remote by removing batteries for 30 seconds. Also, verify the infrared sensor on the fireplace is clean and unobstructed. If problems remain, refer to the user manual or contact customer support for further assistance or potential replacement.

Resolving Heating Element Malfunctions

If the heating element isn’t functioning, ensure the fireplace is properly plugged in and the circuit breaker isn’t tripped. Check the thermostat settings to confirm it’s set to heat. If the issue persists, turn off the unit and unplug it for 30 minutes to reset. Consult the user manual for detailed troubleshooting steps or contact Duraflame customer support for assistance. Regular maintenance and adherence to safety guidelines can help prevent such malfunctions.

Troubleshooting Flame Effect Problems

If the flame effects aren’t displaying correctly, ensure the fireplace is turned on and the flame feature is activated via the remote or control panel. Check for loose connections or obstructions blocking the view. Restart the unit by unplugging it for 30 seconds and plugging it back in. Clean any dust from the flame effect area for optimal visibility. If issues persist, consult the user manual or contact Duraflame customer support for further assistance or potential repair options.

Safety Precautions and Maintenance

Keep flammable materials away from the fireplace. Ensure proper installation and avoid unauthorized repairs. Clean regularly to maintain performance and safety standards for your Duraflame electric fireplace.

Important Safety Tips for Using Duraflame Electric Fireplaces

Always place the fireplace on a level, stable surface away from flammable materials. Avoid using it near water or in humid environments. Keep children and pets at a safe distance. Never leave the fireplace unattended while in operation. Ensure proper ventilation to prevent overheating. Avoid using damaged cords or plugs, as this could lead to electric shock. Regularly inspect the unit for wear and tear. Follow all instructions in the manual to ensure safe and efficient operation. Maintain a minimum clearance of 3 feet from combustible materials. Never use the fireplace in areas where gasoline, paint, or flammable liquids are stored. Turn off the fireplace and unplug it during cleaning or maintenance. Keep the remote control out of reach of children to prevent accidental activation. Read and understand all safety precautions before first use to ensure a safe and enjoyable experience with your Duraflame electric fireplace.

Cleaning and Maintaining the Remote Control

Regularly clean the remote control with a soft, dry cloth to remove dirt and fingerprints. Avoid using harsh chemicals or abrasive materials that could damage the surface. Gently wipe the buttons to ensure proper functionality. For stubborn stains, dampen a cloth with water, but avoid moisture entering the remote. Check battery terminals for corrosion and clean them with a cotton swab if necessary. Store the remote in a dry place, away from direct sunlight. Replace batteries with the correct type and ensure proper alignment. Test the remote after cleaning to ensure all buttons work correctly. Proper maintenance enhances performance and longevity;

Regular Maintenance for Optimal Performance

Perform routine inspections of your Duraflame electric fireplace and remote control to ensure smooth operation. Check for dust accumulation around vents and heat elements, and clean them gently with a soft brush or cloth. Inspect the power cord for damage and ensure secure connections. Verify that all remote control buttons function correctly and replace batteries as needed. Regularly update your knowledge of the user manual to stay informed about new features and maintenance tips. Consistent upkeep prevents malfunctions and extends the lifespan of your appliance.

Additional Resources

Access official Duraflame manuals, customer support, and online forums for comprehensive guidance on remote control instructions, troubleshooting, and product care, ensuring optimal usage of your electric fireplace.

Where to Find Duraflame Remote Control Manuals

Official Duraflame manuals are available on their website or through authorized retailers. Models like DFI-5010-01 and DFI-550-22 have dedicated PDF downloads. Third-party sites like ManualsLib and ManualsOnline also host these manuals. Ensure to verify the source for authenticity to avoid incorrect versions. For specific models, such as DFI-030ARU, visit the product page or contact customer support for direct assistance.

Customer Support and Warranty Information

For assistance, visit tsicustomerservice.com or contact info@duraflame.com. Warranty details are provided with purchase, covering repairs or replacements for defective parts. Register your product online for extended support. Ensure to follow manual guidelines to maintain warranty validity. For press inquiries, email sales@duraflame.com. Duraflame offers reliable customer service to address any concerns about your electric fireplace or remote control.

Online Communities and Forums for Duraflame Users

Join online forums and communities dedicated to Duraflame users to share experiences, troubleshooting tips, and solutions. Websites like tsicustomerservice.com and social media groups provide platforms for discussions. Engage with fellow users to resolve remote control issues or learn about new features. These forums also offer insights into maximizing your electric fireplace’s performance and maintaining its longevity. Visit the official Duraflame website for additional resources and customer support contacts.

Bytrace

bissell proheat manual 12 amps manual

Bissell ProHeat 12 Amps Manual

The Bissell ProHeat 12 Amps manual provides comprehensive guidance for operating and maintaining your carpet cleaner. It includes assembly, safety tips, and troubleshooting for optimal performance.

The Bissell ProHeat 12 Amps is a powerful and versatile carpet cleaner designed to tackle tough stains and deep-seated dirt. With its robust 12-amp motor, it delivers reliable performance for cleaning carpets, upholstery, and hard floors. This model features a heated cleaning system, which helps maintain the optimal temperature of the cleaning solution for effective stain removal. The ProHeat 12 Amps is ideal for pet owners and households with heavy foot traffic, offering a combination of advanced cleaning technology and user-friendly design. It also supports the Bissell Pet Foundation, contributing to animal welfare with every purchase. This cleaner is a practical choice for maintaining clean and hygienic floors effortlessly.

Overview of the Product

The Bissell ProHeat 12 Amps is a high-performance carpet cleaner engineered for deep cleaning and stain removal. It features a robust 12-amp motor, providing strong suction power and efficient dirt extraction. The cleaner includes a rotating brush system that agitates and lifts embedded dirt, while its built-in heater ensures consistent cleaning solution temperature for optimal results. Designed for versatility, it supports both wet and dry cleaning modes, making it suitable for carpets, upholstery, and hard floors. Lightweight and easy to maneuver, the ProHeat 12 Amps comes with additional tools for targeted cleaning. It also supports the Bissell Pet Foundation, aiding homeless pets with every purchase, making it a practical and socially responsible cleaning solution.

Key Features of the Bissell ProHeat 12 Amps

The Bissell ProHeat 12 Amps boasts a powerful 12-amp motor for robust cleaning performance, ensuring deep carpet penetration and effective stain removal. Its rotating brush system actively agitates and lifts embedded dirt, while the built-in heater maintains optimal cleaning solution temperature. Designed with pet owners in mind, it supports Bissell’s pet-friendly initiatives and includes tools for targeted cleaning. The eco-friendly design emphasizes energy efficiency, and the machine is lightweight for easy maneuverability. Additional features include a large-capacity water tank and adjustable settings for tailored cleaning. This versatile cleaner is backed by a limited one-year warranty, ensuring reliability and customer satisfaction. Its combination of power, efficiency, and pet-focused features makes it an ideal choice for home cleaning needs.

User Guide and Assembly Instructions

The Bissell ProHeat 12 Amps user guide provides detailed instructions for assembling and operating the cleaner. Start by attaching the handle to the main unit until it clicks securely. Next, fill the clean water tank with warm water, ensuring not to exceed the recommended level. For wet cleaning, always install the float to prevent overfilling. Plug in the machine and select the desired mode. Use Bissell-recommended cleaning formulas for optimal results. The guide also includes troubleshooting tips for common issues like low suction or brush malfunction. Follow the step-by-step assembly and operation instructions to ensure safe and effective use of your ProHeat 12 Amps cleaner.

Step-by-Step Assembly Process

Begin by unpacking and organizing all components. Attach the handle to the main unit by aligning the clips and pressing firmly until it clicks. Next, connect the cleaning tank by sliding it into the designated slot on the front of the machine. Ensure the tank is secure and properly aligned. For models with a detachable hose, snap it into place on the back of the unit. Finally, wrap the power cord around the cord wrap on the handle for convenient storage. Refer to the diagrams in the manual for visual guidance. Once assembled, your Bissell ProHeat 12 Amps is ready for operation.

Operating the Bissell ProHeat 12 Amps

  • Before use, ensure the machine is properly assembled and the tank is filled with the recommended Bissell cleaning solution mixed with hot water.
  • Plug in the device and select the desired cleaning mode using the control dial on the handle.
  • For standard cleaning, push the machine forward, allowing the rotating brush to agitate the carpet fibers. Pull back slowly to suction the dirt and water.
  • For tough stains, use the built-in heater to maintain optimal solution temperature and apply additional cleaning formula directly to the affected area.
  • Regularly empty and rinse the dirty water tank to maintain efficiency and prevent clogs. Refer to the manual for specific guidance on operation and maintenance.

Safety Precautions and Warnings

To ensure safe operation of the Bissell ProHeat 12 Amps, follow these guidelines:

  • Avoid using the cleaner near open flames or sparks, as flammable vapors may be released.
  • Never immerse the machine in water or expose it to excessive moisture to prevent electrical hazards.
  • Keep children and pets away while operating the device to avoid accidental injury.
  • Do not leave the machine unattended while plugged in or in use.
  • Always turn off and unplug the device before performing maintenance or troubleshooting.
  • Use only Bissell-approved cleaning solutions and avoid overloading the tank to prevent damage.
  • Store the cleaner in a dry, cool place when not in use to maintain its performance and longevity.

Adhering to these precautions ensures safe and effective use of your Bissell ProHeat 12 Amps carpet cleaner.

General Safety Guidelines

Always read and follow the instructions in the Bissell ProHeat 12 Amps manual to ensure safe and proper use. Keep the cleaner out of reach of children and pets to avoid accidental operation. Avoid using the device near open flames or sparks, as cleaning solutions may release flammable vapors. Ensure the machine is placed on a stable, flat surface to prevent tipping. Never operate the cleaner with damaged cords or plugs, and avoid overloading the water tank. Use only Bissell-recommended cleaning solutions to maintain performance and safety. Regularly inspect the device for wear and tear, and address any issues promptly to prevent malfunctions. By adhering to these guidelines, you can ensure a safe and effective cleaning experience with your Bissell ProHeat 12 Amps.

Electrical Safety Tips

To ensure safe operation of the Bissell ProHeat 12 Amps, always plug the device into a grounded electrical outlet rated for 12 amps. Avoid using damaged or frayed cords, as they can pose a fire hazard. Never submerge the cleaner in water or expose it to excessive moisture, as this can cause electrical shock. If the device falls into water, unplug it immediately and have it repaired by an authorized service center. Keep the power cord away from heated surfaces and avoid overstretching it during use. Before performing any maintenance, turn off the power and disconnect the plug from the outlet. This helps prevent accidental start-ups and ensures your safety while servicing the machine. Always follow these electrical safety tips to protect yourself and maintain the longevity of your Bissell ProHeat 12 Amps.

Maintenance and Troubleshooting

Regular maintenance ensures optimal performance of your Bissell ProHeat 12 Amps. After each use, clean the machine thoroughly, paying attention to the brush roller and tanks. Empty and rinse the dirty water tank to prevent mold growth. Check for blockages in the hose or nozzle, as these can reduce suction power. If the brush stops turning, inspect for tangled hair or debris and clean as needed. For troubleshooting, refer to the user guide for solutions to common issues like low suction, no spray, or leakage; Always unplug the machine before performing any maintenance. Proper care extends the life of your cleaner and ensures effective cleaning results.

Cleaning and Maintaining the Machine

Regular cleaning and maintenance are essential to keep your Bissell ProHeat 12 Amps in optimal condition. After each use, empty and rinse the dirty water tank to prevent mold and mildew buildup. Wash the filter with warm water and allow it to air dry before reinstalling. Check the brush roller for tangled hair or debris and clean it thoroughly. For hard-to-reach areas, use a soft brush or cloth to wipe down the exterior. Refer to the user guide for specific cleaning instructions for your model. Proper maintenance ensures efficient performance and extends the lifespan of your carpet cleaner.

Troubleshooting Common Issues

If your Bissell ProHeat 12 Amps isn’t performing as expected, check for common issues like low suction or no power. Ensure the tank is properly seated and the float is installed for wet pick-up. If the brush isn’t turning, inspect for blockages or debris. For no spray, verify the water tank is filled and the solution is correctly mixed. Refer to the user guide for model-specific troubleshooting steps. Regularly cleaning the brush roller and ensuring proper filter maintenance can prevent many issues. Always use BISSELL-approved cleaning products to avoid machine damage. Troubleshooting tips are detailed in the manual to help resolve problems quickly and effectively.

Accessories and Replacement Parts

Enhance your Bissell ProHeat 12 Amps experience with genuine accessories designed for optimal performance. Compatible items include deep cleaning formulas, replacement brushes, and filters. These parts ensure your machine runs efficiently and effectively, maintaining its cleaning power. For replacement parts, visit the Bissell website or authorized retailers, where you can search by model number to find exact fits. Regularly updating your accessories can prevent issues like poor suction or brush malfunction. Use only BISSELL-approved products to maintain warranty validity and ensure safety. Accessories are easily available online or through customer support, making it simple to keep your ProHeat in top condition for years of reliable service.

Compatible Accessories for the Bissell ProHeat 12 Amps

Enhance your Bissell ProHeat 12 Amps with genuine accessories designed for optimal performance. These include deep cleaning formulas, replacement brushes, and advanced filters to maintain peak functionality. Additional attachments like crevice tools and pet hair brushes are available for specialized cleaning tasks. Using BISSELL-approved parts ensures compatibility and safety, while maintaining your warranty. These accessories are crafted to enhance cleaning efficiency and address specific needs, ensuring your machine continues to deliver exceptional results. Explore the range of compatible products to keep your ProHeat in top condition and extend its service life effectively.

Where to Find Replacement Parts

Replacement parts for the Bissell ProHeat 12 Amps can be easily sourced from the Bissell official website or authorized retailers. Visit the Bissell online store or check retailers like Amazon, Walmart, or Home Depot. Ensure to use the model number (found on the machine’s label) to find compatible parts. Genuine Bissell accessories, such as brushes, belts, and cleaning solutions, are recommended for optimal performance. Local hardware stores may also carry compatible items. For convenience, Bissell’s customer support website offers a parts finder tool. Always verify the authenticity of parts to maintain warranty validity and ensure proper machine functionality.

Warranty and Customer Support

The Bissell ProHeat 12 Amps is backed by a limited one-year warranty, covering defects in materials and workmanship. For warranty claims, contact Bissell’s Consumer Services department. Customer support is accessible via phone, email, or through the official Bissell website. The website also offers a parts finder tool and troubleshooting guides. To ensure warranty validity, use only genuine Bissell parts and follow the user manual instructions. Bissell’s dedicated support team is available to assist with repairs, replacements, and general inquiries. Visit the Bissell website for detailed warranty terms and to locate authorized service centers near you.

Understanding the Limited One-Year Warranty

The Bissell ProHeat 12 Amps is protected by a limited one-year warranty, ensuring coverage for defects in materials and workmanship. This warranty applies from the date of purchase and requires proper registration. It covers repairs and replacements for faulty parts and labor at no additional cost. To maintain warranty validity, users must adhere to the manual’s guidelines and use only Bissell-approved accessories. The warranty does not apply to damage caused by misuse or unauthorized modifications. For warranty claims, contact Bissell’s Consumer Services team through their official website or support hotline. This warranty underscores Bissell’s commitment to quality and customer satisfaction.

Reaching Bissell Customer Service

To contact Bissell’s customer service, visit their official website or call their dedicated support hotline at 1-844-383-2630. The team is available Monday through Friday from 9am to 9pm ET and Saturday from 9am to 8pm ET. Sunday support is unavailable. For faster assistance, locate your product’s model number before reaching out. Bissell also provides online resources, including troubleshooting guides and user manuals, to address common issues. Additionally, Bissell supports the Bissell Pet Foundation, donating to animal welfare with every purchase, making customer support a part of their broader mission to help pets in need.

Eco-Friendly and Pet-Friendly Features

The Bissell ProHeat 12 Amps is designed with eco-conscious and pet-friendly features. It uses energy-efficient technology to minimize power consumption while maintaining strong cleaning performance. The machine is also pet-friendly, making it ideal for households with furry friends. Bissell supports the Bissell Pet Foundation, which works to rescue and rehabilitate homeless pets. A portion of proceeds from Bissell product sales contributes to this mission. The ProHeat 12 Amps effectively removes pet dander, stains, and odors, ensuring a cleaner and healthier environment for both pets and families. This model aligns with Bissell’s commitment to sustainability and animal welfare.

Eco-Friendly Design and Energy Efficiency

The Bissell ProHeat 12 Amps features an eco-friendly design that emphasizes energy efficiency without compromising performance. Its 12-amp motor is engineered to deliver powerful cleaning while minimizing energy consumption. Bissell’s commitment to sustainability is reflected in this model, which uses advanced technology to optimize power use. The machine is also designed with recyclable materials, promoting environmental responsibility. By supporting energy efficiency, the ProHeat 12 Amps helps reduce carbon footprints while maintaining its effectiveness in deep cleaning carpets. This eco-conscious approach aligns with Bissell’s broader mission to create products that are both effective and environmentally friendly, making it a greener choice for home cleaning needs.

Support for the Bissell Pet Foundation

Bissell proudly supports the Bissell Pet Foundation, which works tirelessly to help homeless pets worldwide. With every purchase of a Bissell product, including the ProHeat 12 Amps, customers contribute to this noble cause. A portion of the proceeds from Bissell sales goes directly toward supporting pet adoption, rescue efforts, and animal welfare programs. Since 2011, Bissell has donated over $28 million to the Pet Foundation, demonstrating their commitment to making a difference in the lives of pets in need. By choosing Bissell, consumers not only gain a reliable cleaning solution but also help support a mission that brings joy and hope to animals everywhere.

The Bissell ProHeat 12 Amps is a powerful and reliable carpet cleaner designed to tackle tough messes with ease. Its 12-amp motor and advanced features, such as the rotating brush and built-in heater, ensure deep cleaning and optimal stain removal. The comprehensive manual provides clear instructions for assembly, operation, and maintenance, while also emphasizing safety and troubleshooting. By following the guidelines, users can extend the machine’s lifespan and enjoy consistent performance. Additionally, Bissell’s commitment to eco-friendly design and support for the Pet Foundation highlights their dedication to both quality and social responsibility. This manual serves as a complete guide to maximizing the potential of your Bissell ProHeat 12 Amps.