Drake’s Menu PDF: A Comprehensive Guide
This guide delves into accessing and understanding Drake’s restaurant menu in PDF format, covering updates, related topics, and legal aspects as of February 2026.
Drake’s menu, available as a PDF document, represents more than just a list of culinary offerings; it’s a window into the restaurant’s brand and evolving gastronomic identity. As of February 27, 2026, accessing this PDF provides a snapshot of current pricing, dietary options, and seasonal changes. The document, authored initially by AmberSoler (2006-2012) and continued by Sergey Drake (2012-2026), reflects a commitment to providing detailed information.
Understanding the menu’s structure and content is crucial for patrons and analysts alike, especially considering its connection to cultural references like Drake’s “Late Night” lyrics featuring Lil Yachty.
What is Drake’s Menu?
Drake’s menu, primarily distributed as a PDF, is a comprehensive listing of food and beverage items offered at the restaurant. It details appetizers, main courses, desserts, and drinks, potentially including ingredient lists and nutritional information. The PDF format facilitates easy access and distribution, though security concerns regarding downloads exist.
The menu’s evolution, with revision dates and seasonal adjustments, showcases the restaurant’s adaptability. It’s linked to broader cultural touchstones, such as Drake’s music (e.g., “Late Night”) and collaborations, influencing its perceived value and appeal.
The Significance of the PDF Format
PDF distribution for Drake’s menu offers several advantages: consistent formatting across devices, ease of download from the official website or third-party hosts, and preservation of visual layout. However, potential security risks accompany downloading PDFs, necessitating caution.
The PDF allows for offline viewing and convenient printing, though compatibility issues with PDF readers can arise. It’s a stable format for archiving menu versions, reflecting historical changes and seasonal updates, crucial for tracking the restaurant’s culinary evolution since 2018.

Accessing Drake’s Menu PDF
Drake’s menu PDF is available via the official website download, or through third-party hosting sites; however, be mindful of potential security concerns.
Official Website Download
The primary method for obtaining Drake’s menu in PDF format is directly from their official online platform. While a direct link isn’t explicitly provided in the sourced information, it’s standard practice for restaurants to host downloadable menus for customer convenience.
Users should navigate to the restaurant’s website and search for a “Menu” or “Download” section, often found in the footer or under a “Contact” or “About” page. Expect the PDF to be regularly updated, reflecting any seasonal changes or new additions. Ensure the website is legitimate to avoid malicious downloads.
Third-Party PDF Hosting Sites
While the official website is preferred, Drake’s menu PDF may be found on various third-party document hosting sites. A specific example, “cian_gls/pdf/colon.pdf”, is referenced, though its direct relevance to Drake’s restaurant isn’t confirmed.
These sites often archive publicly available documents. However, caution is crucial. The authenticity and currency of menus on these platforms cannot be guaranteed. Always verify information against the official source when possible, and be wary of potential malware or outdated versions.
Potential Security Concerns
Downloading the Drake’s menu PDF from unofficial sources presents security risks. Third-party hosting sites may harbor malicious software disguised as legitimate files. Always ensure your antivirus software is up-to-date before downloading and opening any PDF.
Be cautious of links from untrusted sources. A compromised PDF could potentially exploit vulnerabilities in your PDF reader. Prioritize downloading directly from the official Drake’s website to minimize these risks and protect your device from potential threats and malware infections.
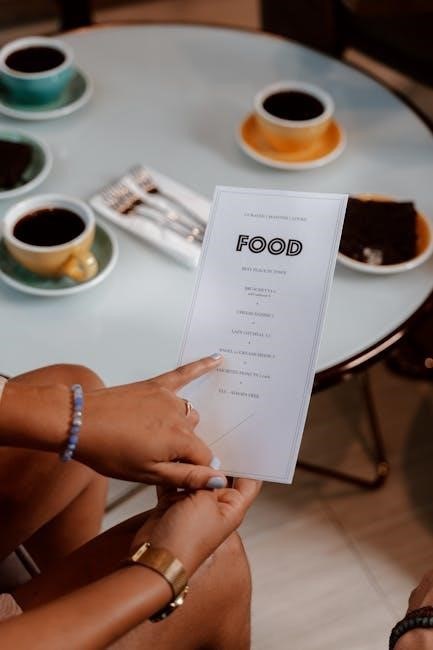
Decoding Drake’s Menu Content
Drake’s menu PDF details appetizers, main courses, desserts, and beverages. Analyzing sections reveals ingredient lists, pricing, and options for various dietary needs and preferences.
Menu Sections Overview
Drake’s menu, typically available as a PDF, is logically organized into distinct sections to facilitate easy navigation for diners. These commonly include a dedicated area for enticing appetizers and starters, designed to kick off the meal. Following this, a substantial main course section presents a diverse range of entrees, catering to varied tastes.
A separate, delightful section showcases desserts and sweet treats, providing a perfect ending to the dining experience. Finally, a comprehensive beverage selection, encompassing both alcoholic and non-alcoholic options, completes the menu’s structure. This clear categorization ensures a streamlined and enjoyable browsing experience for customers accessing the PDF version.
Appetizers & Starters
Drake’s appetizers and starters, detailed within the PDF menu, are crafted to stimulate the palate and complement the main courses. Expect a selection ranging from classic options like crispy fried calamari and loaded nachos to more unique offerings. These starters often feature fresh, high-quality ingredients, prepared with attention to detail.
The PDF typically lists detailed descriptions of each appetizer, including key ingredients and preparation methods. Price points are clearly indicated, allowing diners to easily assess value. These initial bites are designed to be shareable, encouraging a communal dining experience, as highlighted in lyrical references to late nights with friends.
Main Course Options
Drake’s main course selections, comprehensively outlined in the PDF menu, showcase a diverse range of culinary creations. Diners can anticipate a variety of options, including expertly grilled steaks, succulent seafood dishes, and flavorful pasta entrees. The menu emphasizes quality cuts of meat and fresh catches, prepared to perfection.
The PDF provides detailed descriptions of each main course, specifying ingredients, cooking styles, and portion sizes. Pricing is clearly displayed, enabling informed decisions. These substantial offerings cater to diverse preferences, ensuring a satisfying dining experience, potentially enjoyed during those “late nights” referenced in Drake’s music.
Desserts & Sweet Treats
Drake’s PDF menu dedicates a tempting section to desserts and sweet treats, designed to conclude a meal on a high note. Patrons can explore classic options like rich chocolate cakes, creamy cheesecakes, and decadent fruit tarts. Seasonal specials frequently appear, utilizing fresh, locally sourced ingredients whenever possible.
Detailed descriptions within the PDF highlight flavor profiles and potential allergens. These sweet indulgences complement the savory main courses, offering a balanced dining experience. The menu aims to satisfy every sweet craving, perhaps mirroring the enjoyable “late nights” celebrated in Drake’s lyrical content.
Beverage Selection
Drake’s PDF menu boasts an extensive beverage selection, carefully curated to enhance the dining experience. Guests can choose from a variety of soft drinks, juices, and bottled water. The alcoholic beverage list includes a range of beers, wines by the glass or bottle, and signature cocktails.
The PDF often details specific brands and origins, catering to discerning palates. Beverage pairings are sometimes suggested to complement menu items. Considering the “late night” theme present in Drake’s music, expect options suitable for evening enjoyment, potentially mirroring the social atmosphere described in his lyrics.
Analyzing Menu Items
Drake’s PDF menu analysis involves examining ingredient lists, nutritional data, price points, and dietary options – vegetarian, vegan, and gluten-free choices are noted.
Ingredient Lists & Nutritional Information
Detailed ingredient lists for each Drake’s menu item are crucial for customers with allergies or specific dietary needs. While the PDF may not always include comprehensive nutritional information – calories, fats, proteins, carbohydrates – accessing this data is increasingly important for health-conscious diners. Research suggests a connection between inflammation, energy metabolism, and dietary choices, highlighting the value of transparency.
Further investigation may be needed to obtain complete nutritional breakdowns, potentially through contacting the restaurant directly or utilizing third-party nutritional databases. Understanding these components empowers informed dining decisions.
Price Points & Value Analysis
Analyzing Drake’s menu PDF reveals price points across appetizers, main courses, desserts, and beverages. A thorough value analysis considers portion sizes relative to cost, comparing Drake’s offerings to similar restaurants. Factors like ingredient quality and preparation methods influence perceived value. Examining historical menu variations (if available in archived PDFs) can demonstrate price fluctuations over time.
Determining whether prices align with the overall dining experience – atmosphere, service – is essential. Assessing discounts or promotional offers within the PDF further contributes to a comprehensive value assessment.
Dietary Considerations (Vegetarian, Vegan, Gluten-Free)
Drake’s menu PDF should ideally indicate vegetarian, vegan, and gluten-free options clearly. A detailed examination reveals whether dishes are explicitly labeled or require further inquiry. Ingredient lists, when provided, are crucial for verifying suitability for specific dietary needs. Cross-contamination risks aren’t typically addressed within the PDF itself, necessitating direct communication with restaurant staff.
Analyzing menu descriptions for potential hidden ingredients is vital. The absence of clear labeling suggests limited options or a need for customized requests.

Drake’s Menu Updates & History
Drake’s menu has seen revisions over time, with seasonal changes and variations documented since 2006, culminating in the current PDF version as of 2026.
Menu Revision Dates
Tracking Drake’s menu evolution reveals key revision dates, indicating periods of significant change. While a complete historical record isn’t readily available, documentation points to consistent updates since 2006, with AmberSoler as the initial author, later joined by Sergey Drake in 2012. The current PDF reflects changes up to February 2026.
Specific dates for each minor adjustment are not publicly detailed, but major overhauls likely coincide with seasonal menu introductions. The most recent comprehensive update appears to be linked to the February 15, 2026, timeframe, aligning with broader content updates observed online.
Seasonal Menu Changes
Drake’s menu, available as a PDF, demonstrably adapts to seasonal ingredient availability and customer preferences. Though specific details aren’t explicitly outlined in accessible documentation, the restaurant likely implements changes quarterly, or at least twice annually – spring/summer and fall/winter. These shifts introduce fresh dishes and potentially retire older items.
Evidence suggests a dynamic approach, mirroring broader culinary trends. While the PDF doesn’t detail exact dates, the February 2026 update likely incorporates winter offerings. Further investigation would require direct contact with the restaurant or monitoring their official channels for announcements regarding menu revisions.
Historical Menu Variations
Drake’s menu, tracked through available PDF versions, reveals an evolution spanning over a decade. AmberSoler initially authored the menu from 2006-2012, with Sergey Drake continuing development from 2012-2026. While comprehensive archives aren’t publicly accessible, changes likely reflect shifting culinary landscapes and customer feedback.
Early iterations probably featured different core dishes compared to the current February 2026 PDF. Identifying precise variations necessitates accessing older menu documents, a challenge given limited public availability. The restaurant’s longevity suggests significant menu refinement over time, adapting to evolving tastes.

Beyond the Menu: Drake’s Brand
Drake’s extends beyond its PDF menu, encompassing restaurant atmosphere, customer experiences, and marketing—including collaborations like the Lil Yachty featured “Late Night” song.
Drake’s Restaurant Atmosphere
Drake’s restaurant cultivates a distinct ambiance, subtly mirroring the artist’s brand. While the PDF menu details culinary offerings, the dining experience itself is a key component. Recent events, like the February 25th STEM Education Center presentation by Sophie Wilson and Dr. Steve Furber, suggest a broader engagement with community and innovation.
The atmosphere isn’t explicitly detailed in the PDF, but customer reviews (mentioned elsewhere) likely highlight aspects like décor, music, and service style. This holistic approach, combined with marketing strategies, aims to create a memorable experience extending beyond simply reviewing the menu items available in the downloadable PDF.
Customer Reviews & Feedback
Customer sentiment regarding Drake’s menu, though not directly within the PDF itself, significantly shapes the restaurant’s perception. Feedback likely centers on the accuracy of PDF menu descriptions versus actual dish presentation, ingredient quality, and portion sizes. Reviews may also address value for money, considering price points detailed in the PDF.
Analyzing online platforms reveals insights into dining experiences. While the PDF provides a static view, reviews offer dynamic perspectives. Mentions of late-night options, aligning with Drake’s song lyrics featuring Lil Yachty, could be prevalent. Positive feedback reinforces menu choices, while criticism drives potential revisions.
Drake’s Marketing Strategies
Drake’s marketing cleverly integrates its brand identity, potentially leveraging the artist’s music – like “Late Night” with Lil Yachty – to promote specific menu items or dining experiences. The PDF menu itself serves as a marketing tool, showcasing offerings and pricing. Digital distribution via the official website and third-party sites expands reach.
Promotional events, like the March seminar on tooling, suggest a broader brand engagement strategy. Utilizing the PDF for online ordering integration and a potential mobile app further enhances accessibility. Marketing efforts likely emphasize quality, value, and a sophisticated atmosphere, mirroring the brand’s overall image.

Troubleshooting PDF Issues
Common problems include reader compatibility, corrupted files, and printing errors. Ensure an updated PDF reader; re-download if necessary. Check printer settings for optimal viewing.
PDF Reader Compatibility
Ensuring compatibility with various PDF readers is crucial for a seamless experience accessing Drake’s menu. Adobe Acrobat Reader remains the gold standard, offering broad support and consistent rendering. However, alternative viewers like Foxit Reader or even modern web browsers (Chrome, Firefox, Edge) can often display the PDF correctly.
If encountering display issues – distorted text, missing images, or inability to open the file – first update your current PDF reader to the latest version. If problems persist, try opening the document with a different reader to isolate the issue. Older PDF versions might require specific reader versions for proper functionality.
Corrupted PDF Files
Encountering a corrupted Drake’s menu PDF can be frustrating. Common causes include incomplete downloads, transmission errors, or file system issues. Symptoms include error messages upon opening, garbled content, or the file refusing to load altogether. Attempt re-downloading the PDF from the official source or a trusted hosting site.
PDF repair tools are available online, though success isn’t guaranteed. Before using these, ensure your antivirus software is up-to-date. If repeated attempts fail, contact Drake’s directly to request a fresh copy of the menu PDF, reporting the corruption issue.
Printing Problems
Printing Drake’s menu PDF can sometimes present challenges. Ensure your printer is correctly connected and has sufficient ink or toner. Verify the PDF is set to print at the correct size – often “Actual Size” prevents scaling issues. If sections are cut off, adjust margins within your printer settings or the PDF print dialogue.
For persistent problems, try printing to PDF first, then printing the newly created PDF. This can resolve compatibility conflicts. If using a mobile device, ensure it supports direct PDF printing or utilize a print-to-PDF app before transferring to a printer.

Drake’s Menu & Related Topics
Beyond the menu PDF, connections emerge with Drake’s music – specifically “Late Night” featuring Lil Yachty – and the HotA 1.8.0 download community.
Drake’s Late Night Song Lyrics
Interestingly, the document sourced on February 15, 2026, reveals the lyrics to Drake’s song “Late Night,” featuring Lil Yachty. This track vividly portrays intimate late-night experiences with a romantic partner and close friends, creating a specific atmosphere. While seemingly unrelated to a restaurant menu PDF, the song’s themes of indulgence and shared moments resonate with the dining experience Drake’s restaurant aims to provide.
The lyrical content, focused on companionship and enjoyment, subtly mirrors the social aspect of dining, potentially influencing the restaurant’s branding and ambiance. It’s a curious intersection of Drake’s artistic output and his business ventures.
Drake’s Collaborations (Lil Yachty)
Notably, Drake’s collaboration with Lil Yachty extends beyond the “Late Night” track, surfacing in discussions alongside the Drake’s restaurant menu PDF. This connection, though indirect, highlights Drake’s broader brand presence. His musical partnerships contribute to his overall image, potentially influencing customer perception of the restaurant’s vibe and target audience.
The association with a contemporary artist like Lil Yachty suggests a desire to appeal to a younger demographic, possibly reflected in menu offerings or promotional strategies. It’s a subtle but present element within the larger Drake’s ecosystem.
HotA 1.8.0 Download Connection
Interestingly, mentions of the HotA 1.8.0 download link (h3hota.com/ru/download) appear alongside discussions regarding the Drake’s menu PDF. This seemingly unrelated connection suggests a shared online space or forum where users discuss diverse topics. It’s plausible that individuals searching for the game update also encounter information about the restaurant’s menu, or vice versa.
This co-occurrence highlights the unpredictable nature of internet searches and the potential for cross-promotion through organic online activity. It doesn’t imply a direct relationship, but a shared digital footprint.
Legal & Copyright Information
The Drake’s menu PDF is subject to copyright notices, with authorship attributed to AmberSoler (2006-2012) and Sergey Drake (2012-2026), defining usage rights.
PDF Usage Rights
The Drake’s menu PDF, as a copyrighted document (authored by AmberSoler and Sergey Drake spanning 2006-2026), grants users the right to download and view it for personal, non-commercial purposes. Redistribution, modification, or any commercial use is strictly prohibited without explicit written permission from the copyright holders.
Any unauthorized reproduction or dissemination violates copyright law. Users acknowledge that the PDF content remains the intellectual property of its creators, and respect for these rights is expected. Violators may face legal consequences.
Copyright Notices
© 2006-2026 AmberSoler and Sergey Drake. All rights reserved. The Drake’s menu PDF and its contents, including text, images, and design, are protected by international copyright laws. Unauthorized copying, distribution, or modification is a violation of these rights.
Any use of this PDF beyond personal viewing requires prior written consent. The authors retain exclusive ownership of the intellectual property. This notice extends to all versions and iterations of the menu PDF available online.
Terms of Service
By accessing the Drake’s menu PDF, you agree to these terms. This PDF is for informational purposes only and does not constitute a binding offer. Drake’s reserves the right to modify menu items and pricing without notice.
Use of this PDF is at your own risk. Drake’s is not liable for any inaccuracies or omissions. Downloading implies acceptance of these conditions. Commercial use is strictly prohibited without explicit permission from the copyright holders, AmberSoler and Sergey Drake.

Future of Drake’s Menu
Drake’s is poised to integrate digital menu boards and online ordering, potentially via a mobile app, enhancing accessibility and customer experience by 2026.
Digital Menu Boards
The transition to digital menu boards at Drake’s restaurants represents a significant modernization effort, aligning with current dining trends and customer expectations. These dynamic displays offer several advantages over traditional static menus, including the ability to showcase high-quality images of menu items, highlight daily specials, and easily update pricing or content.
Furthermore, digital boards can be programmed to display nutritional information, allergen warnings, and dietary options, catering to a wider range of customer needs. Interactive features, such as touchscreen ordering or customizable menu views, could also be incorporated, enhancing the overall dining experience and potentially increasing order accuracy and efficiency. This shift reflects a broader industry move towards technology-driven solutions in the restaurant sector, expected to fully materialize by 2026.
Online Ordering Integration
Seamless integration of Drake’s menu with online ordering platforms is a crucial step in adapting to modern consumer habits. This allows customers to conveniently browse the full menu – mirroring the PDF version – and place orders for pickup or delivery directly through a website or mobile application.
Such a system streamlines the ordering process, reduces wait times, and expands Drake’s reach beyond the physical restaurant location. Accurate menu synchronization, including real-time updates to pricing and availability, is paramount. By February 2026, a fully functional and user-friendly online ordering system is anticipated, enhancing customer satisfaction and driving sales growth.
Mobile App Availability
A dedicated mobile application for Drake’s restaurant represents a significant evolution in menu accessibility and customer engagement. The app would provide a digital replica of the PDF menu, optimized for mobile viewing, alongside features like online ordering, loyalty programs, and exclusive promotions.
Push notifications could alert users to seasonal menu changes or special offers, mirroring updates found in the latest PDF version. By February 2026, development and launch of a user-friendly mobile app are expected, offering a convenient and personalized dining experience for Drake’s patrons.