Monthly Archive July 31, 2025

Bytrace

pathfinder uniform guide

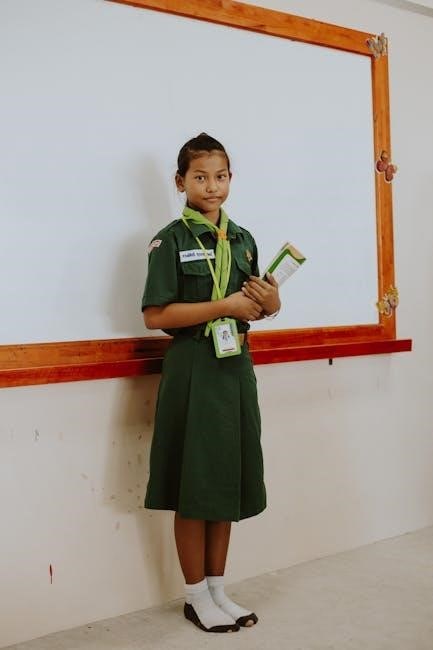
The Pathfinder uniform serves as a visual representation of the program’s ideals, fostering unity and identity among members. It signifies belonging to a global community.

1.1 Overview of the Pathfinder Program

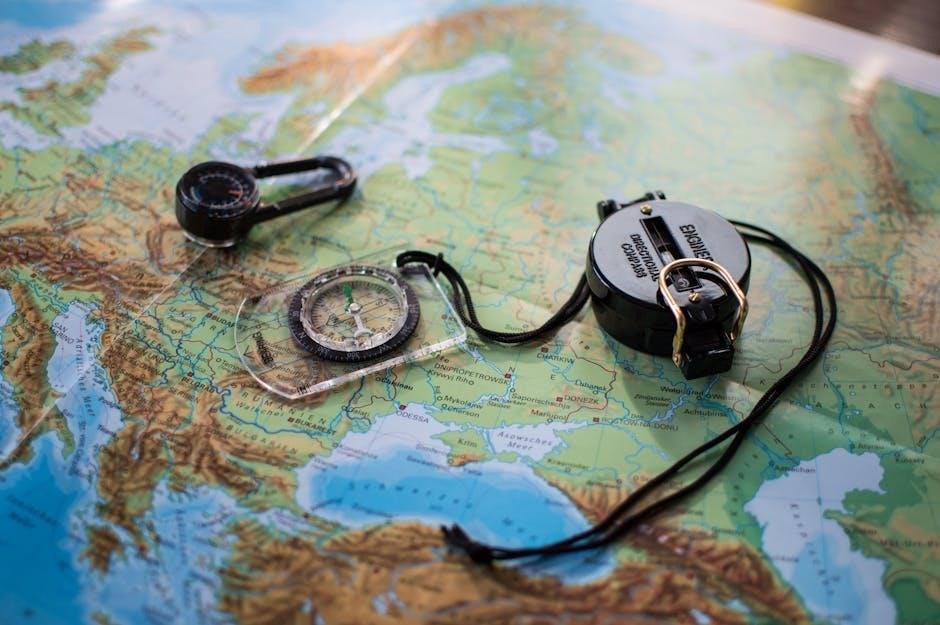
The Pathfinder Program is a global youth ministry designed for individuals aged 10-15, emphasizing spiritual growth, community service, and outdoor activities. It fosters skills development through hands-on experiences and leadership training. The program aims to nurture a sense of responsibility and unity among its members. Pathfinders engage in various activities such as camping, honors, and service projects, which are central to the curriculum. The program is structured to promote teamwork, discipline, and character building, preparing young people to become active participants in their communities. The uniform plays a key role in identifying members and symbolizing their commitment to the program’s values.

1.2 Importance of Uniforms in the Pathfinder Program

The Pathfinder uniform holds significant importance as it fosters unity, equality, and a sense of belonging among members. It serves as a visual identifier, making the program real and visible to others. Uniforms symbolize commitment to the Pathfinder ideals and standards, promoting a collective identity. They also encourage professionalism, discipline, and respect for the program’s mission. By wearing the uniform, members demonstrate their dedication to the values of the Pathfinder community. It acts as a unifying element, transcending individual differences and emphasizing the shared purpose of spiritual growth, service, and leadership. The uniform is not just attire but a representation of the program’s global presence and its members’ pride in their involvement.

History and Evolution of the Pathfinder Uniform

The Pathfinder uniform has evolved over decades, reflecting the program’s growth and mission. Its design has adapted to practical needs while maintaining symbolic significance and visibility.

2.1 Origins of the Pathfinder Uniform

The Pathfinder uniform traces its origins to the early days of the Pathfinder program, established in the 1950s. Designed to promote unity and professionalism, the uniform was crafted to reflect the organization’s values of service, leadership, and faith. The iconic design, featuring a distinctive shirt, pants, and insignia, was chosen to create a recognizable identity for Pathfinders worldwide. The uniform’s colors and symbols, such as the Pathfinder logo, carry deep meaning, representing the club’s mission and spiritual foundation. From its inception, the uniform has served as a tool for fostering camaraderie and pride among members, while also signaling their commitment to the Pathfinder ideals. Over time, the design has been refined, but its core purpose remains unchanged;

2.2 Changes Over the Years

Over the years, the Pathfinder uniform has undergone several updates to reflect modern needs while maintaining its symbolic importance. Initially, the uniform featured a simpler design with fewer insignia. In the 1980s, the introduction of the Master Guide insignia added a new layer of distinction for leadership roles. The 2010s saw updates to fabric quality and fit to improve comfort and practicality. In 2018, the North American Division (NAD) introduced standardized guidelines, including a revised shirt color and updated insignia placement. These changes ensure the uniform remains relevant while preserving its tradition and meaning. The evolution reflects the program’s growth and adaptability to contemporary expectations.

Components of the Pathfinder Uniform

The Pathfinder uniform consists of a shirt, pants or skirt, shoes, and accessories like a neckerchief and insignia, each designed to reflect unity and professionalism.

3.1 The Pathfinder Shirt

The Pathfinder shirt is a central component, typically featuring epaulets for insignia and a design that embodies the program’s global identity. It is worn during events and activities, symbolizing unity and professionalism among members. The shirt’s style may vary slightly by region but maintains a standardized appearance to uphold the program’s consistency. Properly wearing the shirt, including correct placement of patches and pins, is emphasized as part of the uniform’s respectful presentation. It is designed to be both functional and representative, ensuring Pathfinders can move freely while maintaining a neat and orderly appearance during all occasions.

3.2 The Pathfinder Pants/Skirt

The Pathfinder pants or skirt complements the shirt, ensuring a balanced and cohesive look. They are designed for practicality and comfort, suitable for both indoor and outdoor activities. The pants typically feature straight legs with a modest fit, while the skirt offers a knee-length option for a professional appearance. Both options are made from durable fabrics to withstand active use. Proper fit and neatness are emphasized, with guidelines provided for alterations to maintain uniformity. These bottom pieces are integral to the overall uniform, promoting a sense of unity and adherence to the program’s standards, while accommodating personal style preferences within established guidelines.

3.3 The Pathfinder Shoes

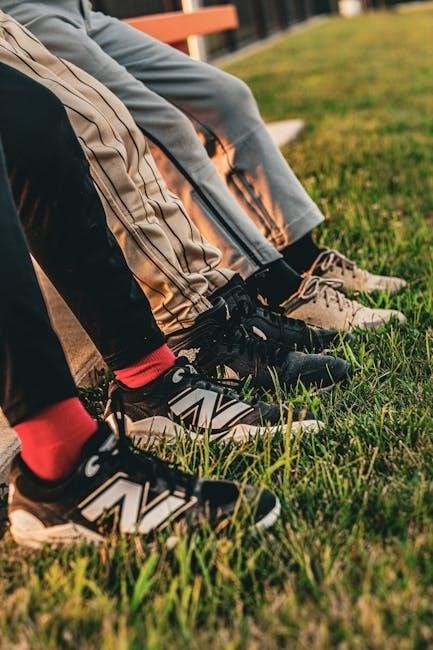
The Pathfinder shoes are a crucial element of the uniform, emphasizing practicality and professionalism. Typically, black leather oxfords are required, ensuring a polished appearance. They should be well-maintained, with clean, unscuffed surfaces and properly tied laces. The soles should provide stability for outdoor activities, reflecting the active nature of the program. Comfort and durability are key, as Pathfinders often participate in events requiring extensive movement. The shoes must align with official guidelines to maintain uniformity, avoiding casual or overly decorative styles. Proper care, including regular polishing, is expected to uphold the standards of the Pathfinder program, ensuring a cohesive and respectful look among all members.

3.4 Accessories and Insignia

Accessories and insignia are essential components of the Pathfinder uniform, adding functionality and symbolic meaning. The Pathfinder neckerchief, typically yellow with black trim, is a distinctive feature, representing club identity. Insignia, such as patches and pins, denote achievements, leadership roles, and affiliations, showcasing individual and group accomplishments. Proper placement of these elements is crucial, following official guidelines to maintain uniformity. Hats or berets may be worn for specific events, while belts and socks complement the overall appearance. These accessories not only enhance the uniform’s aesthetic but also serve as reminders of the values and goals of the Pathfinder program, fostering pride and unity among members.

Class-Specific Uniforms

Class-specific uniforms in the Pathfinder program are designed to distinguish roles and achievements, fostering unity and identity among members while emphasizing individual contributions and leadership within the organization.

4.1 Master Guide Uniform

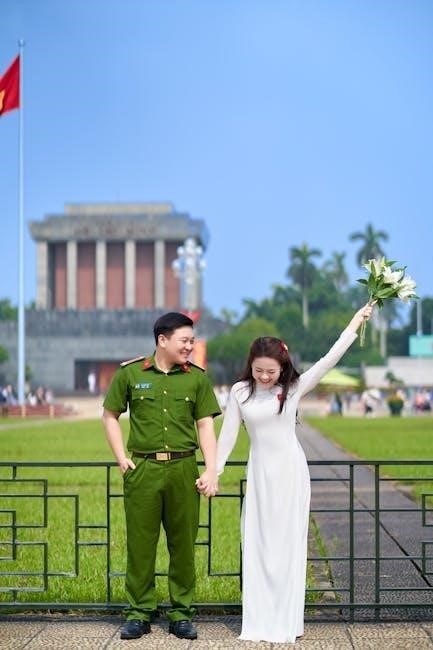
The Master Guide uniform is a distinguished attire reserved for Pathfinder leaders who have achieved the highest level of training and service. It signifies their dedication, expertise, and commitment to mentoring youth. The uniform typically includes a white shirt, navy blue pants or skirt, and a tie for males, while females may wear a blouse with a scarf. Distinctive insignia and badges are displayed, showcasing their advanced leadership roles and accomplishments. Wearing the Master Guide uniform is a privilege, reflecting their responsibility in guiding Pathfinders and upholding the program’s standards. It embodies professionalism and respect, serving as a role model for younger members.

4.2 Pathfinder Leader Uniform

The Pathfinder Leader Uniform is worn by Pathfinders and non-Master Guide staff, distinguishing them as active participants and leaders within the program. It consists of a yellow Pathfinder neckerchief with black trim stitching, paired with the standard Pathfinder shirt, pants, or skirt, and appropriate shoes. This uniform identifies members as part of the global Pathfinder community while promoting unity and equality among participants. It also serves as a visual representation of the club’s values and standards. Wearing the uniform fosters a sense of belonging and accountability, ensuring all members are easily recognizable during events and activities. It embodies the spirit of teamwork and shared purpose central to the Pathfinder program.

4.3 Teen Leadership Training (TLT) Uniform

The Teen Leadership Training (TLT) Uniform is designed for young leaders in training, blending functionality with the Pathfinder identity. It includes a distinct TLT insignia on the sleeve or chest, signifying their role as future leaders. The uniform typically features the standard Pathfinder shirt and pants or skirt, with a unique TLT neckerchief or scarf. This attire fosters professionalism and respect while maintaining unity with the broader Pathfinder community. The TLT uniform emphasizes the importance of mentorship and leadership development, preparing teens to take on responsibilities within the club. It is worn during training events, camporees, and community services, symbolizing their commitment to growth and service within the Pathfinder program.

Uniform Standards and Regulations

The Pathfinder uniform must be worn with humble pride, adhering to official guidelines. Proper care and maintenance are essential to uphold the club’s professionalism and unity.

5.1 Official Guidelines for Wearing the Uniform

The official guidelines for wearing the Pathfinder uniform emphasize proper attire and presentation. Members are expected to wear the uniform with pride, ensuring it is clean, well-fitted, and correctly accessorized. The uniform should be worn during all official Pathfinder events, meetings, and community service activities. Specific guidelines dictate the correct placement of insignia, neckerchiefs, and hats. Uniforms must not be altered in a way that deviates from official standards. Proper footwear, socks, and belts are also required. The uniform should reflect the values of the Pathfinder program, promoting unity and professionalism. Adherence to these guidelines ensures consistency and respect for the organization’s traditions.

5.2 Proper Care and Maintenance

Proper care and maintenance of the Pathfinder uniform are essential to preserve its appearance and longevity. Uniforms should be washed in cold water using mild detergents to prevent fading or damage. Bleach and harsh chemicals should be avoided. Ironing should be done on a low setting to avoid scorching, particularly on embroidered or printed areas. Uniforms should be stored on hangers or folded neatly to maintain their shape. Regular inspections are recommended to identify and mend any tears or worn-out sections promptly. Proper care reflects respect for the uniform and the Pathfinder program, ensuring it remains a symbol of unity and professionalism for years to come.

The Role of the Uniform in Pathfinder Activities

The Pathfinder uniform plays a crucial role in activities, fostering unity, professionalism, and visibility. It signifies identity and purpose, essential for events and community service engagements.

6.1 Uniforms in Camporees and Events

Uniforms are integral to Pathfinder camporees and events, embodying unity and professionalism. They visually announce the group’s identity, fostering pride and belonging. During activities, uniforms ensure visibility, enhancing organization and safety. The attire also reflects the program’s standards, encouraging members to uphold its values. By wearing uniforms, Pathfinders demonstrate commitment to the organization’s mission. This shared appearance strengthens camaraderie, creating a cohesive atmosphere at gatherings. It also facilitates easy identification of members, which is crucial for large events. Overall, uniforms in camporees and events are not just attire but a symbol of collective purpose and identity.

6.2 Uniforms in Community Service

Uniforms in community service activities play a vital role in representing the Pathfinder program’s values. They make members easily identifiable, fostering trust and professionalism in public settings. Wearing uniforms during service projects, such as clean-up initiatives or food drives, showcases unity and dedication; It also promotes a sense of responsibility and respect for the community. The uniform serves as a visual reminder of the group’s mission to serve others. By dressing in uniform, Pathfinders demonstrate their commitment to the program’s ideals and embody the principles of humility and compassion. This practice not only enhances the group’s visibility but also educates members on the importance of service and empathy.

Cultural Variations in Pathfinder Uniforms

Pathfinder uniforms adapt to regional cultures, incorporating local fabrics and designs while maintaining core symbols. Special editions honor heritage, promoting unity through diverse expressions of the global Pathfinder identity.

7.1 Regional Differences

Pathfinder uniforms vary across regions, reflecting local cultures and traditions. In Africa, vibrant prints and colors are often incorporated, while in Asia, subtle embroidery may be added. Europe and the Americas feature tailored designs, blending modern aesthetics with heritage elements. These adaptations ensure the uniform remains respectful of cultural norms while maintaining its global identity. Regional differences highlight diversity within the Pathfinder community, fostering a sense of local pride and global unity. Special fabrics, embroidery, and accessories unique to each area enrich the uniform’s appearance, making it a symbol of both cultural heritage and shared values. This approach ensures the uniform remains meaningful and relevant worldwide.

7.2 Special Edition Uniforms

Special edition Pathfinder uniforms are occasionally released to commemorate milestones, events, or unique themes. These designs often feature exclusive fabrics, embroidery, or insignia, distinguishing them from standard uniforms. For instance, anniversary editions may include commemorative patches or ribbons, while others might incorporate cultural or artistic elements. These uniforms are highly sought after by members and collectors alike, serving as symbols of pride and connection to specific moments or causes. They maintain the program’s core identity while offering a fresh, creative twist. Special editions are typically worn during celebrations or special events, enhancing the sense of occasion and unity among participants. They remain a cherished part of Pathfinder tradition and heritage.

The Uniform as a Symbol of Identity

The Pathfinder uniform embodies the program’s values, fostering pride and unity. It symbolizes global identity, representing shared goals and standards, and is instantly recognizable worldwide.

8.1 Unity and Belonging

The Pathfinder uniform creates a sense of unity and belonging among members, transcending cultural and geographical boundaries. By wearing the same attire, individuals feel connected to a global community, fostering camaraderie and equality. The uniform eliminates visual distinctions, emphasizing that every Pathfinder is part of one cohesive group. This shared identity strengthens bonds and promotes teamwork, as members recognize they are collectively representing the program’s mission and values. The uniform becomes a powerful symbol of togetherness, reinforcing the idea that Pathfinders are united in purpose and spirit, regardless of their background or location.

8.2 Professionalism and Respect

The Pathfinder uniform embodies professionalism and respect, reflecting the values of the program. Wearing the uniform correctly demonstrates discipline and accountability, fostering a sense of pride among members. It promotes a professional image, ensuring Pathfinders are recognizable and respected in public settings. The uniform also teaches respect for the organization, its traditions, and fellow members. By adhering to uniform standards, individuals show commitment to upholding the program’s integrity. This attire not only unifies but also elevates the demeanor of Pathfinders, encouraging respectful behavior and a professional mindset. The uniform serves as a constant reminder of the importance of presenting oneself with integrity and respect in all activities.

The Pathfinder uniform is more than attire; it is a symbol of unity, professionalism, and respect. It represents the program’s global ideals and standards, fostering a sense of belonging among members. By wearing the uniform with pride, Pathfinders embody the values of the organization, creating a visual representation of its mission. The uniform also serves as a bridge between tradition and modernity, adapting to cultural and practical needs while maintaining its core significance. Ultimately, the Pathfinder uniform is a timeless emblem of identity, unity, and commitment, inspiring members to uphold the program’s values in all their endeavors. Its enduring relevance ensures it remains central to the Pathfinder experience.

Bytrace

reference letter sample pdf

A reference letter is a document assessing an individual’s qualities, skills, and characteristics. It is crucial for various applications, including employment, scholarships, and academic admissions. Free samples in PDF format are widely available online for easy customization and use.

1.1 Importance of Reference Letters in Various Applications

Reference letters play a pivotal role in various applications, including employment, academic admissions, and scholarships. They provide insight into an individual’s skills, character, and achievements, helping decision-makers assess candidates effectively. For job applications, they highlight professional competence and work ethic. In academic contexts, they showcase intellectual abilities and potential. Scholarship committees rely on them to evaluate candidates’ qualifications and dedication. Easily accessible samples in PDF format offer templates that can be customized for different purposes, ensuring clarity and professionalism. These letters are instrumental in creating a positive impression and distinguishing applicants in competitive environments. Their versatility makes them essential for supporting individuals in achieving their goals across diverse fields and opportunities.

1.2 Brief Overview of Reference Letter Samples in PDF Format

Reference letter samples in PDF format are readily available online, offering structured templates for various purposes. These samples provide clear outlines, including sections for contact information, dates, and recipient details. They often feature professional language and formatting, making it easy for users to customize them according to specific needs. Common examples include employment, academic, and personal reference letters. Websites offer downloadable templates that cater to different scenarios, such as job recommendations, scholarship endorsements, and character references. These samples ensure consistency and professionalism, guiding users to craft compelling letters efficiently. Their availability in PDF format allows for easy sharing and printing, making them a convenient resource for anyone requiring a reference letter.

Types of Reference Letters

Reference letters are categorized into personal, professional, academic, and employment types, each tailored to specific purposes like job recommendations, academic admissions, or character endorsements.

2.1 Personal Reference Letters

A personal reference letter highlights an individual’s character, integrity, and personal qualities. It is often requested for non-professional purposes, such as rental applications, community involvement, or personal loans. This type of letter is typically written by someone who knows the individual well, such as a friend, family member, or community leader. The letter should emphasize the applicant’s reliability, trustworthiness, and positive traits. For instance, a personal reference for a rental application might focus on the applicant’s responsibility and ability to meet financial obligations. Free PDF samples are available online, providing templates that can be customized to suit specific needs. Proper formatting and a professional tone are essential, even for personal references.

2.2 Professional Reference Letters

A professional reference letter is written by a supervisor, colleague, or client to endorse an individual’s skills and work ethic. It is essential for job applications, career advancement, or business partnerships. The letter should detail the applicant’s role, achievements, and contributions in their professional capacity. For example, a manager might highlight an employee’s leadership abilities and project successes. Free PDF templates are available online, offering structured formats that can be tailored to specific job roles. Ensuring the letter is concise, specific, and professionally formatted is crucial for making a strong impression. These letters are often requested during hiring processes to verify a candidate’s capabilities and reliability.

2.3 Academic Reference Letters

An academic reference letter is typically written by professors or academic advisors to recommend students for scholarships, university admissions, or research opportunities. It highlights the student’s academic achievements, intellectual capabilities, and potential for future success. The letter should include specific examples of the student’s academic performance, such as notable projects or research contributions. Free PDF samples are available online, offering templates that can be customized to fit individual needs. Ensuring the letter is detailed and professionally formatted is essential for making a strong impression. These letters play a critical role in helping academic institutions assess a candidate’s suitability and potential for their programs.

Key Elements of a Reference Letter

A reference letter must include the referee’s contact information, the date, recipient’s details, an introduction stating the relationship with the applicant, and a body highlighting their qualities, skills, and achievements. A polite conclusion offering further information completes the letter, ensuring it is comprehensive and professional.

3.1 Contact Information of the Referee

The referee’s contact information is essential for credibility and follow-up. It typically includes the referee’s full name, job title, company name, business address, phone number, and professional email address. Including a letterhead adds professionalism. This information ensures the recipient can verify the reference if needed. Proper formatting, such as bolding the name and aligning the text to the left, enhances readability. Accuracy is crucial to avoid communication issues. Samples often highlight this section prominently, making it easy to replicate in custom templates. Ensuring all details are up-to-date is vital for maintaining professionalism and reliability in the reference letter.

3.2 Date of the Letter

The date should be prominently placed at the top of the letter, typically right after the letterhead or sender’s contact information. It serves as a timestamp, indicating when the letter was written. Including the date is crucial for formal documentation and ensures clarity. Proper formatting, such as using a standard date format like MM/DD/YYYY, is recommended. Samples often align the date to the left or center for consistency. Accuracy is key to maintain professionalism. The date helps the recipient understand the relevance and timeliness of the reference. It also aids in record-keeping and verification processes. Ensuring the date is clearly visible and correctly formatted is essential for a polished look.

3.3 Recipient’s Contact Information

The recipient’s contact information should be included below the date, typically on the left side of the page. It includes the recipient’s name, title, organization, and mailing address. This information ensures the letter is properly addressed and adds formality. Samples often format this section with clear labels, such as “Dear [Recipient’s Name],” followed by their details. Including a title, like “Admissions Committee” or “Hiring Manager,” personalizes the letter. Providing a complete mailing address ensures the letter reaches its intended destination. Proper formatting maintains professionalism and clarity, making the letter more effective. This section is essential for directing the letter accurately and professionally.

The introduction establishes the referee’s relationship with the applicant, such as supervisor, professor, or colleague. It should clearly state how long the referee has known the applicant and in what capacity. For example, “I have had the pleasure of working with [Applicant’s Name] for over three years as their direct supervisor.” This section sets the tone and credibility of the letter. It should also mention the applicant’s role or position and highlight their key contributions. Samples often include specific details to make the introduction personal and authentic. Avoid vague statements; instead, focus on specific qualities and experiences that showcase the applicant’s strengths. This section is crucial for building trust and context for the recipient.

3.5 Body of the Letter: Qualities, Skills, and Achievements

The body highlights the applicant’s key qualities, skills, and achievements. It should provide specific examples demonstrating their strengths, such as leadership, problem-solving, or communication abilities. For instance, “John successfully led a team project, improving efficiency by 20%.” Samples often include quantifiable accomplishments to emphasize impact. This section should also align with the application’s requirements, showcasing relevant skills. Avoid generic praise; instead, use concrete examples to illustrate the applicant’s capabilities. The body should be detailed yet concise, ensuring each paragraph focuses on a distinct strength. Proper formatting, as seen in PDF templates, enhances readability and professionalism. This section is vital for persuading the recipient of the applicant’s suitability.

3.6 Conclusion and Offer to Provide Further Information

The conclusion summarizes the applicant’s strengths and reaffirms the writer’s confidence in their abilities. It often ends with a polite offer to provide additional information, inviting the recipient to contact the writer. For example, “Please feel free to reach out if you require further details.” This section should be concise, reinforcing the applicant’s suitability without introducing new information. Samples in PDF format typically include a professional sign-off, ensuring a polished finish. The conclusion ties together the letter’s content, leaving a lasting impression of the applicant’s qualifications. Proper formatting, as seen in templates, ensures clarity and professionalism. This final section is crucial for maintaining a positive tone and encouraging follow-up.

Structure of a Reference Letter

A reference letter follows a standard format, typically including a header, date, recipient’s details, salutation, introduction, body, and closing. PDF samples demonstrate this structure clearly, ensuring professionalism and readability. The layout often features proper spacing, fonts, and margins, making the letter visually appealing and easy to read. Using templates helps maintain consistency and ensures all essential elements are included. Proper formatting enhances the letter’s credibility and effectiveness in supporting the applicant’s request. Samples online provide excellent examples of how to structure each section effectively, guiding writers to create impactful reference letters. Always ensure the document is well-organized and free of errors for a professional presentation. The structure is key to conveying the applicant’s strengths clearly and persuasively.

4.1 Standard Format and Layout

A reference letter typically follows a standard format, beginning with the referee’s contact information at the top, followed by the date and recipient’s address. The body starts with a formal salutation, such as “Dear Hiring Manager” or “To Whom It May Concern.” The content is divided into clear sections: introduction, body, and conclusion. Proper spacing, font selection, and margins ensure readability. PDF samples often include professional layouts, making it easy to replicate the structure. Consistency in formatting is key to maintaining a professional appearance. Using templates helps ensure all essential elements are included without errors. The standard format enhances the letter’s credibility and ensures the applicant’s strengths are presented clearly and persuasively. Proper formatting guides the reader through the letter effectively.

4.2 Proper Salutation and Closing

A reference letter begins with a formal salutation, such as “Dear Hiring Manager,” “Dear Admissions Committee,” or “To Whom It May Concern.” This sets a professional tone. The closing should include “Sincerely,” followed by the referee’s name, title, and contact information. PDF samples demonstrate these elements clearly. Proper salutation and closing ensure the letter is respectful and polished. Using the right titles and names is crucial for formality. The closing should offer further assistance, like providing additional information. These elements ensure the letter is both courteous and professional, enhancing the applicant’s credibility. Proper salutation and closing are essential for making a positive impression, as seen in many downloadable templates.

Samples and Templates for Reference Letters

This section provides downloadable reference letter samples and templates in PDF format for employment, academic, and personal use, saving time and ensuring a professional appearance.

5.1 Employment Reference Letter Templates

Employment reference letter templates are essential for endorsing job candidates. They include details like job title, tenure, and key achievements. Customizable PDF formats are available online, allowing employers to highlight specific skills and work ethic. These templates ensure consistency and professionalism, making the recommendation process efficient. They often feature sections for contact information, dates, and personalized comments about the candidate’s contributions. Downloadable samples cater to various industries, such as retail, non-profit, and corporate sectors. By using these templates, referees can provide clear, concise, and impactful recommendations, enhancing the candidate’s chances of securing new opportunities.

5.2 Academic Reference Letter Samples

Academic reference letters are crucial for students seeking admission to universities or scholarships. They provide insights into a student’s academic abilities, character, and potential. Samples in PDF format are widely available online, offering customizable templates for educators to endorse students effectively. These letters typically highlight academic achievements, such as grades, research skills, and extracurricular involvement. Professors or academic advisors often write them, emphasizing the student’s suitability for advanced studies. By using these samples, recommenders can ensure clarity and professionalism, making the letter a strong advocate for the student’s academic pursuits. They also serve as a testament to the student’s dedication and intellectual capabilities, aiding in competitive selections.

5.3 Personal Reference Letter Examples

Personal reference letters are often required for character assessments in various applications, such as immigration, housing, or private school admissions. These letters differ from professional references as they focus on personal qualities rather than work-related skills. Friends, family members, or community leaders typically write them, highlighting the individual’s integrity, reliability, and positive attributes. Samples in PDF format provide templates that can be customized to fit specific needs, ensuring the letter is both heartfelt and professional. They often include anecdotes or specific examples of the person’s good character, making the letter more compelling. These examples serve as a guide, helping writers convey their genuine support effectively.

Writing Tips for an Effective Reference Letter

Be specific and detailed, highlighting the applicant’s unique qualities and achievements. Maintain a professional tone and avoid clichés. Use concrete examples to make the letter impactful and sincere.

6.1 Being Specific and Detailed

When crafting a reference letter, it is essential to provide specific examples that highlight the applicant’s skills and achievements. Avoid vague statements like “hardworking” or “qualified.” Instead, describe particular instances where the individual demonstrated exceptional abilities or contributions. For instance, mention a project they led successfully or a problem they solved innovatively. Including quantifiable results, such as “increased sales by 20%” or “improved efficiency by 15%,” adds credibility and depth. Specific details make the letter more persuasive and help the recipient understand the applicant’s true potential. This approach ensures the letter is both impactful and meaningful, setting the applicant apart from others.

6.2 Maintaining Professional Tone

A professional tone is crucial in a reference letter to ensure credibility and respect. Avoid using casual language, slang, or overly emotional expressions. Instead, use formal and polished language that reflects the seriousness of the recommendation. Ensure the letter is well-structured, starting with proper greetings and closing with a polite sign-off. Avoid exaggerations or overly dramatic statements, as they can undermine the letter’s credibility. Maintain a neutral and objective tone, focusing on facts and specific qualities of the applicant. Proper grammar, spelling, and punctuation are essential to convey professionalism. By adhering to these guidelines, the letter will be taken seriously and effectively support the applicant’s case.

6.3 Avoiding Clichés and Overused Phrases

Avoiding clichés and overused phrases is essential to make a reference letter impactful and original. Phrases like “think outside the box” or “team player” are overused and lack depth. Instead, use specific examples to highlight the applicant’s skills and qualities. For instance, describe a project they excelled in or a challenge they overcame. Personalize the letter to reflect the applicant’s unique strengths and experiences. Generic statements can make the letter seem insincere or lazy. Tailor each letter to the individual and the purpose of the recommendation. This ensures the letter stands out and provides meaningful support to the applicant. Refer to sample PDFs for examples of original and effective language.

Common Mistakes to Avoid

Common mistakes include lack of specificity, overly casual language, and incomplete contact information. Ensure the letter is detailed, professional, and includes all necessary details for credibility.

7.1 Lack of Specificity

Avoid vague statements in reference letters. Instead of saying “hard worker,” specify achievements, like “increased sales by 20%.” Be clear about skills and impact to strengthen credibility.

7.2 Overly Casual Language

Using overly casual language in reference letters can undermine professionalism. Phrases like “they’re great” should be replaced with formal expressions such as “they consistently demonstrated exceptional skills.” Maintain a professional tone to ensure the letter is taken seriously by recipients.

7.3 Incomplete Contact Information

Incomplete contact information is a common mistake in reference letters. Always include the referee’s full name, job title, address, phone number, and email. This ensures the recipient can easily verify the details if needed. Omitting crucial information may lead to delays or rejection of the application. Ensure accuracy to maintain professionalism and credibility.

Requesting a Reference Letter

When requesting a reference letter, provide the referee with all necessary details, including your resume, the purpose of the letter, and any deadlines to ensure accuracy.

8.1 How to Ask for a Reference

When requesting a reference letter, approach the referee politely and provide clear details about the purpose, deadline, and any specific requirements. Offer to share your resume, personal statement, or portfolio to help them craft a tailored letter. Be respectful of their time and express gratitude for their support. Mention if you need a hard copy or a digital version, such as a PDF. If templates are available, share them to guide the referee. Follow up courteously to ensure they have all necessary information. This approach ensures the letter is well-written and submitted on time, enhancing your application’s success.

8.2 Providing Necessary Information to the Referee

Provide the referee with essential details to craft an effective reference letter. Share your resume, a draft of your personal statement, and any specific requirements of the application. Highlight key achievements or experiences relevant to the opportunity. Specify the deadline and format, such as a PDF, if required. Offer sample templates or guidelines to guide their writing. Clearly state the purpose of the reference and the institution or organization it is intended for; This ensures the letter is personalized, relevant, and meets the submission criteria. Additionally, inform the referee if you need multiple copies or if the letter should be mailed directly to the recipient.

Formatting and Submitting the Letter

Ensure the reference letter is saved in PDF format for professional presentation and readability. Use standard fonts, proper margins, and a clean layout to maintain a polished appearance.

9.1 Saving the Letter in PDF Format

Saving a reference letter in PDF format ensures a professional and consistent presentation. This format preserves the letter’s layout, fonts, and structure, preventing formatting issues when viewed on different devices. Many templates and samples available online are already in PDF format, making it easy to download and customize. PDFs are widely accepted for their readability and professional appearance, ensuring the letter looks polished and well-organized. When submitting, always convert the final version to PDF to maintain its integrity. This step is crucial for both digital and printed submissions, as it guarantees the letter will appear as intended. Using tools like Adobe Acrobat or online converters simplifies the process of saving and sharing the document in PDF format.

9.2 Ensuring Proper Formatting and Readability

Proper formatting and readability are essential for a professional reference letter. Use a standard font like Arial or Times New Roman in size 12 for clarity. Ensure margins are consistent, typically 1-inch on all sides, and align the text to the left. Avoid excessive bold or italic text, as it can distract from the content. Use bullet points sparingly to highlight key achievements. Check for proper spacing between paragraphs and sections to maintain a clean appearance. Proofread the letter for grammatical errors and typos to ensure professionalism. Many templates and samples in PDF format provide excellent examples of proper formatting, making it easier to achieve a polished look. Pay attention to these details to ensure the letter is both visually appealing and easy to read, enhancing the applicant’s credibility.

Bytrace

singer e99670 instruction manual

The Singer E99670 manual is a comprehensive guide for setting up, operating, and maintaining your sewing machine. It includes safety tips, troubleshooting, and creative sewing instructions.

1.1 Overview of the Manual

The Singer E99670 instruction manual is a detailed, 95-page guide designed to help users master their sewing machine. It covers everything from initial setup to advanced features, ensuring optimal performance. The manual includes safety precautions, threading instructions, and troubleshooting tips. It also provides guidance on selecting stitches, maintaining the machine, and resolving common issues. Whether you’re a beginner or an experienced sewer, this manual offers clear, step-by-step instructions to enhance your sewing experience. Available as a free PDF download, it’s an essential resource for anyone owning the Singer E99670 sewing machine.

1;2 Key Features of the Singer E99670 Sewing Machine

The Singer E99670 sewing machine offers versatility with its wide range of stitches, including decorative, embroidery, and utility options. It features an LCD screen for easy stitch selection and a robust construction for durability. The machine is compatible with various fabrics, from delicate to heavy-duty materials. Additional features include an automatic needle threader, built-in thread cutter, and adjustable stitch length and width. It also comes with multiple presser feet for specialized tasks, such as zipper, buttonhole, and blind hem applications. These features make it suitable for both beginners and experienced sewers, catering to a variety of sewing projects.

Safety Precautions

Read all instructions carefully before use to ensure safe operation. Follow guidelines to avoid electric shock and injuries, and keep the machine out of children’s reach.

2.1 General Safety Guidelines

Always read the manual thoroughly before using the Singer E99670 sewing machine. Ensure the machine is placed on a stable, flat surface away from water and heat sources. Avoid overloading the machine, as this can cause mechanical stress. Keep children and pets away while operating. Never touch electrical components with wet hands or while standing on damp surfaces. Unplug the machine when not in use or during maintenance. Regularly inspect the power cord for damage and avoid using damaged accessories. Follow all warnings and cautions provided in the manual to ensure safe and efficient operation.

2.2 Specific Warnings and Cautions

Avoid using damaged power cords or accessories, as they can cause electrical hazards. Keep the machine away from water and moisture to prevent short circuits. Never operate the machine near open flames or sparks. Ensure long hair and loose clothing are tied back to avoid entanglement. Do not sew over pins, as this can damage the machine or cause injury. Always turn off the machine when changing needles or performing maintenance. Use only Singer-recommended parts and accessories to ensure compatibility and safety. Follow all specified guidelines to prevent accidents and extend the machine’s lifespan.

Parts and Accessories

This section provides a detailed inventory of the Singer E99670’s components and included accessories, explaining their functions and proper usage for optimal sewing performance.

3.1 Identification of Machine Components

The Singer E99670 manual provides a detailed guide to identifying and understanding the sewing machine’s components. Key parts include the spool pins, stitch selector dial, and presser foot; Each component is illustrated with diagrams to ensure easy recognition. The manual also explains the function of the bobbin winder, thread take-up lever, and tension dials. Understanding these components is essential for proper machine operation. Refer to the manual’s visual guide for clear images and descriptions to help you familiarize yourself with every part of your Singer E99670 sewing machine.

3.2 Included Accessories and Their Uses

The Singer E99670 sewing machine comes with essential accessories to enhance your sewing experience. These include multiple bobbins for consistent stitching, assorted presser feet for specialized tasks like zigzag and blind hemming, and a seam ripper for correcting mistakes. A dust cover is also provided to protect the machine when not in use. Additional accessories may vary, but they are designed to support various sewing projects and maintenance needs. Refer to the manual for a full list and guidance on using each accessory effectively to ensure optimal performance and longevity of your machine.

Setting Up the Machine

Setting up the Singer E99670 involves unpacking, placing it on a stable surface, and plugging it in. Refer to the manual for detailed guidance and safety precautions.

4.1 Unpacking and Initial Preparation

Unpacking the Singer E99670 requires care to avoid damage. Place the machine on a stable, flat surface and ensure all accessories are included. Before use, inspect for any damage or defects. Plug in the machine near a power source and familiarize yourself with its components. Read the safety guidelines to ensure proper handling and operation. This step ensures a smooth setup and prepares you for sewing efficiently. Proper preparation is key to optimal performance and longevity of the machine.

4.2 Plugging In and Powering On

To power on the Singer E99670, ensure the machine is placed on a stable surface. Locate the power cord and plug it into a nearby electrical outlet. Verify that the voltage matches your region’s standard. Once plugged in, locate the power switch, usually found on the right side of the machine. Press the switch to turn it on. You should hear a gentle hum as the machine activates. Check the LCD display for any prompts or error messages. Always read the manual for specific instructions to ensure safe and proper operation. This step is crucial for starting your sewing journey with the E99670.

Basic Sewing Operations

This section covers essential sewing steps like threading, winding the bobbin, and selecting stitches. These basics ensure smooth operation and unlock your creativity with the Singer E99670.

5.1 Threading the Machine

Threading the Singer E99670 is a straightforward process that ensures proper stitch formation. Begin by placing the spool on the spool pin and guide the thread through the take-up lever. Next, pass the thread through the tension discs, ensuring it is seated correctly. Then, insert the thread into the needle’s eye. Always use high-quality thread suitable for your fabric type to prevent breakage. Proper threading is essential for maintaining consistent tension and achieving professional results in your sewing projects.

5.2 Winding and Inserting the Bobbin

Winding the bobbin correctly is crucial for smooth stitching. Place the bobbin on the winder and draw the thread from the spool. Wind evenly, ensuring the thread fills the bobbin without overlapping. Once full, cut the thread and insert the bobbin into the bobbin case. Make sure it sits securely and the thread feeds through the tension spring. Properly winding and inserting the bobbin prevents tangles and ensures balanced stitching. Follow the manual’s guidelines to achieve consistent results and avoid common sewing issues.

5.3 Selecting Stitches and Fabrics

Selecting the right stitch and fabric combination is essential for optimal sewing results. The Singer E99670 offers various stitch options for different fabrics, from delicate cotton to heavy-duty denim. Always choose a stitch type that matches your fabric to ensure even stitching and prevent damage. For instance, straight stitches are ideal for woven fabrics, while zigzag stitches work best for stretchy materials. The manual provides a detailed guide to help you pair fabrics with the appropriate stitches. This ensures professional-looking results and extends the life of your sewing projects.

Advanced Features

The Singer E99670 offers advanced features like special stitches, embroidery options, and customizable settings, allowing for intricate designs and personalized sewing experiences.

6.1 Using Special Stitches and Embroidery

The Singer E99670 instruction manual details how to access and utilize its extensive library of special stitches and embroidery patterns. With over 600 built-in stitches, including decorative, alphanumeric, and embroidery designs, the manual provides step-by-step guidance on selecting and customizing these features. It explains how to navigate the machine’s interface to choose patterns, adjust stitch lengths, and combine designs for unique creations. The manual also covers tips for embroidery placement, hoop usage, and fabric preparation to ensure professional-quality results. This section is essential for unlocking the machine’s full creative potential and achieving intricate, personalized sewing projects.

6.2 Adjusting Tension and Presser Foot

Proper tension and presser foot adjustment are crucial for optimal sewing performance. The manual guides users through balancing thread tension to prevent fabric pulling or loose stitching. It explains how to adjust the presser foot pressure for various fabrics, ensuring even feeding and smooth stitching. Additionally, it covers how to switch between different presser feet for specialized tasks, such as zigzag or embroidery. Correct tension and presser foot settings ensure professional-quality results, reduce fabric damage, and extend the machine’s lifespan. These adjustments are simple but vital for achieving precise and consistent stitching.

Maintenance and Cleaning

Regular maintenance ensures smooth operation. Brush lint from the bobbin area, oil mechanical parts, and clean the exterior to prevent dust buildup and maintain performance.

7.1 Regular Cleaning Procedures

Regular cleaning is essential for maintaining your Singer E99670 sewing machine. Start by turning off and unplugging the machine. Use a soft, dry cloth to wipe down the exterior, removing any dust or debris. Open the bobbin case and gently brush away lint and thread fragments using the provided cleaning brush. Pay attention to the feed dogs and tension discs, as these areas tend to accumulate dust. For stubborn lint, a small vacuum cleaner or compressed air can be used. Clean after each use to ensure optimal performance and prevent damage. Always refer to the manual for specific cleaning tools and techniques.

7.2 Lubricating the Machine

Lubricating your Singer E99670 sewing machine is crucial for smooth operation. Apply a few drops of Singer sewing machine oil to the hook race and shuttle. Gently turn the handwheel to spread the oil evenly. Avoid over-lubrication to prevent residue buildup. Regular lubrication ensures moving parts operate efficiently and reduces wear. Refer to the manual for specific locations and frequency, typically every 500 stitches or as needed. Use only Singer-recommended oil to maintain warranty and performance. Proper lubrication extends the machine’s lifespan and ensures consistent stitching quality. Always clean excess oil to avoid attracting dust and debris.

Troubleshooting Common Issues

This section helps resolve common issues like thread breakage or uneven stitching. Check thread tension, ensure proper bobbin alignment, and refer to the manual for solutions.

8.1 Diagnosing Thread Breakage

Thread breakage can occur due to incorrect threading, improper tension, or using low-quality thread. Check if the thread is properly seated in the machine’s tension discs and take-up lever. Ensure the spool is correctly placed and the thread is not tangled. Verify that the needle is compatible with the fabric and thread type. If the issue persists, clean the machine to remove any lint or debris that might be causing friction. Refer to the manual for step-by-step guidance on adjusting tension settings and rethreading the machine correctly to resolve thread breakage effectively.

8.2 Resolving Tension Problems

Tension issues can cause uneven stitching or fabric pulling. To resolve this, adjust the top tension dial to balance the thread’s tightness. Ensure the bobbin tension is not too loose or tight, as this can disrupt stitching. Clean the machine to remove lint or debris that may interfere with tension. Retest the machine on scrap fabric after adjustments. If the problem persists, consult the manual for specific tension settings for different fabrics and threads. Proper tension ensures smooth stitching and optimal sewing performance.

Additional Resources

For further assistance, visit Singer’s official website for downloadable PDF manuals, online support, and troubleshooting guides. Access additional sewing tips and FAQs to enhance your experience.

9.1 Accessing Online Support

For additional guidance, Singer offers extensive online support resources. Visit their official website to access the Singer E99670 manual, FAQs, and troubleshooting guides. The site provides detailed stitching tutorials, maintenance tips, and error resolution steps. Users can also explore forums and expert advice sections for personalized assistance. Singer’s online support ensures seamless operation of your sewing machine, offering solutions for common issues and creative projects. This resource is ideal for both beginners and experienced sewists, promoting optimal performance and creativity with the Singer E99670.

9.2 Downloading the PDF Manual

The Singer E99670 manual is available as a free PDF download on Singer’s official website. Visit the “Manuals and Updates” section, select your model, and download the PDF. This 95-page guide covers setup, operation, and maintenance, ensuring optimal performance. It includes safety precautions, troubleshooting tips, and creative sewing instructions. Singer has moved to digital manuals as part of their Green Initiative, reducing environmental impact while providing comprehensive support for users of all skill levels.

Bytrace

california transfer on death deed pdf

The California Transfer on Death (TOD) Deed is a legal tool allowing property owners to transfer real estate to beneficiaries upon death without probate. It is revocable‚ retaining ownership during the grantor’s lifetime‚ and offers a simple‚ cost-effective way to pass property. Recognized under California law‚ it provides clarity and efficiency in estate planning.

Overview of California Transfer on Death Deed

The California Transfer on Death (TOD) Deed is a legal document enabling property owners to transfer real estate to beneficiaries upon death without probate. It is revocable‚ allowing the grantor to retain control and ownership during their lifetime. The deed automatically transfers the property upon death‚ ensuring a smooth transition. It applies to properties like single-family homes‚ condominiums‚ or up to four residential units. The TOD Deed is recognized under California law‚ providing a straightforward and efficient way to manage property distribution as part of estate planning.

Importance of Understanding the Process

Understanding the California Transfer on Death (TOD) Deed process is crucial for ensuring proper execution and avoiding legal complications. It allows property owners to bypass probate‚ offering a seamless transfer of real estate to beneficiaries. The process involves creating and recording the deed‚ which must meet specific legal requirements. Proper understanding ensures the grantor’s intentions are upheld and the deed remains valid. Missteps can lead to disputes or delays‚ emphasizing the need for clarity and adherence to legal guidelines throughout the process.

Legal Implications and Benefits

The California Transfer on Death (TOD) Deed offers significant legal benefits‚ including probate avoidance and cost savings. It ensures property transfers smoothly to beneficiaries upon death without court intervention. Legally‚ the deed remains revocable‚ allowing the grantor to retain control and make changes during their lifetime. Tax implications are favorable‚ as the property may receive a step-up in basis‚ minimizing capital gains taxes. Proper execution is essential to uphold its validity and prevent disputes‚ making it a valuable estate planning tool for California property owners seeking efficiency and clarity in asset distribution.

What is a California Transfer on Death Deed?

A California Transfer on Death (TOD) Deed is a legal document allowing property owners to transfer real estate to beneficiaries upon death without probate‚ retaining control during lifetime.

Definition and Purpose

A California Transfer on Death (TOD) Deed is a legal document enabling property owners to transfer real estate to designated beneficiaries upon death without probate. Its primary purpose is to bypass the lengthy and costly probate process‚ ensuring a smooth transition of ownership. The deed is revocable‚ allowing the grantor to retain full control and make changes during their lifetime. It provides a straightforward‚ cost-effective method for estate planning‚ ensuring properties pass to heirs according to the owner’s wishes while maintaining flexibility and control.

How It Differs from Other Types of Deeds

A California Transfer on Death (TOD) Deed differs from other deeds by allowing property transfer upon death without probate. Unlike traditional deeds‚ it does not transfer ownership during the grantor’s lifetime but ensures automatic transfer posthumously. It is revocable‚ enabling the grantor to change beneficiaries or revoke the deed at any time. This contrasts with irrevocable deeds or trusts‚ which often lack flexibility. The TOD deed is specifically designed for real estate‚ primarily residential properties‚ and avoids the complexities of probate‚ making it a unique and efficient estate planning tool.

Eligibility Criteria for Property

The California Transfer on Death Deed applies to specific types of property. It is limited to residential real estate‚ including properties with one to four units‚ condominiums‚ or farm properties. The property must be located in California‚ and the grantor must have full ownership or joint ownership. It cannot be used for commercial properties or certain types of trusts. Additionally‚ the deed does not apply to property held in joint tenancy or as community property with the right of survivorship. This ensures the deed is tailored for specific estate planning needs.

Key Aspects of the California TOD Deed

The California TOD Deed is revocable‚ allows the grantor to retain ownership during their lifetime‚ and ensures automatic property transfer to beneficiaries upon death‚ bypassing probate.

Revocable Nature of the Deed

The California Transfer on Death Deed is revocable‚ granting the grantor the flexibility to alter or revoke the deed at any time during their lifetime. This feature ensures that the grantor maintains full control over the property and can modify beneficiaries or rescind the deed without penalty. The revocable nature provides peace of mind‚ allowing adjustments to reflect changing circumstances or wishes. To revoke‚ the grantor can execute a new deed‚ sell the property‚ or take other specified actions‚ ensuring their intentions remain paramount until death.

Retention of Ownership During Lifetime

A key feature of the California Transfer on Death Deed is that it allows the grantor to retain full ownership and control of the property during their lifetime. The deed does not transfer ownership until the grantor’s death‚ ensuring the grantor can use‚ sell‚ or mortgage the property without restriction. This provision guarantees that the grantor’s rights remain intact‚ and the beneficiary has no legal claim to the property while the grantor is alive. The deed’s terms do not affect the grantor’s ownership rights in any way during their lifetime.

Automatic Transfer Upon Death

The California Transfer on Death Deed ensures that the property automatically transfers to the designated beneficiary upon the grantor’s death. This eliminates the need for probate‚ as the transfer occurs by operation of law. The beneficiary must record an Affidavit of Death of Transferor and a certified death certificate with the county recorder to complete the process. This streamlined approach provides a seamless transition of ownership‚ maintaining the grantor’s control during their lifetime while ensuring their wishes are carried out efficiently after their passing.

Legal Requirements for a Valid TOD Deed in California

A valid California TOD deed requires proper execution‚ notarization‚ and recording with the county recorder. The grantor must have legal capacity‚ and the deed must comply with state laws.

Execution and Recording Process

To execute a valid California TOD deed‚ the grantor must sign the document in the presence of a notary public. The deed must then be recorded with the county recorder’s office where the property is located. Recording ensures the deed becomes part of the public record and is enforceable upon the grantor’s death. The process must be completed within the statutory deadline to maintain its validity. Proper execution and recording are essential to avoid legal challenges and ensure seamless property transfer to the beneficiary;

Legal Capacity of the Grantor

The grantor executing a California TOD deed must have legal capacity‚ meaning they must be at least 18 years old and of sound mind. This ensures they understand the deed’s implications. If the grantor lacks capacity due to incapacity or undue influence‚ the deed may be contested or invalidated. It is crucial to verify the grantor’s legal capacity to execute the deed effectively. Consulting an attorney can help ensure the grantor meets all requirements and the document is legally binding.

Notarization and Witness Requirements

A California Transfer on Death Deed must be notarized to be valid‚ ensuring the grantor’s identity and voluntary execution. While witnesses are not required for a TOD deed in California‚ proper notarization is essential. The notary public verifies the grantor’s signature and capacity‚ adhering to state laws. This step ensures the deed’s authenticity and legal enforceability‚ preventing potential disputes. Proper notarization is a critical component in the validity of the TOD deed process.

Recording with the County Recorder

Recording the California Transfer on Death Deed with the County Recorder is a critical step for its validity. The deed must be filed in the county where the property is located‚ typically within 60 days of execution. This ensures the transfer is officially documented and recognized by the county records. The process involves submitting the deed along with any required forms and fees. Proper recording guarantees the deed’s enforceability and prevents legal disputes. It is essential for the seamless transfer of property to the beneficiary upon the grantor’s death.

Benefits of Using a Transfer on Death Deed

The California TOD deed avoids probate‚ saving time and costs. It is cost-effective‚ flexible‚ and provides tax advantages‚ ensuring a smooth property transfer to beneficiaries upon death.

Avoidance of Probate

A California Transfer on Death Deed bypasses probate‚ ensuring the property transfers directly to beneficiaries without court involvement. This eliminates the lengthy‚ costly‚ and public probate process‚ saving time and reducing legal fees. The deed allows the grantor to retain control during their lifetime‚ with the transfer becoming effective only upon death. Beneficiaries receive the property seamlessly‚ avoiding delays and potential disputes. This streamlined process provides peace of mind‚ financial protection‚ and clarity for families‚ ensuring assets pass according to the grantor’s wishes without the burdens of probate.

Cost-Effectiveness

A California Transfer on Death Deed is a cost-effective estate planning tool‚ avoiding the high expenses associated with probate and trusts. It eliminates the need for lengthy legal processes‚ reducing fees and court costs. The deed is relatively inexpensive to create and record‚ offering a budget-friendly alternative to complex estate planning strategies. By bypassing probate‚ it saves beneficiaries from significant financial burdens‚ making it an attractive option for property owners seeking affordable and efficient asset transfer solutions.

Flexibility and Control

A California Transfer on Death Deed provides grantors with flexibility and control over their property during their lifetime. It allows owners to revoke or change beneficiaries at any time without legal repercussions. The deed does not affect current property rights‚ enabling grantors to use‚ sell‚ or mortgage the property freely. This flexibility ensures that property owners maintain full control over their assets while creating a seamless transfer process for beneficiaries upon their death‚ aligning with their estate planning goals and ensuring their wishes are respected.

Tax Implications and Advantages

A California Transfer on Death Deed offers significant tax benefits. It avoids probate‚ reducing estate taxes and administrative costs. The transfer is exempt from documentary transfer tax under California law. Beneficiaries may also benefit from stepped-up tax basis‚ minimizing capital gains taxes. Property tax exemptions‚ such as those under Proposition 19‚ may still apply. This deed provides a tax-efficient way to transfer property‚ ensuring heirs receive assets with minimal tax burden while maintaining flexibility for the grantor during their lifetime. It simplifies estate planning and protects financial interests effectively.

How the Transfer on Death Deed Works

A California Transfer on Death Deed allows property to automatically transfer to beneficiaries upon the grantor’s death‚ bypassing probate. The grantor retains full control during their lifetime. When the grantor dies‚ the beneficiary records the deed with the county‚ completing the transfer. This streamlined process ensures the property passes efficiently and according to the grantor’s wishes‚ maintaining clarity and avoiding lengthy legal proceedings.

Step-by-Step Process

The California Transfer on Death Deed process begins with obtaining the correct form‚ ensuring it complies with state law. The grantor fills in the property details and beneficiary information accurately. The deed must be notarized and recorded with the county recorder within the required timeframe. Upon the grantor’s death‚ the beneficiary records an affidavit of death and the deed‚ transferring ownership without probate. This streamlined process ensures the property transitions smoothly to the beneficiary as intended by the grantor.

Role of the Beneficiary

The beneficiary plays a passive role during the grantor’s lifetime‚ as they have no legal rights to the property until the grantor’s death. Upon the grantor’s passing‚ the beneficiary must take action to formalize ownership. This includes filing an affidavit of death and recording the TOD deed with the county recorder. The beneficiary must also ensure all legal steps are followed to complete the transfer. Their role is crucial in finalizing the property transfer‚ ensuring the grantor’s wishes are carried out efficiently without the need for probate.

Process After the Grantor’s Death

Upon the grantor’s death‚ the beneficiary must take specific steps to complete the property transfer. They need to file an affidavit of death with the county recorder‚ accompanied by a certified death certificate. The beneficiary must also ensure the TOD deed is recorded within 60 days of the grantor’s passing. This process legally transfers ownership without probate. The beneficiary assumes full rights to the property‚ and the deed becomes irrevocable. Proper documentation and timely filing are essential to finalize the transfer smoothly‚ ensuring the grantor’s wishes are honored.

Advantages and Disadvantages

The California TOD deed offers probate avoidance and cost-effectiveness but lacks court oversight‚ potentially complicating disputes. It provides flexibility yet may not address all estate planning needs effectively.

Advantages Over Traditional Probate

A California Transfer on Death Deed avoids probate‚ saving time‚ costs‚ and stress. It ensures a seamless property transfer to beneficiaries without court involvement. Unlike probate‚ which can delay distribution and reduce estate value through legal fees‚ a TOD deed maintains the grantor’s control during their lifetime while providing clarity and efficiency after death. This method is particularly beneficial for those seeking a straightforward‚ cost-effective way to transfer property‚ avoiding the complexities and expenses associated with traditional probate proceedings.

Potential Drawbacks

While a California Transfer on Death Deed offers many benefits‚ it also has limitations. The deed only applies to specific types of property‚ such as single-family homes or condominiums‚ and may not cover all assets. Beneficiaries may face challenges if the grantor’s debts exceed the property’s value‚ leaving them liable for taxes or other obligations. Additionally‚ the deed does not address broader estate planning needs‚ and changes in beneficiary designations or legal circumstances may require updates. Legal disputes or contests by heirs could also complicate the transfer process after the grantor’s death.

Comparison with Other Estate Planning Tools

The California Transfer on Death Deed is often compared to trusts and wills. Unlike trusts‚ it does not require funding or complex management‚ making it simpler and more cost-effective. Unlike wills‚ it avoids probate entirely‚ offering a more direct transfer of property. However‚ it only addresses real property‚ whereas trusts and wills can cover a broader range of assets. This makes the TOD deed a valuable but limited tool‚ best used in conjunction with other estate planning strategies for comprehensive coverage. Its simplicity and efficiency make it a popular choice for specific needs.

How to Create a California Transfer on Death Deed

Obtain the correct California TOD deed form‚ fill it accurately‚ ensure notarization‚ and record it with the county recorder to establish a valid transfer upon death.

Obtaining the Correct Form

The California Transfer on Death Deed form is available online or through legal professionals. It must comply with California Probate Code Section 5642 and be specific to the state. The form is revocable and applies to residential properties‚ including single-family homes‚ condos‚ or multi-unit dwellings. Ensure the form is tailored to California laws to avoid legal issues. Using the correct form is crucial for validity‚ as improper forms may lead to complications. Consulting an attorney can help verify the form’s accuracy and suitability for your needs.

Filling Out the Deed Accurately

Accurately completing the California Transfer on Death Deed is essential for its validity. The form requires the grantor’s name‚ property description‚ and beneficiary details. Include the legal description of the property‚ ensuring it matches county records. Specify beneficiaries clearly‚ noting their relationship to the grantor. The deed must be signed‚ notarized‚ and witnessed according to California law. Errors or omissions can lead to legal challenges. Carefully review all sections to ensure completeness and correctness before recording the deed with the county recorder.

DIY vs. Attorney Assistance

Property owners can complete a California Transfer on Death Deed themselves or seek legal assistance. DIY options are cost-effective and straightforward for simple cases‚ with forms available online. However‚ complex situations‚ such as multiple properties or beneficiaries‚ may require an attorney to ensure compliance and avoid disputes. While DIY saves money‚ legal expertise can prevent errors and provide peace of mind. Consulting an attorney is recommended for those unfamiliar with legal terminology or needing customized solutions. Proper execution is crucial for the deed’s validity and intended outcomes.

Recording the Deed

Recording the California Transfer on Death Deed is essential for its validity. The deed must be filed with the County Recorder’s office in the county where the property is located. This step ensures the deed becomes part of public records and is legally recognized. The recording process typically involves submitting the original signed deed and paying a nominal fee. It must be recorded within 60 days of execution to avoid potential legal complications. Proper recording guarantees the transfer will occur automatically upon the grantor’s death‚ as intended.

Real-Life Applications and Scenarios

The California Transfer on Death Deed is commonly used by property owners to seamlessly transfer homes‚ vacation properties‚ or rental assets to beneficiaries upon death‚ avoiding probate.

Common Uses of the TOD Deed

The California Transfer on Death Deed is commonly used to transfer residential properties‚ such as primary homes‚ vacation homes‚ or rental properties‚ to beneficiaries upon death. It is also frequently utilized for condominiums and properties with up to four units. Many individuals use this deed to ensure smooth estate planning‚ avoid probate‚ and retain control over their assets during their lifetime. It is particularly popular for transferring property to family members or loved ones in a cost-effective and straightforward manner‚ ensuring clarity and efficiency in asset distribution.

Case Studies and Examples

A California homeowner used a TOD deed to transfer their primary residence to their children‚ ensuring the property passed seamlessly upon their death without probate. Another example involved a widow who avoided costly legal processes by using a TOD deed to transfer her late husband’s share of their condo to her. Additionally‚ an estate in Fresno County utilized a TOD deed to efficiently distribute property according to the decedent’s wishes‚ highlighting its practicality in real-life estate planning scenarios.

Family Transfers and Estate Planning

The California Transfer on Death Deed is a valuable tool for families to ensure smooth property transfers. It allows parents to pass real estate to children directly upon death‚ avoiding probate. Spouses can also use it to transfer property to each other or other beneficiaries‚ maintaining control during their lifetime. This deed is particularly useful for keeping family property within the lineage without legal complications‚ offering a straightforward solution for estate planning and asset distribution.

Pitfalls and Potential Issues

The California TOD deed can be contested by heirs‚ and errors in execution or recording may invalidate it. Beneficiaries may challenge the deed if not properly notified‚ and changes in the grantor’s marital status or property ownership can create complications. Ensuring accurate execution and awareness of potential disputes is crucial to avoid legal challenges.

Common Mistakes to Avoid

Common mistakes include improper execution‚ failure to record the deed‚ incomplete beneficiary information‚ and using outdated forms. Ensure the deed is properly notarized‚ witnesses are present if required‚ and the document is filed with the county recorder within the legal timeframe. Avoid naming beneficiaries without their knowledge or in a way that could lead to disputes. Failing to update the deed after life changes‚ such as divorce or death of a beneficiary‚ can cause complications. Always consult legal advice to prevent errors and ensure compliance with California Probate Code Section 5642.

Contesting the Deed

Contesting a California Transfer on Death Deed involves legal challenges by heirs or beneficiaries who dispute the deed’s validity. Grounds for contesting may include lack of legal capacity‚ undue influence‚ or fraud. Beneficiaries or heirs may file objections if they believe the deed was improperly executed or recorded. The court will review the deed’s validity‚ ensuring it meets California Probate Code requirements. Contests can delay property transfer and may require legal representation. Proper execution and recording are critical to minimizing disputes‚ as the deed is designed to avoid probate and ensure smooth asset transfer upon the grantor’s death.

Impact of Divorce or Legal Separation

Divorce or legal separation can affect a California Transfer on Death Deed if the beneficiary is the former spouse. Unless the deed is revoked or updated‚ the ex-spouse may still inherit the property. California law does not automatically remove a former spouse as a beneficiary; the grantor must take action to revoke or modify the deed. Failure to update the deed can lead to unintended outcomes‚ emphasizing the importance of reviewing and revising estate plans during significant life changes to ensure the grantor’s intentions are fulfilled.

The California Transfer on Death Deed offers a straightforward‚ cost-effective way to transfer property upon death‚ avoiding probate and ensuring clarity in estate planning. Consult professionals for guidance.

Final Thoughts on the California TOD Deed

The California Transfer on Death Deed is a valuable estate planning tool‚ offering a simple and cost-effective way to transfer property upon death. It avoids probate‚ retains control during the grantor’s lifetime‚ and provides flexibility through its revocable nature. While it is an excellent option for many‚ it is essential to understand its limitations and ensure it aligns with overall estate goals. Consulting with a legal professional can help navigate the process and guarantee the deed is executed correctly to meet individual needs and wishes.

Recommendations for Property Owners

Property owners considering a California Transfer on Death Deed should consult an attorney to ensure it aligns with their estate plan. The deed is ideal for transferring residential properties‚ including single-family homes‚ condos‚ or multi-unit dwellings‚ but may not suit all situations. Proper execution‚ including notarization and recording‚ is crucial for validity. Beneficiaries should be clearly named‚ and owners should review and update the deed as needed. While cost-effective‚ it may not address all estate planning needs‚ making it wise to combine it with other tools like trusts for comprehensive coverage.