The Honeywell TH6220U2000 is a programmable thermostat offering flexible scheduling and energy-saving modes. Its compatibility with heat pumps and conventional systems ensures efficient temperature control. The installation manual provides essential guidance for proper setup and operation, ensuring optimal performance and energy efficiency. Referencing the manual is crucial for safe installation, troubleshooting, and maximizing the thermostat’s advanced features.
1.1 Overview and Features
The Honeywell TH6220U2000 is a state-of-the-art programmable thermostat designed for precise temperature control and energy efficiency. It features a sleek, user-friendly interface with a large backlit display, making it easy to read and navigate. This thermostat is compatible with a wide range of heating, cooling, and heat pump systems, offering flexibility for various home setups. It includes advanced features like touchscreen functionality, programmable scheduling, and energy-saving modes to optimize comfort and reduce energy consumption. The device also supports remote access via smartphones, allowing users to adjust settings from anywhere. With its robust design and intuitive controls, the Honeywell TH6220U2000 is an ideal choice for homeowners seeking a reliable and modern temperature management solution. Its installation-friendly wiring harness and clear terminal designations ensure a seamless setup process.
1.2 Importance of the Installation Manual
The installation manual for the Honeywell TH6220U2000 thermostat is essential for ensuring a proper and safe setup. It provides detailed, step-by-step instructions tailored to this specific model, helping users navigate complex wiring and configuration processes. Without the manual, installers may encounter challenges such as incorrect terminal connections or improper system integration, which could lead to malfunction or damage. The manual also highlights safety precautions, ensuring compliance with electrical standards and preventing potential hazards. Additionally, it serves as a reference for troubleshooting common issues and optimizing the thermostat’s performance. By following the manual, users can maximize the thermostat’s efficiency and enjoy its advanced features while minimizing the risk of errors. It is a critical resource for both DIY enthusiasts and professional installers.

Installation Process
The Honeywell TH6220U2000 installation involves mounting, wiring, and configuring the thermostat. It requires careful preparation and adherence to safety guidelines to ensure proper functionality.
2.1 Step-by-Step Mounting Guide
Begin by turning off power to the HVAC system at the circuit breaker. Remove the existing thermostat by taking out the screws and gently pulling it away from the wall. If necessary, repair any damage to the wall surface. Attach the mounting bracket to the wall using the provided screws, ensuring it is level and secure. Connect the wires to the corresponding terminals on the new thermostat, matching the wire labels to the correct terminals. Mount the Honeywell TH6220U2000 onto the bracket, ensuring it clicks into place securely. Finally, restore power and test the thermostat to confirm proper operation. Always follow safety precautions and manufacturer guidelines during installation.
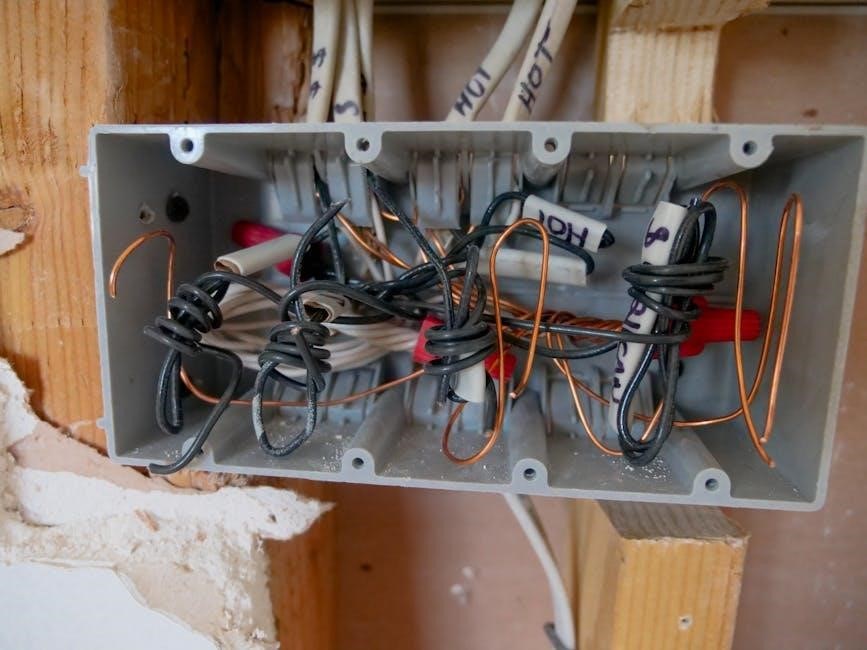
2.2 Wiring Instructions and Terminal Designations
Before wiring, ensure the power to the HVAC system is off. Refer to the terminal designations in the manual to identify the correct connections for your system. Common terminals include R (24V power), W (heating), Y (cooling), G (fan), C (common), and O or B (heat pump reversal). Connect the wires to the corresponding terminals on the thermostat, matching the labels from your system. If your system uses a different configuration, consult the manual for compatibility. Secure all connections firmly and double-check for accuracy. Incorrect wiring can damage the thermostat or HVAC system. Once complete, restore power and test the system to ensure proper functionality. Always follow the manufacturer’s wiring guidelines to avoid errors.
2.3 Final Installation Checks
After completing the installation, perform a series of final checks to ensure proper functionality. First, restore power to the HVAC system and test each mode (heating, cooling, and fan) to confirm operation. Verify that the thermostat display is clear and responsive. Check that the device is securely mounted and level. Inspect all wiring connections to ensure they are tight and correct. Review the terminal designations to confirm accuracy. Test the programmable features to ensure they function as expected. Finally, run a full cycle of the system to verify smooth transitions between modes. Address any issues immediately to prevent operational problems. These checks ensure a safe and efficient installation. Always refer to the manual for specific testing procedures. Proper verification guarantees optimal performance and longevity of the thermostat.
System Compatibility
The Honeywell TH6220U2000 thermostat is compatible with various HVAC systems, including heat pumps, conventional systems, and dual-fuel setups. It supports gas, oil, electric, and geothermal heating, as well as cooling systems, ensuring versatility for different home configurations. Proper system compatibility ensures efficient performance and seamless integration. Always verify compatibility before installation to avoid operational issues. This thermostat is designed to work with most standard HVAC systems, making it a reliable choice for many households. Its universal design accommodates diverse heating and cooling needs, providing consistent comfort and energy efficiency across various setups. Compatibility ensures optimal functionality and performance. System compatibility is crucial for the thermostat’s effectiveness. Ensure your HVAC system matches the specifications for the best results. Proper pairing guarantees reliability and efficiency. The thermostat supports both single-stage and multi-stage systems, enhancing its adaptability. This feature-rich compatibility ensures it meets a wide range of household needs. Compatibility verification is essential for a trouble-free installation and operation. The device is engineered to integrate smoothly with compatible systems, delivering precise temperature control and energy savings. Always check compatibility to maximize the thermostat’s potential. The Honeywell TH6220U2000 is a versatile solution for various HVAC configurations, ensuring reliable performance and efficiency. Its broad compatibility makes it suitable for many homes. Compatibility ensures the thermostat functions as intended, providing consistent comfort and energy efficiency. Verify system compatibility to avoid installation issues and ensure optimal performance. The thermostat’s compatibility with multiple systems makes it a practical choice for homeowners with diverse HVAC setups. Proper compatibility ensures smooth operation and maximizes energy savings. The Honeywell TH6220U2000 is designed to be compatible with a wide range of heating and cooling systems, ensuring flexibility for different households. Compatibility is key to achieving the best results with this thermostat. Always confirm system compatibility before installation to ensure proper functionality and efficiency. The thermostat’s versatility in system compatibility makes it an excellent option for various HVAC configurations. Compatibility ensures the device operates efficiently, providing consistent comfort and energy savings. Verify compatibility to avoid installation issues and ensure the thermostat performs optimally. The Honeywell TH6220U2000 is compatible with most standard HVAC systems, making it a reliable and efficient choice for many homes. System compatibility is essential for the thermostat’s proper functioning and energy efficiency; Ensure your HVAC system matches the specifications for the best performance. Proper compatibility ensures the thermostat delivers precise temperature control and energy savings. The Honeywell TH6220U2000 is engineered to be compatible with a variety of systems, providing flexibility and reliability for homeowners. Compatibility verification is crucial for a smooth installation and optimal operation. The thermostat’s broad compatibility ensures it can integrate seamlessly with different HVAC setups, delivering consistent comfort and efficiency. Always check system compatibility to maximize the benefits of the Honeywell TH6220U2000 thermostat. Compatibility is vital for ensuring the thermostat functions as intended and provides the desired performance. Verify compatibility before installation to avoid any issues and ensure energy efficiency. The Honeywell TH6220U2000 is designed to be compatible with multiple HVAC systems, offering a practical solution for homeowners with varying needs. System compatibility ensures the thermostat operates efficiently and effectively, delivering consistent comfort and energy savings. Always confirm compatibility to ensure the best results with this thermostat. The Honeywell TH6220U2000 is a versatile and reliable choice for many HVAC configurations due to its broad system compatibility. Compatibility ensures optimal performance and efficiency. Verify system compatibility before installation to ensure the thermostat functions correctly and delivers the expected results. The Honeywell TH6220U2000 is compatible with a wide range of heating and cooling systems, making it suitable for diverse household needs. System compatibility is essential for the thermostat’s proper operation and energy efficiency. Ensure your HVAC system matches the specifications for the best performance. Proper compatibility ensures the thermostat delivers precise temperature control and energy savings. The Honeywell TH6220U2000 is engineered to be compatible with various systems, providing flexibility and reliability for homeowners. Compatibility verification is crucial for a smooth installation and optimal operation. The thermostat’s broad compatibility ensures it can integrate seamlessly with different HVAC setups, delivering consistent comfort and efficiency. Always check system compatibility to maximize the benefits of the Honeywell TH6220U2000 thermostat. Compatibility is vital for ensuring the thermostat functions as intended and provides the desired performance. Verify compatibility before installation to avoid any issues and ensure energy efficiency. The Honeywell TH6220U2000 is designed to be compatible with multiple HVAC systems, offering a practical solution for homeowners with varying needs. System compatibility ensures the thermostat operates efficiently and effectively, delivering consistent comfort and energy savings. Always confirm compatibility to ensure the best results with this thermostat. The Honeywell TH6220U2000 is a versatile and reliable choice for many HVAC configurations due to its broad system compatibility. Compatibility ensures optimal performance and efficiency. Verify system compatibility before installation to ensure the thermostat functions correctly and delivers the expected results. The Honeywell TH6220U2000 is compatible with a wide range of heating and cooling systems, making it suitable for diverse household needs. System compatibility is essential for the thermostat’s proper operation and energy efficiency. Ensure your HVAC system matches the specifications for the best performance. Proper compatibility ensures the thermostat delivers precise temperature control and energy savings. The Honeywell TH6220U2000 is engineered to be compatible with various systems, providing flexibility and reliability for homeowners. Compatibility verification is crucial for a smooth installation and optimal operation. The thermostat’s broad compatibility ensures it can integrate seamlessly with different HVAC setups, delivering consistent comfort and efficiency. Always check system compatibility to maximize the benefits of the Honeywell TH6220U2000 thermostat. Compatibility is vital for ensuring the thermostat functions as intended and provides the desired performance. Verify compatibility before installation to avoid any issues and ensure energy efficiency. The Honeywell TH6220U2000 is designed to be compatible with multiple HVAC systems, offering a practical solution for homeowners with varying needs. System compatibility ensures the thermostat operates efficiently and effectively, delivering consistent comfort and energy savings. Always confirm compatibility to ensure the best results with this thermostat. The Honeywell TH6220U2000 is a versatile and reliable choice for many HVAC configurations due to its broad system compatibility. Compatibility ensures optimal performance and efficiency. Verify system compatibility before installation to ensure the thermostat functions correctly and delivers the expected results. The Honeywell TH6220U2000 is compatible with a wide range of heating and cooling systems, making it suitable for diverse household needs. System compatibility is essential for the thermostat’s proper operation and energy efficiency. Ensure your HVAC system matches the specifications for the best performance. Proper compatibility ensures the thermostat delivers precise temperature control and energy savings. The Honeywell TH6220U2000 is engineered to be compatible with various systems, providing flexibility and reliability for homeowners. Compatibility verification is crucial for a smooth installation and optimal operation. The thermostat’s broad compatibility ensures it can integrate seamlessly with different HVAC setups, delivering consistent comfort and efficiency. Always check system compatibility to maximize the benefits of the Honeywell TH6220U2000 thermostat. Compatibility is vital for ensuring the thermostat functions as intended and provides the desired performance. Verify compatibility before installation to avoid any issues and ensure energy efficiency. The Honeywell TH6220U2000 is designed to be compatible with multiple HVAC systems, offering a practical solution for homeowners with varying needs. System compatibility ensures the thermostat operates efficiently and effectively, delivering consistent comfort and energy savings. Always confirm compatibility to ensure the best results with this thermostat. The Honeywell TH6220U2000 is a versatile and reliable choice for many HVAC configurations due to its broad system compatibility. Compatibility ensures optimal performance and efficiency. Verify system compatibility before installation to ensure the thermostat functions correctly and delivers the expected results. The Honeywell TH6220U2000 is compatible with a wide range of heating and cooling systems, making it suitable for diverse household needs. System compatibility is essential for the thermostat’s proper operation and energy efficiency. Ensure your HVAC system matches the specifications for the best performance. Proper compatibility ensures the thermostat delivers precise temperature control and energy savings. The Honeywell TH6220U2000 is engineered to be compatible with various systems, providing flexibility and reliability for homeowners. Compatibility verification is crucial for a smooth installation and optimal operation. The thermostat’s broad compatibility ensures it can integrate seamlessly with different HVAC setups, delivering consistent comfort and efficiency. Always check system compatibility to maximize the benefits of the Honeywell TH6220U2000 thermostat. Compatibility is vital for ensuring the thermostat functions as intended and provides the desired performance. Verify compatibility before installation to avoid
3.1 Heat Pump Systems
The Honeywell TH6220U2000 thermostat is fully compatible with heat pump systems, offering precise temperature control and energy efficiency. It supports both single-stage and multi-stage heat pumps, as well as dual-fuel systems that combine heat pumps with auxiliary heating sources. The thermostat’s advanced features, such as auxiliary heat lockout and compressor protection, ensure optimal performance and longevity of the heat pump system. It also works seamlessly with geothermal heat pumps, making it a versatile option for eco-friendly setups. Proper installation, as outlined in the manual, is essential to ensure compatibility and efficient operation. The thermostat’s ability to adapt to various heat pump configurations makes it a reliable choice for homeowners seeking consistent comfort and energy savings.
3.2 Conventional HVAC Systems
The Honeywell TH6220U2000 thermostat is designed to work seamlessly with conventional HVAC systems, including furnaces, air conditioners, and boilers. It supports single-stage, two-stage, and multi-stage heating and cooling systems, ensuring precise temperature control and energy efficiency. The thermostat’s universal compatibility makes it suitable for a wide range of setups, from traditional gas furnaces to electric systems. Its advanced features, such as adaptive recovery and smart fan operation, optimize performance for conventional systems. Proper installation, as detailed in the manual, ensures reliable operation and compatibility with existing HVAC equipment. This makes the TH6220U2000 a versatile and efficient choice for homeowners with traditional heating and cooling systems, providing consistent comfort and energy savings.

Advanced Features
The Honeywell TH6220U2000 offers programmable scheduling, energy-saving modes, and adaptive recovery, ensuring optimal comfort and efficiency while minimizing energy consumption through smart, user-friendly controls and automation.
4.1 Programmable Scheduling Options
The Honeywell TH6220U2000 thermostat offers advanced programmable scheduling options, allowing users to customize temperature settings for different times of the day. This feature enables homeowners to create a weekly schedule with up to six distinct temperature settings per day, ensuring optimal comfort and energy efficiency. The thermostat’s intuitive interface makes it easy to program, with options for wake, leave, return, and sleep periods. Additionally, it supports both 5-day and 7-day scheduling, accommodating varying lifestyles. The programmable scheduling feature is detailed in the installation manual, providing step-by-step guidance on how to set up and modify schedules. By tailoring temperature settings to daily routines, users can reduce energy consumption while maintaining a comfortable indoor environment. This feature is a key component of the thermostat’s energy-saving capabilities, making it a practical choice for modern homes.

4.2 Energy-Saving Modes
The Honeywell TH6220U2000 thermostat features energy-saving modes designed to optimize heating and cooling efficiency. These modes include an energy-saving “E” mode, which limits temperature swings to reduce energy consumption. Additionally, the thermostat offers a “Smart Response” feature that learns the system’s operation to minimize energy use while maintaining comfort. The manual provides instructions on enabling these modes, allowing users to balance energy savings with their comfort needs. By utilizing these energy-saving modes, homeowners can lower their utility bills without compromising on performance. The thermostat’s advanced algorithms ensure efficient operation, making it an eco-friendly choice for modern HVAC systems. This feature is detailed in the installation manual, guiding users to maximize energy efficiency effortlessly.
The Role of the Manual
The manual provides essential installation steps, operational guidance, and troubleshooting tips for the Honeywell TH6220U2000 thermostat, ensuring proper setup and efficient use of its features.
5.1 Detailed Installation Guidelines
The manual offers a systematic approach to installing the Honeywell TH6220U2000 thermostat, ensuring a seamless setup process. It outlines essential steps, such as preparing the necessary tools, turning off the power supply, and removing the old thermostat. The guide provides clear instructions for mounting the new thermostat, including how to handle different wall types and wiring configurations. Detailed diagrams and written explanations help users understand terminal designations and how to connect wires correctly. Additionally, the manual covers programming the thermostat after installation, allowing users to set up their preferred temperature schedules. By following these guidelines, users can ensure their thermostat is installed safely and functions optimally. The manual also emphasizes safety precautions to avoid electrical hazards, making it a comprehensive resource for both professionals and DIY enthusiasts.
5.2 Operational Instructions
The manual provides clear operational instructions for the Honeywell TH6220U2000 thermostat, ensuring users can navigate and utilize its features effortlessly. It explains how to adjust temperature settings, switch between heating and cooling modes, and utilize the programmable scheduling options. The guide also details how to access advanced features such as energy-saving modes, fan settings, and system alerts. Instructions for troubleshooting common issues, like incorrect temperature readings or display malfunctions, are included to help users resolve problems quickly. Additionally, the manual covers how to customize settings, such as screen brightness and language preferences, to enhance user experience. By following these operational guidelines, users can maximize the thermostat’s efficiency and enjoy optimal comfort in their homes. The manual serves as a handy reference for everyday use and maintenance.

Troubleshooting Common Issues
This section helps users identify and resolve common issues with the Honeywell TH6220U2000 thermostat, such as error codes, display problems, or connectivity issues, ensuring smooth operation.
6.1 Error Codes and Solutions
The Honeywell TH6220U2000 thermostat may display error codes like E1, E2, or E30, indicating issues such as temperature mismatches, sensor problems, or communication faults. E1 often relates to incorrect temperature settings, while E2 may signal a malfunctioning outdoor sensor. E30 typically indicates a loss of communication with the outdoor unit. To resolve these, check wiring connections, ensure proper sensor installation, and verify system compatibility. Restarting the thermostat or resetting it by removing batteries can also address temporary glitches. If issues persist, consult the installation manual or contact Honeywell support for assistance. Regularly updating software and ensuring correct system configuration can prevent recurring errors and ensure optimal performance. Always refer to the manual for specific troubleshooting steps and solutions.
6.2 Maintenance Tips
Regular maintenance ensures the Honeywell TH6220U2000 thermostat operates efficiently and accurately. Clean the display and sensors with a soft cloth to prevent dust buildup. Replace batteries every 5-7 years or when the low-battery indicator appears. Check wiring connections periodically to ensure they are secure and undamaged. Update the thermostat’s software whenever new versions are released to access improved features and bug fixes. Inspect the outdoor sensor for debris or damage and ensure it is properly mounted. Avoid exposing the thermostat to extreme humidity or temperature fluctuations. Schedule annual HVAC system Checks to ensure compatibility and optimal performance. By following these tips, you can extend the lifespan of your thermostat and maintain reliable temperature control. Always refer to the manual for detailed maintenance recommendations.
Maintenance and Upkeep
Routine maintenance is essential for ensuring the Honeywell TH6220U2000 thermostat operates efficiently and lasts longer. Regularly clean the device, check for software updates, and inspect battery levels to maintain optimal performance.
7.1 Regular Cleaning Procedures
Regular cleaning is crucial for maintaining the Honeywell TH6220U2000 thermostat’s performance and longevity. Dirt, dust, or debris can interfere with temperature sensing and display accuracy. Start by turning off the power to the thermostat at the circuit breaker. Gently remove the faceplate and wipe it with a soft, dry cloth to eliminate surface dust. For stubborn stains, dampen the cloth slightly but avoid moisture seeping inside. Use compressed air to clean between buttons and internal components, holding the can upright to prevent liquid spray. Avoid harsh chemicals or abrasive materials that could damage the screen or casing. Repeat this process every 2-3 months to ensure optimal functionality. Regular cleaning helps prevent malfunctions and ensures accurate temperature control. By maintaining a clean device, you extend its lifespan and maintain energy efficiency.
7.2 Software Updates
Software updates are essential for ensuring the Honeywell TH6220U2000 thermostat operates with the latest features and security patches. Regular updates improve performance, add functionality, and fix potential bugs. To check for updates, navigate to the thermostat’s menu and select the “Update” option. If an update is available, follow the on-screen instructions to download and install it. Ensure the device remains powered on throughout the process to avoid interruptions. After installation, restart the thermostat to apply changes. Updates may also be available through the Honeywell Home app or the manufacturer’s website. Always refer to the installation manual for detailed guidance on updating software. Keeping the thermostat up to date ensures optimal performance and compatibility with your HVAC system. Regular checks for updates are recommended to maintain efficiency and functionality.
7.3 Battery Maintenance
The Honeywell TH6220U2000 thermostat is designed to operate efficiently with its battery-powered system. Proper battery maintenance ensures uninterrupted performance and extends the lifespan of the device. The thermostat typically uses lithium batteries (CR 2032), which are known for their long-lasting energy storage. Replace the batteries when the thermostat displays a low battery alert. To do this, slide the battery door open, remove the old batteries, and insert the new ones while ensuring the correct polarity. Avoid mixing old and new batteries to maintain consistent power. Dispose of used batteries responsibly, following local regulations. Regular checks for battery life are essential, especially during extreme temperature changes. Keeping the thermostat’s batteries in good condition ensures reliable operation and precise temperature control. Always refer to the installation manual for specific battery replacement instructions. Proper maintenance prevents unexpected shutdowns and maintains system efficiency.
The Honeywell TH6220U2000 thermostat installation manual serves as a comprehensive guide to ensure proper setup and operation. By following the detailed instructions, users can seamlessly integrate the thermostat into their HVAC systems, whether heat pumps or conventional setups. The manual emphasizes the importance of correct wiring, system compatibility, and advanced features like programmable scheduling and energy-saving modes. Regular maintenance, including battery checks and software updates, is crucial for optimal performance. Troubleshooting tips and error code solutions empower users to address issues independently. This guide not only simplifies installation but also enhances overall system efficiency and comfort. Refer to the manual regularly to maximize the thermostat’s capabilities and ensure long-term reliability. Proper use and maintenance will provide years of reliable temperature control and energy savings.