Welcome to the Honeywell T6 Installation Manual, your comprehensive guide for installing and configuring the Honeywell T6 thermostat. This manual provides detailed instructions for a seamless setup, ensuring optimal performance and smart home integration.
1.1 Overview of the Honeywell T6 Thermostat
The Honeywell T6 thermostat is a cutting-edge, programmable device designed to optimize heating and cooling systems for energy efficiency and comfort. Part of Honeywell’s Pro Series, it offers advanced features like voice control via Amazon Alexa and Google Assistant, geofencing, and smart scheduling. Compatible with various HVAC systems, the T6 learns your home’s temperature needs over time, adjusting settings for consistent comfort. Its intuitive design and Wi-Fi connectivity allow remote management through the Honeywell Home app, making it a versatile solution for modern smart homes. The T6 Pro model also supports Z-Wave technology for seamless integration with other smart devices.
1.2 Importance of Proper Installation
Proper installation of the Honeywell T6 thermostat is crucial for ensuring optimal performance, energy efficiency, and safety. Incorrect wiring or placement can lead to system malfunctions, reduced efficiency, and potential damage to the device or HVAC system. Following the manual’s guidelines ensures accurate temperature control and smart feature functionality. Improper installation may also void the warranty or cause safety hazards, such as overheating or electrical issues. For best results, the installation should be performed by a trained HVAC technician, as specified in the manual. This guarantees a seamless setup and maximizes the thermostat’s advanced features for long-term reliability and comfort.
System Requirements and Compatibility
The Honeywell T6 thermostat is compatible with most HVAC systems, including forced air and hydronics. Ensure your system meets the specified voltage and wiring requirements. Compatibility with smart home systems like Amazon Alexa and Google Assistant enhances functionality. A compatible Wi-Fi adapter is required for remote control via the Honeywell Home app. Proper environmental conditions, such as avoiding direct sunlight and heat sources, are essential for accurate temperature sensing and optimal performance.

2.1 Compatible HVAC Systems
The Honeywell T6 thermostat is designed to work with a wide range of HVAC systems, including forced air, hydronics, and heat pumps. It supports both heating and cooling systems, ensuring versatility for various home setups. The thermostat is compatible with 2-stage heating and 2-stage cooling systems, providing precise temperature control. Additionally, it works seamlessly with gas, oil, and electric furnaces, as well as air conditioning units. Proper compatibility ensures efficient performance and integration with existing HVAC infrastructure, making the Honeywell T6 a reliable choice for smart home climate control.
2.2 Environmental Considerations
Ensure the Honeywell T6 thermostat is installed in an environment free from direct sunlight, drafts, and heat sources. Avoid placing it near windows, radiators, or air vents to maintain accurate temperature readings. The thermostat should be mounted at least 1.2 to 1.5 meters above the floor and away from metal objects to prevent interference. Proper placement ensures reliable performance and accurate temperature control. Additionally, the device should not be exposed to extreme humidity or temperatures outside its operating range of 0°C to 50°C (32°F to 122°F) for optimal functionality.

Installation Process
The Honeywell T6 installation involves mounting the thermostat using the UWP system or optional cover plate, followed by wiring and placing the device in an ideal location. Ensure all connections are secure and test system operation before finalizing the setup.
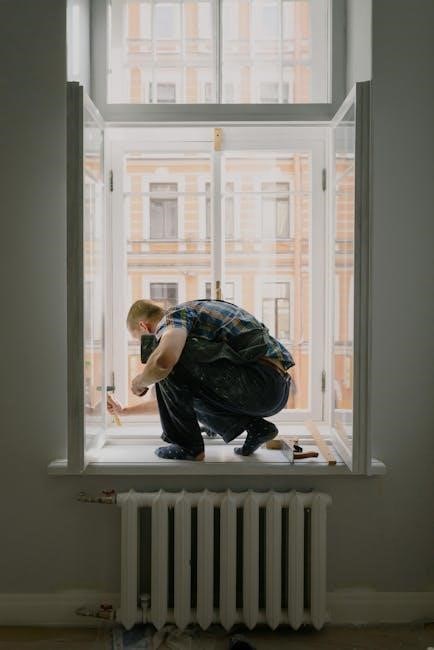
3.1 Mounting Options
The Honeywell T6 thermostat offers flexible mounting options to suit various installations. Use the UWP Mounting System for a quick and secure setup without needing a cover plate. Alternatively, the optional cover plate is ideal for covering paint gaps from previous thermostats or mounting directly to an electrical junction box. Ensure the thermostat is placed at least 1.2 to 1.5 meters above the floor, away from direct sunlight, heat sources, or drafts. Proper placement ensures accurate temperature readings and optimal performance. Follow the manual’s guidelines for precise installation and alignment to achieve the best results for your smart home system.
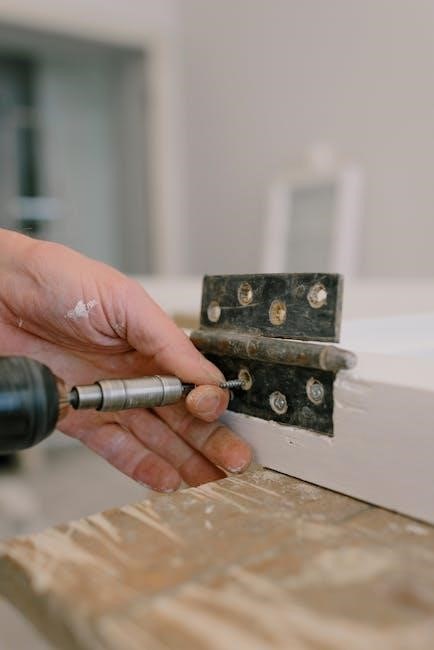
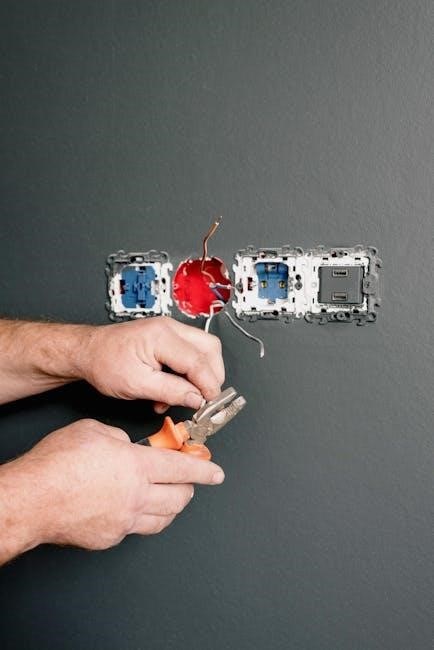
3.2 Wiring and Connections
Proper wiring is essential for the Honeywell T6 thermostat to function correctly. Refer to the terminal designations in the manual to ensure accurate connections. The thermostat is compatible with conventional HVAC systems, including forced air and hydronic configurations. Use the provided wiring labels to match terminals on your system. Avoid incorrect connections to prevent damage. For smart features, ensure a reliable internet connection and use the Honeywell Home app for setup. Follow safety guidelines and manufacturer recommendations to complete the wiring process effectively. This ensures seamless operation and integration with your home’s climate control system.
3;3 Thermostat Placement
Correct placement of the Honeywell T6 thermostat is crucial for accurate temperature sensing and optimal performance. Avoid installing it near drafts, direct sunlight, or heat sources, as this can lead to incorrect temperature readings. The thermostat should be placed at least 1.2 to 1.5 meters above the floor to ensure proper airflow and consistent temperature measurement. Additionally, it should not be mounted near metal objects or in areas with high humidity. Ensure the location provides an unobstructed view of the surrounding area to maintain accurate climate control. Proper placement ensures reliable operation and efficient energy management for your home.
Power Options and Configuration
This section explains the power options for the Honeywell T6, including hardwiring and battery installation, as well as configuration steps for optimal performance and smart connectivity.
4.1 Hardwiring the Thermostat
Hardwiring the Honeywell T6 thermostat ensures a reliable power supply. Start by turning off the power to your HVAC system at the circuit breaker. Locate the existing thermostat wires and identify their terminals (R, W, Y, G, C, etc.). Carefully disconnect the old thermostat wires and connect them to the corresponding terminals on the T6. Use a common wire (C) if required for continuous power. Secure the thermostat to the wall using the provided mounting hardware. Turn the power back on and test the system to ensure proper functionality. Refer to the wiring diagram in the manual for specific terminal designations.
4.2 Battery Installation
For battery-powered operation, insert two AA alkaline batteries into the thermostat’s battery compartment, located on the rear. Ensure the batteries are inserted with the correct polarity, as indicated by the symbols on the compartment. Replace the compartment cover securely. The Honeywell T6 thermostat will automatically switch to battery power if hardwiring is not used. The device includes a low-battery indicator, alerting you when replacements are needed. For optimal performance, use high-quality alkaline batteries. The Honeywell Home app will also notify you of low battery levels, ensuring uninterrupted smart functionality and climate control.
Post-Installation Setup
After installation, configure the thermostat using the Honeywell Home app or the device’s interface. Set up schedules, enable geofencing, and explore smart features for optimized performance.
5.1 Initial System Configuration
After installation, power up the thermostat and follow on-screen prompts to begin configuration. Use the Honeywell Home app or the device interface to set up basic preferences. Select your HVAC system type, choose heating or cooling modes, and set date/time. Enable geofencing for location-based temperature control. Ensure Wi-Fi connectivity for smart features. Touch START SETUP on the thermostat, then toggle through options using arrows. Configure temperature ranges, humidity settings, and adaptive recovery learning. Test system operation to ensure proper functionality. Refer to the app or manual for detailed guidance on optimizing settings for your home’s comfort needs.
5.2 Setting Up Schedules
Create custom schedules for your Honeywell T6 thermostat using the Honeywell Home app or the device interface. Set temperature preferences for different times of the day, optimizing comfort and energy savings. Program schedules for weekdays and weekends separately or apply the same settings across all days. Use geofencing to automatically adjust temperatures based on your location. For advanced control, enable adaptive recovery to ensure your home reaches the desired temperature by your scheduled time. Refer to the app guide for step-by-step instructions to customize your heating and cooling schedules effectively.
5.3 Geofencing and Smart Features
Enhance your Honeywell T6 thermostat experience with geofencing and smart features. Geofencing uses your smartphone’s location to automatically adjust temperatures when you leave or arrive home. Enable smart features like voice control through Amazon Alexa or Google Assistant. The Honeywell Home app allows remote adjustments and integrates seamlessly with other smart devices. Adaptive Intelligent Recovery learns your system’s behavior to optimize heating and cooling. These features ensure energy efficiency, comfort, and convenience, making the T6 a versatile addition to any smart home setup. Refer to the app guide for detailed setup instructions to maximize these advanced functionalities.
Troubleshooting Common Issues
Welcome to the troubleshooting section of the Honeywell T6 manual. This guide helps identify and resolve common issues, ensuring your thermostat operates smoothly and efficiently.
6.1 Common Installation Mistakes
Common installation mistakes include incorrect wiring, improper mounting, and skipped system setup steps. Ensure wires are connected according to the terminal designations. Avoid ignoring the UWP Mounting System, as it ensures secure installation. If using the optional cover plate, align it correctly to avoid gaps. Failure to level the thermostat can lead to inaccurate temperature readings. Double-check all connections and settings before finalizing. Proper installation is key to optimal performance. Refer to the manual for detailed wiring diagrams and setup instructions to avoid these issues and ensure a smooth operation of your Honeywell T6 thermostat.
6.2 Error Codes and Solutions
The Honeywell T6 thermostat may display error codes like E1, E2, or E3, indicating issues such as temperature differences, sensor malfunctions, or system communication problems. For E1, check if the temperature differential is set correctly. E2 may require cleaning or replacing the sensor. E3 often relates to wiring issues or lost connection to the HVAC system. Refer to the troubleshooting section in the manual for specific solutions. Resetting the thermostat or checking wire connections can resolve many errors. Ensure proper system calibration and verify that all components are functioning correctly for optimal performance.
Additional Resources and Support
Visit the official Honeywell website for downloadable PDF manuals, troubleshooting guides, and FAQs. Contact customer support at 1-800-468-1502 for assistance or visit customer.honeywell.com.
7.1 Official Honeywell T6 Manuals
The official Honeywell T6 manuals are available for free download from the Honeywell website and the Honeywell Home app. These manuals provide detailed installation instructions, operating tips, and troubleshooting guides. The PDF versions are accessible in multiple languages, ensuring global accessibility. They cover topics like wiring, mounting options, and smart features. For further assistance, visit the official Honeywell support page or contact customer care at 1-800-468-1502.
7.2 Online Support and FAQs

For additional assistance, Honeywell offers extensive online support and FAQs through their official website and the Honeywell Home app. Visit the Resideo website for troubleshooting tips, installation guides, and user manuals. The FAQs section addresses common queries about wiring, smart features, and system compatibility. You can also download the Honeywell Home app from the App Store or Google Play for remote configuration and setup. For direct support, contact Honeywell Customer Care at 1-800-468-1502 or access live chat and email support through their portal.

About the author