2016 Subaru Crosstrek Manual: A Comprehensive Guide
This comprehensive guide details the 2016 Subaru Crosstrek, offering access to owners manuals, multimedia system details, and technical service bulletins via PDF downloads.
Explore resources like Starlink information, repair manuals, and tire pressure guidance, ensuring a thorough understanding of your vehicle’s operation and maintenance.
The 2016 Subaru Crosstrek represents a versatile blend of practicality and capability, built upon the Impreza platform. This manual serves as your primary resource for understanding all facets of your vehicle, from routine maintenance to advanced technological features. Accessing the official Subaru owners manuals, available as PDF downloads, is crucial for maximizing your driving experience.
Information regarding the Starlink multimedia system, detailed within specific manuals, unlocks the full potential of in-car connectivity. Furthermore, understanding technical service bulletins ensures you’re aware of any updates or recommended procedures. This guide aims to empower you with the knowledge to confidently operate and maintain your 2016 Crosstrek.
Understanding the Owner’s Manual
Your 2016 Subaru Crosstrek’s owner’s manual is a vital document, offering comprehensive insights into your vehicle’s operation and maintenance. Available electronically and often as a downloadable PDF, it details everything from basic controls to complex systems like Subaru Starlink. Pay close attention to sections covering safety features, including the airbag system and anti-lock braking;
Understanding the dashboard symbols and recommended maintenance schedules is paramount. Familiarize yourself with technical service bulletins, accessible online, for crucial updates. The manual also provides guidance on tire pressure and fluid checks, ensuring optimal performance and longevity of your Crosstrek.

Vehicle Overview & Key Features
The 2016 Crosstrek blends versatility with Subaru’s renowned reliability, featuring symmetrical all-wheel drive and a user-friendly Starlink multimedia system.
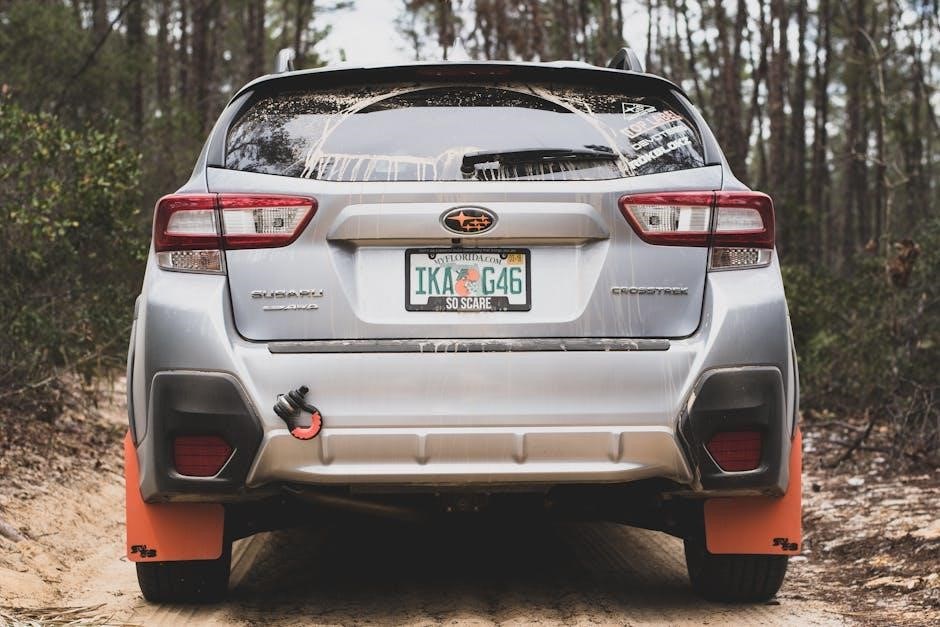
Exterior Features and Functions
The 2016 Crosstrek’s exterior boasts practical features designed for adventure and everyday use. Standard equipment includes automatic headlights, while available options enhance visibility and style. Owners can find detailed information regarding exterior lighting operation, wiper functionality, and mirror adjustments within the comprehensive owner’s manual.
The manual also covers proper care for exterior components, including cleaning procedures and protective measures against environmental elements. Understanding these features ensures optimal performance and longevity of the vehicle’s exterior. Refer to the manual for specific instructions on utilizing features like the rear gate spoiler and roof rails, maximizing the Crosstrek’s utility.
Interior Features and Controls
The 2016 Crosstrek’s interior prioritizes comfort and functionality. The owner’s manual provides a detailed overview of all interior features, including seat adjustments, climate control operation, and the placement of various controls. Subaru Starlink multimedia system functionality is thoroughly explained, covering audio settings, Bluetooth pairing, and navigation system usage.
Learn about the operation of power windows, door locks, and the available sunroof. The manual also details the location and use of interior lighting, storage compartments, and other convenience features. Proper understanding of these controls enhances the driving experience and ensures safe operation of the vehicle’s interior systems.
Dashboard Symbols and Indicators
The 2016 Crosstrek’s instrument panel displays a variety of symbols and indicators crucial for monitoring vehicle status. The owner’s manual provides a comprehensive explanation of each symbol, categorizing them by severity – warning, indicator, and malfunction indicator lights. Understanding these signals is vital for proactive vehicle maintenance and safe driving practices.
Learn to differentiate between critical warnings, such as low oil pressure or engine temperature, and informational indicators like turn signal activation. The manual details the actions to take when specific symbols illuminate, ensuring prompt response to potential issues. Familiarity with these indicators promotes confident and informed vehicle operation.
Operating Your Vehicle
The 2016 Crosstrek manual details essential procedures, from starting and stopping the engine to driving modes and manual transmission operation for optimal performance.
Starting and Stopping the Engine
The 2016 Subaru Crosstrek manual provides detailed instructions for safely starting and stopping the engine. Before starting, ensure the parking brake is engaged and the gear selector is in neutral (manual transmission). Insert the key and turn it to the ‘ON’ position, then fully rotate to start;
Allow the engine to idle briefly before driving. To stop, gently apply the brakes to bring the vehicle to a complete halt, shift into neutral, and engage the parking brake. Turn the ignition key to the ‘LOCK’ position and remove it. Always follow these procedures to prevent unintended vehicle movement and ensure safe operation. Refer to the manual for specific warnings and precautions.
Driving Modes and Systems
The 2016 Subaru Crosstrek manual details the vehicle’s driving modes and systems, including Symmetrical All-Wheel Drive, which continuously distributes power for optimal traction. The manual explains how to utilize features like Vehicle Dynamic Control (VDC) for enhanced stability during challenging conditions.
It also covers the operation of systems like X-Mode, designed for improved performance on low-friction surfaces. Understanding these systems is crucial for maximizing the Crosstrek’s capabilities. The manual provides detailed explanations and warnings regarding the proper use of each system, ensuring safe and effective driving in various environments.
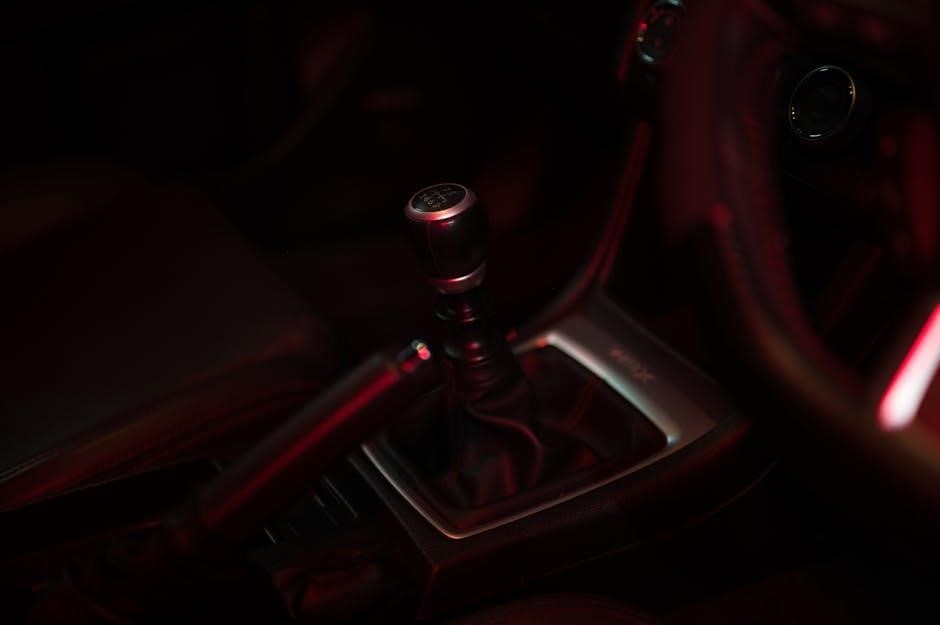
Transmission Operation (Manual)
The 2016 Subaru Crosstrek manual provides comprehensive instructions for operating the manual transmission. It details proper shifting techniques, emphasizing smooth clutch engagement and gear selection for optimal performance and longevity. The manual explains how to avoid common issues like stalling or harsh shifting.
Specific guidance is given on downshifting, hill starts, and utilizing the transmission’s full range. It also includes information regarding the transmission’s internal components and recommended fluid checks. Following these guidelines ensures efficient operation and helps prevent premature wear, maximizing the lifespan of the manual transmission.
Fueling and Range
The 2016 Subaru Crosstrek manual details the recommended fuel type – unleaded gasoline – and its octane rating. It explains the fuel tank capacity and provides guidance on locating the fuel filler door. The manual outlines the estimated driving range based on combined city and highway driving conditions, though actual range varies.
Factors influencing fuel economy, such as driving habits, cargo weight, and weather conditions, are discussed. It also includes information on the fuel consumption indicator and how to interpret it. Proper fueling practices, as outlined in the manual, contribute to optimal engine performance and efficiency.

Maintenance & Service
The 2016 Crosstrek manual outlines a recommended maintenance schedule, detailing oil changes (especially for manual transmissions), tire care, and essential fluid checks for longevity.
Recommended Maintenance Schedule
The 2016 Subaru Crosstrek’s maintenance schedule, detailed within the owner’s manual, is crucial for optimal performance and longevity. Regular inspections are recommended at every oil change, covering vital components like brakes, fluids, and belts.
Specifically, the manual advises oil and filter changes based on mileage or time intervals – whichever comes first. Tire rotations are essential for even wear, and coolant levels should be checked periodically. Furthermore, the schedule includes recommendations for air filter replacement, spark plug inspection, and fluid flushes, ensuring your Crosstrek remains reliable and efficient throughout its lifespan. Adhering to this schedule helps prevent costly repairs and maintains the vehicle’s value.
Oil Change Procedures (Manual Transmission)
For the 2016 Subaru Crosstrek with a manual transmission, oil changes require specific steps. Begin by warming the engine, then securely lift the vehicle. Locate the oil drain plug and carefully remove it, allowing the old oil to drain completely. Replace the drain plug with a new crush washer, tightening to the specified torque.
Next, remove the oil filter using a filter wrench, lubricating the new filter’s gasket before installation. Fill the engine with the recommended oil type and quantity, as outlined in the owner’s manual. Finally, check the oil level with the dipstick and properly dispose of the used oil.
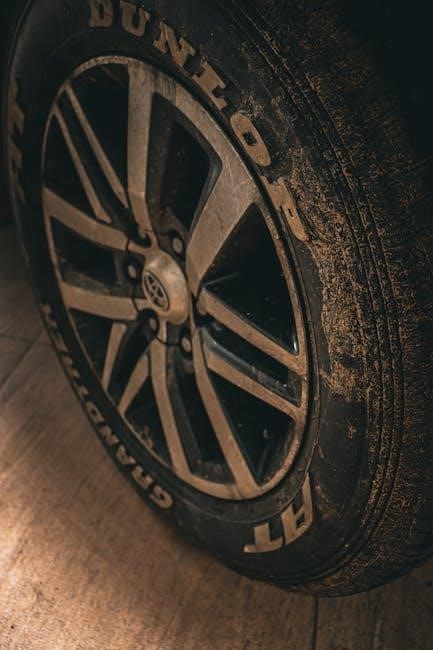
Tire Pressure and Maintenance
Maintaining correct tire pressure is crucial for the 2016 Subaru Crosstrek’s performance and safety. The recommended pressure, typically found on a sticker inside the driver’s side door jamb, ensures optimal handling and fuel efficiency. Regularly check tire pressure, especially with temperature changes.
Inspect tires for wear and damage, including cuts or bulges. Rotate tires according to the recommended schedule in the owner’s manual to promote even wear. Proper tire maintenance extends tire life and contributes to overall vehicle safety, enhancing your driving experience.
Fluid Checks and Replacements
Regular fluid checks are vital for the 2016 Subaru Crosstrek’s longevity. Inspect engine oil, coolant, brake fluid, power steering fluid, and windshield washer fluid levels frequently. Refer to the owner’s manual for specific fluid types and capacities.
Scheduled fluid replacements, including oil changes (especially with manual transmissions – using the correct oil is key!), coolant flushes, and brake fluid exchanges, prevent component damage. Maintaining proper fluid levels ensures optimal performance and prevents costly repairs, contributing to a reliable driving experience.

Safety Features & Systems
The 2016 Crosstrek boasts advanced safety, including airbags, ABS, VDC, and potentially EyeSight driver assist, detailed within the owner’s manual.
Airbag System
The 2016 Subaru Crosstrek’s airbag system is a crucial safety component, designed to provide occupant protection during collisions. The owner’s manual thoroughly explains the system’s operation, including the locations of the various airbags – front, side, and curtain airbags.
Understanding the system’s limitations is vital; airbags supplement seatbelts, they do not replace them. Proper seatbelt usage is always paramount. The manual details specific warnings regarding airbag deployment and potential hazards, particularly for children. It also outlines procedures for inspecting the airbag system and addresses what to do after an airbag deployment event, emphasizing the need for professional servicing.
Anti-lock Braking System (ABS)
The 2016 Subaru Crosstrek features an Anti-lock Braking System (ABS), enhancing braking performance and control, especially on slippery surfaces. The owner’s manual provides a detailed explanation of how ABS functions, emphasizing that it prevents wheel lock-up during hard braking.
Drivers should understand that applying firm, continuous pressure to the brake pedal is crucial when ABS activates – you may feel a pulsing sensation. The manual cautions against pumping the brakes, as this can reduce ABS effectiveness. It also details the ABS warning light and what it indicates, advising immediate inspection if illuminated. Proper ABS function is vital for safe driving.
Vehicle Dynamic Control (VDC)
The 2016 Subaru Crosstrek’s Vehicle Dynamic Control (VDC) system enhances stability by detecting and mitigating skids. The owner’s manual explains VDC uses sensors to monitor steering angle and vehicle direction, selectively applying brakes to individual wheels to correct oversteer or understeer.
It’s crucial to understand VDC isn’t a substitute for careful driving. The manual details the VDC warning light, indicating system malfunction or activation. Drivers should avoid abrupt steering or braking maneuvers, even with VDC engaged. The system can be temporarily disabled, but the manual advises against prolonged operation without VDC assistance.
EyeSight Driver Assist Technology
The 2016 Subaru Crosstrek’s EyeSight Driver Assist Technology, detailed in the owner’s manual, utilizes stereo camera technology to enhance safety. It features Adaptive Cruise Control, maintaining a safe distance from preceding vehicles, and Pre-Collision Braking, alerting the driver and potentially applying brakes to mitigate or avoid collisions.
Lane Departure Warning alerts drivers if the vehicle drifts from its lane without signaling. The manual emphasizes EyeSight is an assistive system, not a replacement for attentive driving. Drivers must remain aware of surroundings and be prepared to take control. System limitations, like adverse weather, are also explained.

In-Car Technology
The 2016 Crosstrek manual details Subaru Starlink, Bluetooth connectivity, and the navigation system, offering comprehensive guides for utilizing these in-car features effectively.
Subaru Starlink Multimedia System
Subaru Starlink, featured in the 2016 Crosstrek, is a sophisticated multimedia system detailed extensively within the vehicle’s manual. This system provides access to various features, including smartphone integration, streaming audio, and available navigation. The manual offers step-by-step instructions for pairing devices via Bluetooth, utilizing the touchscreen interface, and understanding voice command functionality.
Users can explore detailed explanations of Starlink’s apps, including Aha and Pandora, enhancing the driving experience. The manual also covers troubleshooting common issues and provides guidance on software updates. A dedicated section explains how to access and utilize the system’s safety features, ensuring responsible use while driving. Refer to resources like the multimedia system manual for visual aids.
Bluetooth Connectivity
The 2016 Subaru Crosstrek’s manual provides comprehensive instructions for establishing and managing Bluetooth connections. Pairing your smartphone allows for hands-free calling, audio streaming, and access to voice-controlled features through the Subaru Starlink system. The manual details the pairing process, including entering PIN codes and resolving potential connection issues.
It explains how to manage multiple paired devices, switch between them seamlessly, and adjust audio settings for optimal sound quality. Troubleshooting tips address common problems like intermittent connectivity or difficulty recognizing devices. The manual emphasizes the importance of safe Bluetooth usage while driving, promoting responsible operation of the system. Detailed guidance ensures a user-friendly experience.
Navigation System
The 2016 Subaru Crosstrek manual thoroughly explains the operation of the vehicle’s navigation system, integrated within the Subaru Starlink multimedia platform. It details how to input destinations, search for points of interest, and utilize map features for efficient route planning. The manual covers voice command functionality, allowing for hands-free operation while driving.
Users will find instructions on updating map data, customizing display settings, and interpreting guidance cues. Troubleshooting sections address common issues like GPS signal loss or inaccurate routing. The manual emphasizes safe navigation practices, advising drivers to prioritize road conditions and traffic laws. Detailed diagrams and step-by-step instructions ensure ease of use.

Troubleshooting & Emergency Procedures
The 2016 Crosstrek manual provides guidance on jump starting, tire changes, and emergency contacts, ensuring driver preparedness for unexpected roadside situations.
Jump Starting Procedures
Safely jump starting your 2016 Subaru Crosstrek requires careful adherence to specific procedures outlined in the owner’s manual. First, position a functioning vehicle close enough for the jumper cables to reach, avoiding contact between the cars. Connect the positive (+) cable to the positive terminal of the discharged battery, then to the positive terminal of the good battery.
Next, connect the negative (-) cable to the negative terminal of the good battery, and finally, to a grounded metal surface on the disabled Crosstrek – not directly to the negative terminal. Start the functioning vehicle, let it run for a few minutes, and then attempt to start the Crosstrek. Disconnect the cables in the reverse order of connection.
Always consult the manual for detailed diagrams and safety precautions to prevent damage to the vehicle’s electrical system.
Flat Tire Changing
Changing a flat tire on your 2016 Subaru Crosstrek involves several crucial steps detailed in the owner’s manual. First, safely pull over to a level surface, away from traffic, and activate your hazard lights. Gather the spare tire, jack, and lug wrench from their designated storage locations. Loosen the lug nuts on the flat tire before jacking up the vehicle.
Position the jack correctly on the vehicle’s frame, as illustrated in the manual, and raise the vehicle until the flat tire is off the ground. Fully remove the lug nuts, carefully remove the flat tire, and mount the spare. Hand-tighten the lug nuts, lower the vehicle, and then fully tighten them in a star pattern.
Remember to stow the flat tire and tools securely.
Emergency Contact Information
In case of emergencies involving your 2016 Subaru Crosstrek, having readily available contact information is vital. The owner’s manual recommends keeping the following numbers accessible: your local emergency services (911 in the US), Subaru Roadside Assistance (check your manual for the specific number), and your insurance provider’s emergency claim line.
Additionally, it’s prudent to store contact details for trusted family members or friends. Consider programming these numbers into your Subaru Starlink system for quick access. Keep a physical list in your glove compartment as a backup.
Knowing these contacts can significantly reduce stress during unforeseen events.

Technical Specifications
The 2016 Crosstrek’s manual details engine specs, dimensions, weight, and towing capacity. Access PDF resources for precise data regarding your vehicle’s capabilities.
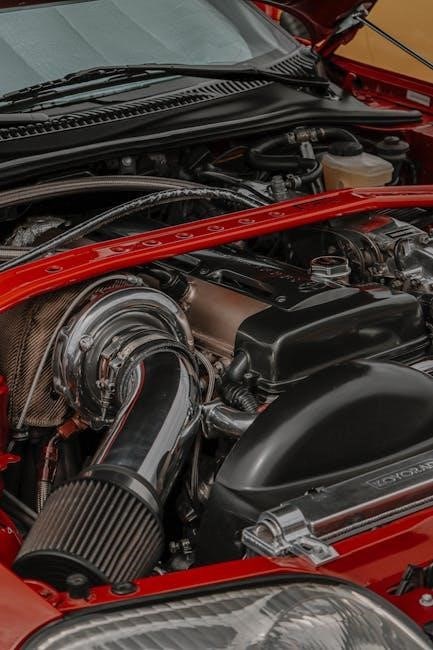
Engine Specifications
The 2016 Subaru Crosstrek primarily features a 2.0-liter FB20 four-cylinder engine, a horizontally opposed engine known for its balance and efficiency. This engine delivers 148 horsepower at 6,200 rpm and 145 lb-ft of torque at 4,200 rpm.
Manual transmission models utilize this engine configuration exclusively. The manual details the engine’s bore and stroke dimensions, compression ratio, and fuel injection system specifics. Owners manuals and technical service bulletins provide detailed insights into the engine’s performance characteristics and maintenance requirements, including recommended oil types for optimal operation.
Understanding these specifications is crucial for proper vehicle care and maximizing performance.
Dimensions and Weight
The 2016 Subaru Crosstrek boasts a compact footprint, measuring 176.9 inches in length, 70.1 inches in width, and 63.6 inches in height. Its wheelbase spans 105.1 inches, contributing to its agile handling. Owners manuals detail these dimensions for accessory compatibility and parking considerations.
Curb weight varies depending on the transmission; manual transmission models typically weigh around 3,120 pounds. This weight distribution impacts handling and fuel efficiency. Repair manuals often include detailed weight specifications for various components. Understanding these dimensions and weight figures is vital for safe operation and maintenance.
Towing Capacity
The 2016 Subaru Crosstrek is not generally recommended for regular towing due to its compact size and engine specifications. Owners manuals explicitly state a limited towing capacity, typically around 1,500 pounds with the proper equipment and precautions. Exceeding this limit can compromise vehicle stability and performance.
Repair manuals emphasize the importance of using a weight-distributing hitch and ensuring the trailer has its own independent braking system. Always consult your Crosstrek’s manual for specific guidelines and limitations. Prioritize safety and adhere to recommended weight limits to prevent damage and ensure a secure towing experience.

Warranty Information
The 2016 Crosstrek comes with a New Vehicle Limited Warranty; details are in the owners manual and service manual resources for comprehensive coverage information.
New Vehicle Limited Warranty
Subaru provides a comprehensive New Vehicle Limited Warranty for the 2016 Crosstrek, offering peace of mind to owners. This warranty covers defects in materials or workmanship under normal use and maintenance. Specific coverage durations apply to various components, including powertrain and emissions systems.
Detailed information regarding the warranty’s terms, conditions, exclusions, and claim procedures can be found within the official owners manual. It’s crucial to review this document to understand your rights and responsibilities. Service manual resources also offer insights into warranty-covered repairs and maintenance. Proper maintenance, as outlined in the manual, is essential for maintaining warranty validity.
Service Manual Resources
Accessing detailed service manuals is crucial for comprehensive 2016 Crosstrek maintenance and repair. Several online resources provide PDF versions of the factory repair manual, offering in-depth diagrams and procedures. Websites like sucross.com host valuable technical information and forums for Subaru enthusiasts.
These manuals cover everything from routine maintenance to complex repairs, aiding both DIY mechanics and professional technicians. Technical service bulletins (TSBs), like those available via NHTSA, provide updates and solutions to known issues. Utilizing these manuals ensures accurate diagnostics and effective repairs, maximizing vehicle longevity and performance.