NZXT H7 Flow Manual: A Comprehensive Guide
This manual details the H7 Flow’s features, offering guidance for building a modern gaming PC with expanded cooling support and competitive pricing.
The NZXT H7 Flow represents a significant update in the H-series case lineup, designed with a focus on optimized airflow and ease of building. This mid-tower case caters to enthusiasts seeking a balance between aesthetics, functionality, and affordability; It’s a fine pick for modern gaming PC builds, offering expanded cooling support to handle high-performance components.
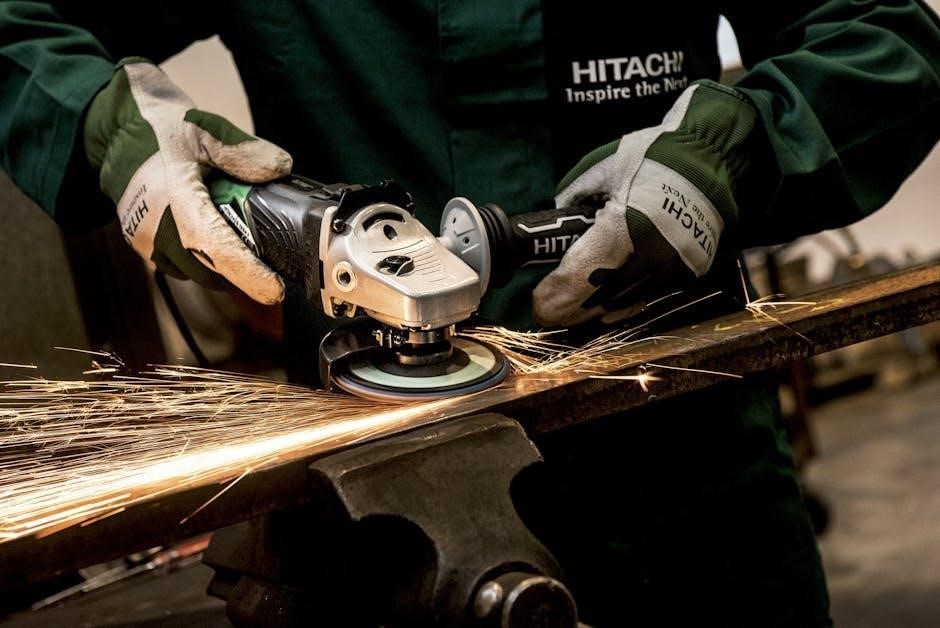
The H7 Flow distinguishes itself through its emphasis on airflow, as the name suggests. NZXT has engineered this chassis to maximize air intake and exhaust, ensuring efficient thermal management. This is crucial for maintaining stable performance and preventing overheating, especially with demanding hardware. Beyond performance, the H7 Flow aims to contain noise, providing a quieter computing experience. It’s a competitively priced option, making it accessible to a wider range of builders.
Unboxing and Component Overview
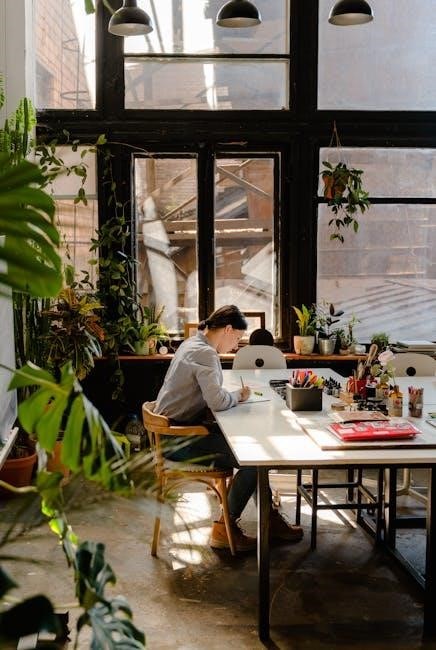
Upon unboxing the NZXT H7 Flow, you’ll find a meticulously packaged mid-tower case designed for streamlined PC building. The package includes the case itself, a detailed manual, a hardware kit containing screws, standoffs, and cable ties, and potentially some NZXT branding elements. Inspect all components for any shipping damage before proceeding.
The case features a sleek, minimalist exterior with a tempered glass side panel showcasing your build. Key components include the front and rear panels, side panels, internal chassis, and pre-installed fans (typically two). The H7 Flow’s internal layout prioritizes airflow, with ample space for components and cable management. Familiarize yourself with the front panel I/O, including USB ports and audio jacks, and the locations of mounting points for radiators and storage devices. The included accessories aid in a clean and organized build process.

Building with the NZXT H7 Flow
This section guides you through the core build process, covering motherboard, CPU cooler, GPU, and storage installation within the H7 Flow chassis.
Motherboard Installation
Preparing for motherboard installation within the NZXT H7 Flow begins with identifying the correct mounting standoffs; ensure they align with your motherboard’s screw holes. Carefully position the motherboard into the case, aligning the I/O shield with the opening in the rear panel. Gently lower the motherboard onto the standoffs, avoiding any accidental shorts.
Secure the motherboard using screws – do not overtighten! The H7 Flow’s spacious interior accommodates various motherboard sizes, including ATX, Micro-ATX, and Mini-ITX. Double-check that all standoffs are properly engaged before proceeding. Proper installation is crucial for system stability and preventing potential damage. Take your time and ensure a snug, secure fit for optimal performance and longevity of your build.
CPU Cooler Installation (Air & AIO)
The NZXT H7 Flow offers excellent compatibility for both air coolers and All-in-One (AIO) liquid coolers; For air coolers, install the appropriate mounting bracket onto the motherboard before installing the motherboard into the case. Ensure the bracket aligns with the CPU socket. For AIOs, determine the radiator placement – top or front are common options.
Mount the radiator with the included screws, ensuring a secure fit. Connect the AIO pump to the CPU fan header on the motherboard. When installing either cooler, apply thermal paste to the CPU heat spreader. Secure the cooler firmly, following the manufacturer’s instructions. The H7 Flow’s design provides ample clearance for large coolers, maximizing cooling potential.
GPU Installation and Considerations
Installing your graphics card into the NZXT H7 Flow is straightforward, but requires attention to detail. First, locate the rear I/O shield cutouts corresponding to your GPU’s port configuration and remove the appropriate covers. Align the GPU with the top-most PCIe x16 slot and firmly press down until it clicks into place. Secure the card with screws to the case.
Consider the GPU’s length; the H7 Flow supports substantial cards, but verify compatibility with your specific model. Ensure adequate airflow around the GPU by managing cables effectively. The case’s airflow design facilitates efficient heat dissipation, crucial for high-performance GPUs. Monitor temperatures post-installation to confirm optimal cooling performance.
Storage Device Installation (SSD/HDD)
The NZXT H7 Flow offers versatile storage options for both SSDs and HDDs. Locate the designated drive bays – typically at the bottom or rear of the case. For 2.5” SSDs, utilize the dedicated mounting points, securing them with screws. 3.5” HDDs fit into the larger bays, often requiring tool-less mechanisms or screws for installation.
Ensure SATA data and power cables are connected securely to the storage devices and the motherboard/power supply. Proper cable management is key to maintaining airflow. Consider SSD placement for optimal cooling, as they can be sensitive to heat. The H7 Flow’s layout allows for flexible storage configurations, accommodating multiple drives.

Cooling System Management
Effectively managing the H7 Flow’s cooling involves strategic fan placement, radiator support, and airflow optimization for peak performance and component longevity.
Fan Configuration and Placement
The NZXT H7 Flow’s design prioritizes airflow, offering multiple mounting locations for optimal cooling configurations. Front panel placement typically accommodates up to two 140mm or three 120mm fans, drawing cool air into the chassis. The top panel supports similar configurations for exhaust, removing warm air efficiently.
Rear and bottom fan mounts further enhance airflow, allowing for customized setups based on component needs. Consider positive pressure – more intake than exhaust – to minimize dust buildup. Utilizing the included fan screws ensures secure mounting. Experiment with fan speeds via motherboard controls or an NZXT RGB & Fan Controller (sold separately) to balance cooling performance and noise levels. Proper fan orientation is crucial; ensure airflow direction aligns with the intended cooling path.
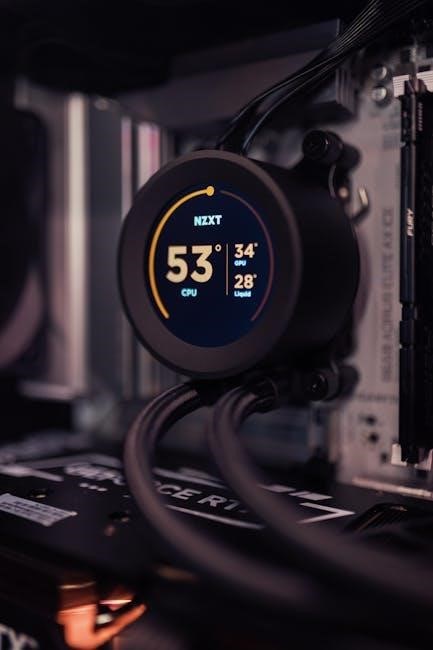
Radiator Support and Liquid Cooling
The NZXT H7 Flow provides extensive support for liquid cooling solutions, catering to both All-in-One (AIO) coolers and custom loops. The front panel accommodates radiators up to 360mm, while the top panel supports radiators up to 280mm, offering flexibility in cooler selection. Ensure sufficient clearance for components when installing larger radiators.
Mounting AIO coolers is straightforward, utilizing existing fan mounting points. Custom loops require careful planning and component selection, considering pump and reservoir placement. The case’s cable management channels assist in routing tubing neatly; Prioritize radiator placement to maximize airflow and heat dissipation. Compatibility with various radiator thicknesses should be verified before purchase.
Airflow Optimization Techniques
Maximizing airflow within the NZXT H7 Flow is crucial for optimal component cooling and system stability. Utilize the case’s perforated front panel to encourage unrestricted intake. Strategically position fans to create a positive pressure environment, minimizing dust accumulation. Consider a front intake, rear exhaust, and optional top exhaust configuration.
Ensure proper cable management to avoid obstructing airflow pathways. Components generating significant heat, like the CPU and GPU, should receive direct airflow. Experiment with fan curves in your BIOS or using NZXT’s CAM software to balance cooling performance and noise levels. Regularly clean dust filters to maintain optimal airflow efficiency. Prioritize unobstructed vents for effective heat expulsion.

Cable Management
Effective cable management within the H7 Flow enhances airflow and aesthetics, utilizing dedicated channels, Velcro straps, and ties for a clean build.
Routing and Concealing Cables
The NZXT H7 Flow prioritizes clean builds with a thoughtfully designed cable management system. Begin by routing major cables—like the 24-pin ATX and EPS—behind the motherboard tray, utilizing the generous space provided. This minimizes obstruction of airflow within the main chamber;
Take advantage of the numerous cutouts strategically placed around the motherboard to guide cables efficiently. For peripheral cables (SATA, fan headers), aim to run them along the edges of the case, keeping them tucked away from components. The H7 Flow’s side panel design allows for easy access and concealment;
Consider the path of cables before connecting them, planning for a tidy arrangement. Prioritize hiding cables behind the motherboard tray whenever possible, creating a visually appealing and functionally optimized interior.
Using the Cable Management Channels
The NZXT H7 Flow features dedicated cable management channels, crucial for achieving a clean and organized build. These channels run behind the motherboard tray and along the floor of the case, providing ample space to conceal excess cabling. Utilize these pathways to route cables away from critical components, maximizing airflow and improving thermal performance.
Start by feeding cables through the strategically placed rubber grommets in the motherboard tray. These grommets protect cables from sharp edges and provide a secure routing point. The channels are designed to accommodate multiple cables, but avoid overfilling them to maintain accessibility.
Remember to plan your cable runs before connecting everything, ensuring a smooth and efficient process. Proper use of these channels significantly enhances the aesthetic appeal of your build.
Velcro Straps and Cable Ties
To further refine cable management within the NZXT H7 Flow, utilize the included Velcro straps and consider additional cable ties. These tools are essential for bundling and securing cables within the designated management channels, preventing them from obstructing airflow or interfering with components.
The Velcro straps are reusable and gentle on cables, allowing for easy adjustments during the build process. Wrap them around groups of cables, tightening them securely but not excessively. Cable ties offer a more permanent solution for tidying up particularly unruly cables.
Focus on grouping cables logically, such as power cables together and signal cables separately. This approach simplifies troubleshooting and future upgrades. A well-managed cable system contributes to a cleaner, more efficient, and visually appealing PC build.

Front Panel I/O and Connectivity
Explore the H7 Flow’s front panel, understanding USB port functions, audio jack configurations, and the operation of the power and reset buttons.
USB Port Functionality
The NZXT H7 Flow’s front panel boasts a selection of USB ports designed for diverse connectivity needs. Typically, you’ll find USB 3.2 Gen 1 Type-A ports, offering rapid data transfer speeds for peripherals like keyboards, mice, and external storage devices.
These ports are backward compatible with USB 2.0 and 1.1 devices, ensuring broad compatibility. Additionally, the H7 Flow often includes a USB Type-C port, providing even faster data transfer rates and supporting Power Delivery (PD) for charging compatible smartphones and tablets.

Understanding the different USB standards is crucial for optimal performance. USB 3.2 Gen 1 offers speeds up to 5Gbps, while USB Type-C with PD can deliver significant power for quick charging. Refer to your motherboard manual to confirm the specific capabilities of each port connected to the front panel.
Audio Jack Configuration
The NZXT H7 Flow’s front panel audio jacks provide convenient connectivity for headphones, microphones, and speakers, enhancing your audio experience. Typically, you’ll find separate 3.5mm jacks for headphones and microphones, often color-coded for easy identification – usually green for headphones and pink for microphones.
These jacks are directly connected to your motherboard’s audio chipset, delivering high-quality sound. Ensure you plug your devices into the correct jacks to guarantee proper functionality; incorrect placement can result in muted audio or microphone issues.
For optimal audio performance, consult your motherboard manual to understand the specific audio capabilities and any supported enhancements. Some motherboards offer advanced audio features like impedance matching or noise cancellation, which can be configured through the BIOS or dedicated software.
Power Button and Reset Button
The NZXT H7 Flow features prominently placed front panel power and reset buttons, essential for controlling your system. The power button initiates the boot sequence, turning your computer on or off, while the reset button provides a quick way to restart the system without a full shutdown.
These buttons connect to your motherboard via designated pins; ensure these connections are secure during the build process. Incorrect connections can prevent the buttons from functioning correctly. Refer to your motherboard manual for the precise pin layout.
Beyond basic functionality, some motherboards allow customization of these buttons through the BIOS, enabling features like delayed shutdown or wake-on-LAN. Properly functioning buttons are crucial for troubleshooting and maintaining your system’s operational status.
Maintenance and Troubleshooting
Regular cleaning of the case and filters is vital, alongside addressing common issues and utilizing NZXT’s support resources for optimal performance.
Cleaning the Case and Filters
Maintaining a clean internal environment is crucial for optimal cooling and system longevity. Dust accumulation significantly restricts airflow, leading to increased component temperatures and potential performance throttling. Regularly inspect and clean the H7 Flow’s filters, located on the front, top, and bottom of the case.
These filters are easily removable for cleaning; gently wash them with lukewarm water and allow them to dry completely before reinstallation. Use a soft brush or compressed air to remove dust from the case’s interior, paying particular attention to fans, heatsinks, and radiators. Avoid using harsh chemicals or abrasive cleaners, as these can damage components.
A consistent cleaning schedule – every three to six months, depending on your environment – will ensure your H7 Flow continues to provide excellent cooling performance and protect your valuable hardware. Remember to power off and unplug the system before commencing any cleaning procedures.
Addressing Common Issues
If you encounter problems with your NZXT H7 Flow, several troubleshooting steps can resolve common issues. First, ensure all cables are securely connected, both internally and to the front panel I/O. Check fan operation; if a fan isn’t spinning, verify its connection to the motherboard or fan controller.
Overheating can often be traced to dust buildup – refer to the ‘Cleaning the Case and Filters’ section. If your system fails to power on, double-check the power supply connection and ensure the power supply switch is flipped to the ‘on’ position.
For USB or audio port malfunctions, confirm proper driver installation and compatibility. If issues persist, consult the NZXT support resources (see the final section) for detailed troubleshooting guides and potential solutions. Remember to document any error messages for efficient support assistance.
NZXT Support Resources
NZXT provides extensive support for the H7 Flow, ensuring a smooth building experience. The primary resource is the official NZXT website, featuring a comprehensive FAQ section addressing common queries and troubleshooting steps. Their support portal allows you to submit direct support tickets for personalized assistance with specific issues.
NZXT’s online knowledge base contains detailed articles, build guides, and compatibility information. Active community forums offer a platform to connect with other H7 Flow users, share experiences, and find solutions.
For visual learners, NZXT’s YouTube channel hosts numerous build guides and tutorials. Social media channels, like Twitter and Facebook, provide updates and quick responses to general inquiries. Don’t hesitate to leverage these resources for optimal support.