Stihl 180 Manual: A Comprehensive Guide
This comprehensive guide details the operation and maintenance of the Stihl MS 180 chainsaw, covering safety, assembly, starting, and troubleshooting for optimal performance.
Understanding this manual ensures safe and efficient use, preventing damage to the tool and potential harm to the operator, as outlined in provided instructions.
Always prioritize safety precautions and adhere to the guidelines for personal protective equipment, kickback prevention, and proper cutting techniques for responsible operation.

The Stihl MS 180 is a lightweight, gasoline-powered chainsaw designed for homeowners and occasional users. It’s renowned for its ease of use, reliable performance, and compact design, making it ideal for various tasks like pruning, cutting firewood, and light felling.
This manual provides essential information for safe and effective operation, covering everything from initial setup to routine maintenance. Understanding the chainsaw’s components and adhering to safety guidelines are crucial for preventing accidents and maximizing its lifespan.
Proper use, as detailed within, ensures optimal cutting performance and minimizes the risk of injury to the operator and bystanders. Always consult this guide before operating the Stihl MS 180.
Safety Precautions
Operating a chainsaw demands strict adherence to safety protocols. Always wear appropriate Personal Protective Equipment (PPE), including a helmet, eye protection, hearing protection, gloves, and chainsaw chaps. Be acutely aware of potential kickback hazards, maintaining a firm grip and proper stance.
Never operate the chainsaw with one hand, and ensure a secure footing. Inspect the surrounding area for obstacles and bystanders, maintaining a safe working distance. Avoid cutting above shoulder height, and always shut off the engine before refueling or performing maintenance.
Familiarize yourself with emergency stop mechanisms and understand the risks associated with improper use.
Personal Protective Equipment (PPE)
Essential PPE is crucial when operating the Stihl 180. A certified helmet safeguards against falling debris, while safety glasses or a face shield protect your eyes. Hearing protection, like earmuffs, minimizes noise exposure. Heavy-duty, cut-resistant gloves enhance grip and offer hand protection.
Chainsaw chaps are vital, providing leg protection against accidental contact with the chain. Sturdy, steel-toed boots offer foot protection and stability. Appropriate clothing should be snug-fitting, avoiding loose garments that could get caught.

Regularly inspect PPE for damage, replacing worn or compromised items immediately.
Kickback Prevention
Kickback, a sudden, forceful upward or backward movement of the chainsaw, is a significant hazard. Avoid cutting with the upper quadrant of the bar’s tip, as this is the primary kickback zone. Maintain a firm grip with both hands, keeping your thumbs wrapped around the handles.
Always stand to the side of the cutting path, never directly behind the saw. Be mindful of hidden obstacles like branches or nails that can cause kickback. Utilize a reduced-kickback chain and bar combination for increased safety.
Proper chain sharpness is vital; a dull chain increases kickback risk.
Understanding the Components
The Stihl 180 chainsaw comprises several key components. The engine provides power, while the chain and bar facilitate cutting. Familiarize yourself with the location and function of controls like the on/off switch, throttle trigger, and choke.
The fuel tank holds the fuel mixture, and the oil tank contains chain lubricant. Understanding these parts is crucial for proper assembly, operation, and maintenance.
Regularly inspect each component for wear or damage, ensuring optimal performance and safety. Refer to diagrams within the manual for detailed identification.

Engine Overview
The Stihl 180 utilizes a 2-stroke engine, known for its power-to-weight ratio and simplicity. This engine requires a precise fuel-to-oil mixture for lubrication and optimal combustion.
Key engine components include the cylinder, piston, and crankshaft, all working in unison to generate power. Proper air filtration is vital, preventing debris from damaging internal parts.
Regular maintenance, such as spark plug checks and air filter cleaning, ensures reliable engine performance. Understanding the engine’s basic operation is essential for troubleshooting and longevity.
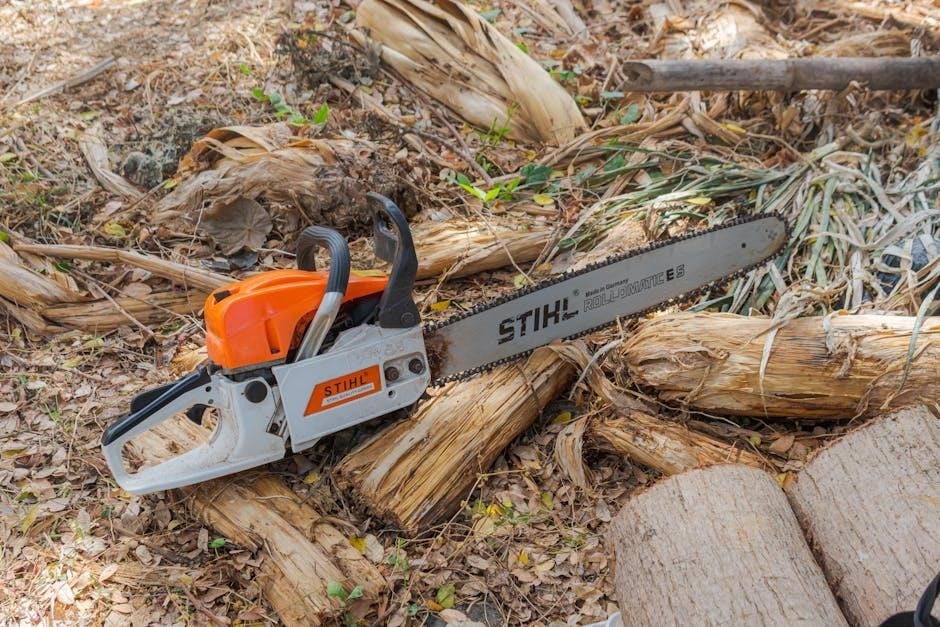
Chain and Bar Details
The Stihl 180 chainsaw employs a roller-matic chain, designed for efficient cutting and reduced kickback risk. Chain pitch and gauge must match the bar specifications for safe operation.
The guide bar provides support and direction for the chain, requiring regular maintenance to ensure smooth movement. Bar rails should be filed to the correct height, maintaining optimal cutting performance.
Chain tension is critical; too loose causes derailment, while too tight strains the engine. Inspect the chain frequently for damage, replacing it when necessary for continued safety.
Controls and Switches
The Stihl 180 features a straightforward control layout, including a combined on/off switch and choke control. This switch activates the engine and engages the choke for cold starts.
A throttle trigger regulates engine speed, providing proportional control over cutting power. The throttle lockout button prevents accidental throttle engagement, enhancing safety during operation and transport.
The decompression lever reduces compression, aiding in easier starting by lessening the force needed to pull the starter cord. Familiarize yourself with each control’s function before operating the chainsaw.
Assembly Instructions
Before first use, some assembly is required. Carefully unpack all components and verify everything is present. Begin by attaching the chain to the bar, ensuring the drive links face the correct direction as indicated by the arrow markings.
Next, install the bar onto the chainsaw, aligning the bar mounting studs with the corresponding holes in the anti-vibration system. Secure the bar with the bar nut, tightening it firmly but not excessively.
Always double-check the chain tension after initial assembly and periodically during use to maintain optimal cutting performance and prevent chain derailment.
Attaching the Chain
Begin by positioning the bar on a stable surface. Carefully feed the chain into the bar’s groove, ensuring the drive links (with the rivets facing outwards) engage with the sprocket. Verify the chain’s cutting edges point in the correct rotational direction.

Once the chain is fully seated, align the chain with the bar and carefully place it around the sprocket. Ensure the chain is not twisted or pinched during installation. Proper chain seating is crucial for safe operation.
Always refer to the manual’s diagrams for visual guidance on correct chain installation.
Bar Installation
Before installing the bar, inspect the chainsaw’s mounting studs for cleanliness and damage. Position the bar onto the studs, aligning the bar’s mounting holes with the studs. Ensure the bar’s oil holes are correctly oriented for lubrication.
Secure the bar with the bar nut, tightening it by hand initially. Then, using the provided wrench, tighten the nut to the manufacturer’s specified torque. Avoid over-tightening, which can damage the bar or studs.
Verify the bar is securely fastened and moves freely. A properly installed bar is essential for safe and efficient cutting.
Starting the Chainsaw
Before starting, ensure the chainsaw is on a firm, level surface and the chain brake is engaged. Verify proper fuel mixture and fuel level. Activate the choke for cold starts, and disengage it for warm starts.
Engage the on/off switch and pull the starter cord with a firm, steady motion. Avoid jerking the cord, as this can damage the starter mechanism. Once the engine sputters, disengage the choke and continue pulling until it starts.
Release the chain brake and allow the engine to warm up before use.
Fueling and Mixing Ratio
The Stihl 180 requires a precise fuel mixture of unleaded gasoline and high-quality 2-stroke engine oil. The recommended ratio is 50:1 – meaning 50 parts gasoline to 1 part oil. Always use fresh fuel and avoid ethanol blends exceeding 10%.
Carefully measure the oil and gasoline before mixing, using a dedicated fuel container. Thoroughly shake the mixture to ensure proper blending; Never use straight gasoline, as it will damage the engine.
Always refuel in a well-ventilated area, away from sparks or flames.
Cold Start Procedure
To cold start your Stihl 180, ensure the chain brake is engaged and the machine is on a flat surface. Activate the choke by moving the choke lever to the “start” position. Slowly pull the starter cord with a firm, steady motion until the engine attempts to start.
Once the engine sputters, disengage the choke and pull the starter cord again. Repeat if necessary. After starting, allow the engine to warm up briefly before use.
Never flood the engine by repeatedly pulling the starter cord with the choke engaged.
Warm Start Procedure
For a warm start on your Stihl 180, disengage the choke. The engine retains some heat, eliminating the need for choking in most cases. Firmly press the decompression lever to reduce resistance, then pull the starter cord with a smooth, consistent motion.
Avoid excessive pulling; the engine should start relatively easily. If it doesn’t, briefly engage the choke and try again.
Never use the choke for extended periods during a warm start, as this can flood the engine.
Operational Instructions
Before each use, inspect the Stihl 180 for damage, ensuring the chain is sharp and properly tensioned. Always maintain a firm grip with both hands, keeping a safe distance from the cutting area. Utilize proper cutting techniques, avoiding pinching the bar.
Be aware of your surroundings, looking for obstacles like roots or stones. Never work alone; maintain audible communication with others.
Always shut off the engine before moving to a new cutting location or performing any maintenance.
Proper Cutting Techniques
Employ a firm stance and secure grip when operating the Stihl 180, maintaining control at all times. Utilize the lower portion of the bar for felling, avoiding pinching. Plan your cuts carefully, considering the tree’s lean and potential roll direction.
Avoid cutting above shoulder height, as this increases the risk of losing control. Never cut with the tip of the bar, minimizing kickback potential. Always be mindful of hidden obstacles.
Release cutting pressure as the bar nears completion, preventing binding and ensuring a clean cut.
Felling Small Trees
When felling smaller trees with your Stihl 180, assess the natural lean and clear the surrounding area of obstacles and bystanders. Create a notch on the side facing the desired fall direction, approximately one-third of the tree’s diameter.
Follow with a back cut, slightly higher than the notch base, leaving a hinge to control the fall. Avoid cutting completely through, maintaining hinge integrity.
Utilize wedges if necessary to guide the tree’s descent and prevent pinching of the bar. Be prepared to move quickly away from the falling tree’s path.
Maintenance and Care
Regular maintenance is crucial for your Stihl 180’s longevity. Consistent chain sharpening ensures efficient cutting and reduces strain on the engine. Inspect the bar frequently for wear and damage, filing down burrs and maintaining proper tension.
Clean the air filter after each use, or more often in dusty conditions, to maintain optimal engine performance. Regularly check and tighten all nuts and bolts. Proper care prevents costly repairs and ensures safe operation.
Adhering to a maintenance schedule will maximize the lifespan and reliability of your chainsaw.
Chain Sharpening
Maintaining a sharp chain is vital for safe and efficient cutting. Use a round file of the correct size, guided by a sharpening guide, to restore the cutting angles. Ensure all cutters are filed to the same length and depth.
Pay attention to the depth gauges, filing them down if necessary to maintain proper cutting performance. A dull chain requires more force, increasing kickback risk. Regular sharpening extends chain life and reduces engine strain.
Professional sharpening is recommended if you’re unfamiliar with the process.
Bar Maintenance
Regular bar maintenance ensures smooth chain operation and prolongs its lifespan. Clean the bar groove frequently to remove sawdust and debris, preventing binding and wear. Inspect the bar rails for burrs or damage, filing them smooth if needed.

Periodically reverse the bar to distribute wear evenly. Check the bar for straightness; a bent bar can cause chain derailment and damage. Lubricate the bar regularly with bar and chain oil to reduce friction.
Replace the bar when worn or damaged beyond repair.

Air Filter Cleaning
Maintaining a clean air filter is crucial for engine performance. Regularly inspect the air filter for dirt and debris; a clogged filter restricts airflow, reducing power and increasing fuel consumption. Remove the filter cover and gently clean the filter element.
For paper filters, tap lightly to dislodge dirt or use compressed air, blowing from the inside out. Foam filters can be washed in warm, soapy water, rinsed thoroughly, and allowed to dry completely before re-oiling.
Replace the air filter when damaged or excessively dirty.
Troubleshooting Common Issues
Encountering problems with your Stihl 180? This section addresses frequent issues. If the engine won’t start, check fuel levels, spark plug condition, and ensure the choke is properly engaged. A chain that stops moving may indicate a blocked bar, insufficient chain oil, or a worn-out drive sprocket.
Always disconnect the spark plug wire before inspecting or repairing the chainsaw. Refer to the manual for detailed diagnostics and solutions. If issues persist, consult a qualified Stihl dealer for professional assistance.
Engine Won’t Start
A non-starting engine is a common issue. First, verify adequate fuel in the tank and the correct fuel mixing ratio. Inspect the spark plug for fouling or damage, cleaning or replacing it as needed. Ensure the choke is engaged for cold starts and disengaged for warm restarts.
Check the air filter for obstructions, as a clogged filter restricts airflow. Confirm the spark plug wire is securely connected. If problems continue, a carburetor issue may exist, requiring professional attention.
Chain Stops Moving
If the chain stops during operation, immediately shut off the engine. A common cause is a clogged chain brake; release and re-engage it to ensure proper function. Inspect the chain for tightness – a loose chain can slip off the bar. Verify adequate chain oiler lubrication, as insufficient oil causes excessive friction.
Check for debris obstructing the chain or bar. A damaged drive sprocket or clutch can also halt chain movement, potentially requiring professional repair or replacement.
Fuel System Maintenance
Maintaining a clean fuel system is crucial for reliable Stihl 180 performance. Regularly replace the fuel filter to prevent debris from reaching the carburetor, ensuring smooth engine operation. Periodically inspect fuel lines for cracks or leaks, replacing them as needed.
Carburetor adjustments may be necessary if the engine runs poorly; however, this is best left to a qualified technician to avoid improper settings and potential damage. Always use fresh fuel and stabilizer for optimal results.
Fuel Filter Replacement
Regular fuel filter replacement is vital for a properly functioning Stihl 180. Locate the fuel filter within the fuel tank, typically accessible by removing the fuel tank cap. Carefully disconnect the fuel lines, noting their positions for reassembly.
Remove the old filter and install a new one, ensuring a secure fit. Reconnect the fuel lines correctly, and firmly replace the fuel tank cap. This simple maintenance step prevents debris from clogging the carburetor, ensuring optimal engine performance.
Carburetor Adjustment
Adjusting the carburetor on your Stihl 180 requires precision. Begin by ensuring the air filter is clean. Locate the carburetor adjustment screws – typically labeled ‘H’ (high speed) and ‘L’ (low speed). Warm up the engine before making adjustments.
Turn the ‘L’ screw for idle speed and mixture, then the ‘H’ screw for high-speed performance. Small adjustments are key; listen for smooth engine operation. If unsure, consult a qualified Stihl service technician to avoid damaging the engine.
Storage Guidelines
Proper storage preserves your Stihl 180’s longevity. Before long-term storage, thoroughly clean the chainsaw, removing sawdust and debris. Drain the fuel tank completely to prevent gumming and corrosion within the fuel system. Consider adding fuel stabilizer to any remaining fuel.
Store the chainsaw in a dry, secure location, away from direct sunlight and extreme temperatures. Remove the chain and bar, applying oil for rust prevention. Always engage the chain brake for added safety during storage.
Long-Term Storage Preparation

Preparing your Stihl 180 for extended storage is crucial. Begin by completely draining the fuel tank and running the engine until it stalls to remove residual fuel. Clean the chainsaw thoroughly, removing all sawdust and debris from the engine and cooling fins.
Apply a light coating of oil to the chain and bar to prevent rust formation. Store the chainsaw in a dry, dust-free environment, ideally in its case. Disconnect the spark plug wire for an extra safety measure during prolonged inactivity.
Fuel Stabilization
To prevent fuel degradation during storage, utilize a fuel stabilizer. Add the stabilizer to fresh fuel according to the manufacturer’s instructions, ensuring thorough mixing. Run the engine for a few minutes to circulate the stabilized fuel throughout the fuel system.
Stabilized fuel maintains its combustibility for extended periods, preventing gum and varnish buildup in the carburetor. This simplifies restarting after long-term storage and avoids costly repairs. Always refer to the Stihl documentation for recommended stabilizer types and ratios.
Technical Specifications
The Stihl MS 180 boasts a 2-stroke engine with a displacement of 45.4 cc (2.77 cu in), delivering 2.3 kW (3.1 hp) of power. Its fuel tank capacity is 0;25 liters (8.5 fl oz), and the oil tank holds 0.18 liters (6.1 fl oz).
The chainsaw weighs 4.9 kg (10.8 lbs) without a bar and chain. Recommended bar lengths range from 30 cm to 40 cm (12” to 16”). Chain pitch is 3/8” with a gauge of 0.050”. These specifications ensure optimal performance and efficiency.
Warranty Information
Stihl offers a limited warranty on the MS 180 chainsaw, covering defects in materials and workmanship. The standard warranty period is typically one year from the date of purchase for homeowner use. Commercial or professional use may have a shorter warranty duration, often 90 days;
This warranty excludes normal wear and tear, improper maintenance, or damage caused by misuse. Registration of your Stihl product is recommended to validate warranty coverage. Contact your local Stihl dealer for complete warranty details and claim procedures.
Stihl Dealer Locator
Finding a qualified Stihl dealer is crucial for purchasing genuine parts, receiving expert service, and accessing warranty support for your MS 180 chainsaw. Stihl maintains an extensive network of authorized dealers across the country, offering sales, repairs, and maintenance services.
To locate the nearest dealer, visit the official Stihl website and utilize their dealer locator tool. You can search by zip code or city to find nearby locations, along with contact information and operating hours. Support your local dealer for continued assistance!
Frequently Asked Questions (FAQ)
Q: Where can I find a downloadable Stihl 180 manual? A: Official manuals are available on the Stihl website or through authorized dealers. Q: What fuel mix ratio is recommended? A: Typically a 50:1 ratio of gasoline to high-quality 2-stroke oil is advised.
Q: How do I prevent kickback? A: Always maintain a firm grip, avoid cutting with the upper quadrant of the bar, and be aware of hidden obstacles. Q: What if my chainsaw won’t start? A: Check fuel levels, spark plug, and air filter.
Important Safety Warnings Recap
Always wear appropriate Personal Protective Equipment (PPE), including a helmet, eye protection, hearing protection, gloves, and chainsaw chaps. Be acutely aware of kickback hazards and utilize the chain brake effectively. Never operate the chainsaw with one hand or attempt reach cuts.
Inspect the chainsaw before each use, ensuring all parts are secure and functioning correctly. Maintain a safe distance from bystanders and be mindful of surrounding obstacles. Avoid operating the chainsaw when fatigued or under the influence.

Resources and Further Information
For additional support and detailed information regarding your Stihl MS 180, visit the official Stihl website for downloadable manuals, safety guides, and frequently asked questions. Locate authorized Stihl dealers through the dealer locator on their website for professional service and genuine parts.
Explore online forums and communities dedicated to chainsaw users for shared experiences and troubleshooting tips. Consider enrolling in a chainsaw safety training course to enhance your operational skills and knowledge. Remember to always prioritize official Stihl documentation.