Monthly Archive March 27, 2026

Bytrace

st john ambulance first aid manual

This authoritative manual, created with leading UK first-aid organizations, delivers vital knowledge for handling emergencies․
It provides user-friendly, step-by-step guidance for over 100 conditions,
empowering individuals with essential life-saving skills and confidence․

What is the St․ John Ambulance?

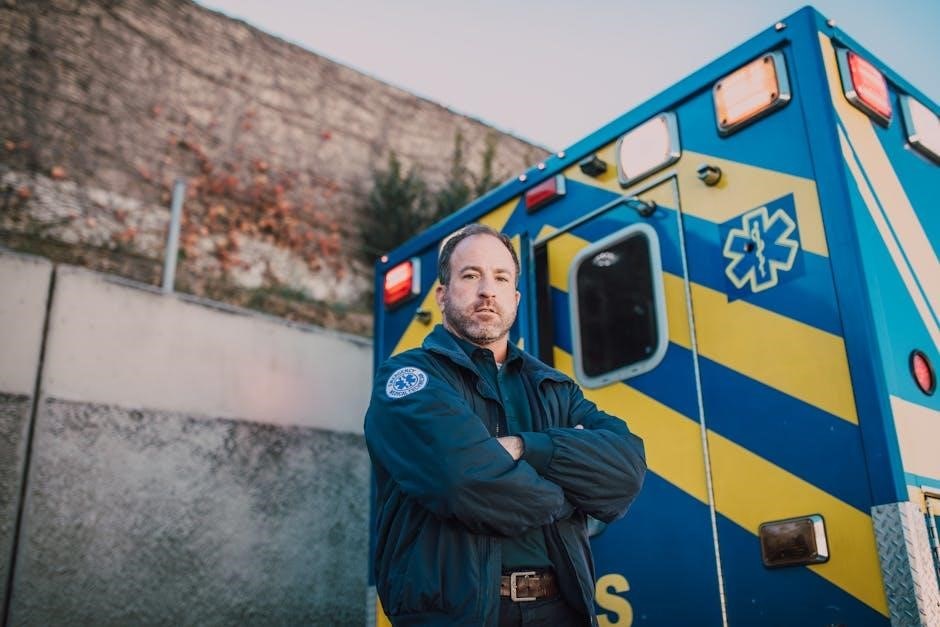
St; John Ambulance is a renowned charitable organization and the leading first aid provider in the nation․ Dedicated to saving lives, it operates through a vast network of highly trained volunteers․ These individuals provide crucial first aid support at public events, respond to emergency calls assisting the National Health Service (NHS), and offer vital assistance to local ambulance services․

The organization’s core mission centers around raising first aid standards across communities․ They achieve this through comprehensive training programs, equipping individuals with the skills to confidently handle medical emergencies․ St․ John Ambulance collaborates with other leading first aid bodies, including St․ Andrews Ambulance Association and the British Red Cross, to ensure consistent, high-quality advice and training․ Their commitment extends to preventing accidents and promoting health and safety, ultimately striving to ensure no one dies unnecessarily due to a lack of immediate care․

The Importance of First Aid Training

First aid training is undeniably crucial, equipping individuals with the knowledge and skills to provide immediate assistance until professional medical help arrives․ This training empowers people to confidently respond to a wide range of emergencies, potentially making the difference between life and death, or minimizing the severity of an injury․

The St․ John Ambulance First Aid Manual emphasizes that having someone present who knows what to do during a medical crisis is invaluable; From minor cuts and burns to more serious incidents like traffic accidents, being prepared can significantly improve outcomes․ Effective first aid not only addresses the immediate physical needs of a casualty but also provides reassurance and support․ Investing in first aid training fosters a sense of community responsibility and builds confidence in handling unexpected, stressful situations, ultimately contributing to safer environments for everyone․

Scope of the Manual: Covering 100+ Conditions

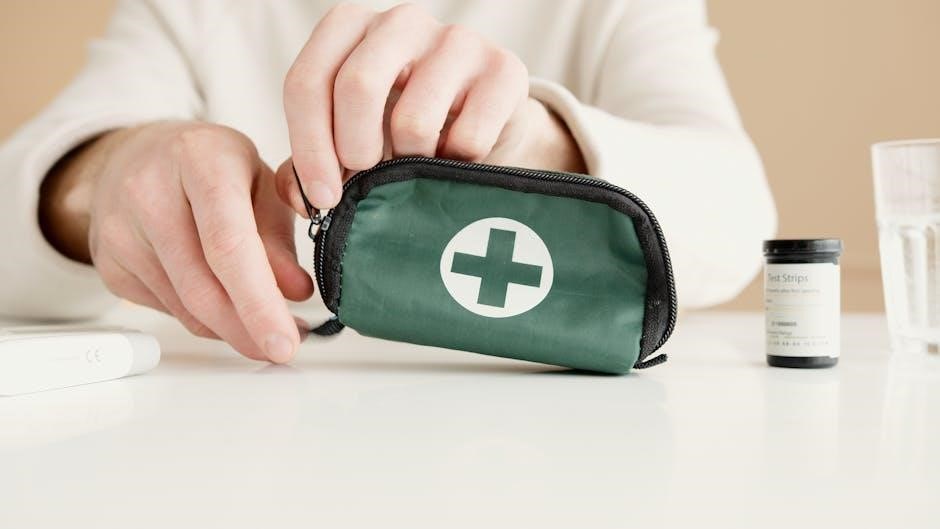
The St․ John Ambulance First Aid Manual boasts an impressively comprehensive scope, detailing how to address over 100 distinct medical conditions and injuries․ This extensive coverage ranges from commonplace occurrences like minor cuts, scrapes, and burns, to more critical situations such as severe wounds and the aftermath of traffic accidents․

The manual doesn’t just focus on treatment; it also includes guidance on accessing casualties and ensuring personal protection – vital considerations for any first responder․ It’s designed to be a complete resource, offering step-by-step instructions that are both easy to learn and readily recalled in emergency scenarios․ This breadth of information makes it an invaluable asset for anyone seeking to be prepared for a diverse array of potential health crises, providing the knowledge needed to offer effective initial support․

Basic Life Support (BLS)

BLS techniques, detailed within the manual, prioritize safety, responsiveness checks, and promptly summoning emergency services․
It covers crucial skills like CPR for adults, children, and infants, alongside effective choking interventions․

Assessing the Situation & Ensuring Safety

Prior to providing any aid, the St․ John Ambulance manual emphasizes a thorough assessment of the scene and ensuring personal safety․ This initial step is paramount, protecting both the rescuer and the casualty from further harm․ It involves identifying any immediate dangers – traffic, electricity, unstable structures, or hazardous materials – and taking steps to mitigate those risks․

The manual stresses the importance of wearing appropriate personal protective equipment (PPE) when available, such as gloves, to prevent the transmission of infection․ A rapid assessment of the number of casualties and the nature of their injuries is also crucial․ This allows for effective prioritization of care, focusing on those with life-threatening conditions first․

Understanding the mechanism of injury or the nature of the illness helps anticipate potential complications․ Finally, the manual highlights the need to maintain situational awareness throughout the entire rescue process, constantly monitoring for changes in the environment or the casualty’s condition․

Checking for Responsiveness

The St․ John Ambulance manual details a systematic approach to determining a casualty’s level of consciousness․ Initially, approach the person and gently shake their shoulder, while simultaneously shouting, “Are you alright?” or “Can you hear me?”․ This dual stimulation – tactile and auditory – is crucial for eliciting a response․

Observe for any signs of responsiveness, including movement, verbal communication, or even a groan․ If there’s a clear response, gather further information about what happened and assess their condition․ However, if the casualty remains unresponsive, it indicates a potentially life-threatening situation requiring immediate action․

The manual emphasizes avoiding unnecessary movement of the casualty, particularly if a spinal injury is suspected․ Following the initial check, if unresponsive, immediately call for help (emergency services) and prepare to begin basic life support procedures, as outlined within the manual’s guidelines․

Calling for Help (Emergency Services)

The St․ John Ambulance First Aid Manual stresses the importance of promptly contacting emergency services when facing a serious situation․ In the UK, dial 999 or 112 for immediate assistance – police, fire, or ambulance․ Be prepared to clearly and concisely provide the operator with essential information․

Key details to communicate include the precise location of the incident (address, landmarks), the nature of the emergency (what happened), the number of casualties, and their approximate condition․ Remain calm and answer all questions asked by the operator, following their instructions carefully․

The manual advises against ending the call until the operator does so, as they may require further information or provide crucial guidance during the initial stages of the emergency․ If possible, designate someone else to assist with first aid while you maintain communication with emergency services․

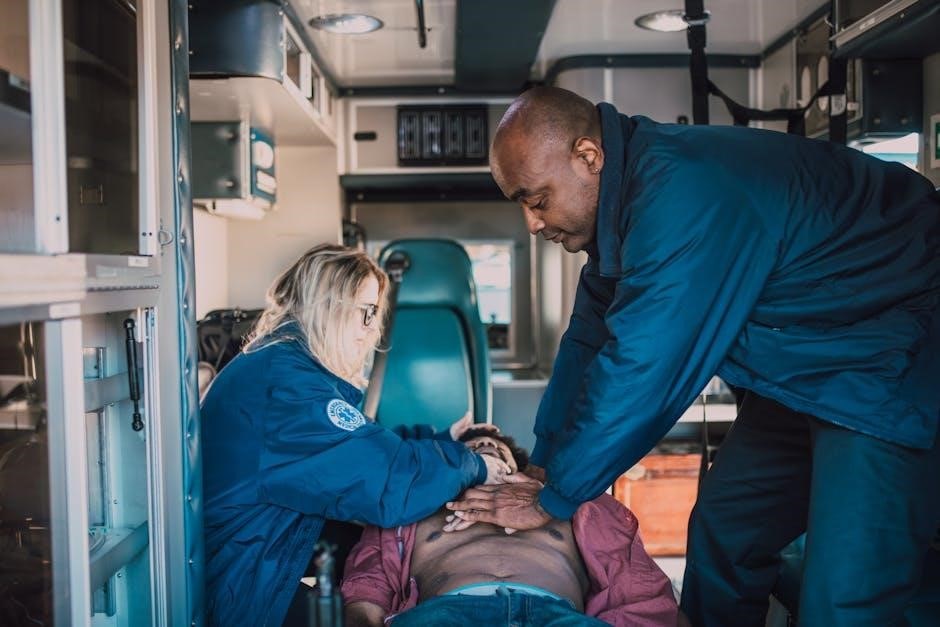
Cardiopulmonary Resuscitation (CPR) ‒ Adult

The St․ John Ambulance First Aid Manual details a crucial sequence for Adult CPR․ Begin by ensuring the scene is safe, then check for responsiveness․ If unresponsive and not breathing normally, immediately call for help (999/112)․

CPR involves chest compressions and rescue breaths․ Place the heel of one hand in the center of the chest, with the other hand on top, interlacing fingers․ Compress the chest firmly and quickly, at a rate of 100-120 compressions per minute, to a depth of approximately 5-6cm․

After every 30 compressions, give two rescue breaths, tilting the head back and lifting the chin to open the airway․ Continue CPR until professional help arrives, or the person shows signs of life․ The manual emphasizes continuous chest compressions are vital, even if rescue breaths are not possible․

CPR ー Child & Infant Modifications

The St․ John Ambulance manual highlights key differences in CPR for children (1 year to puberty) and infants (under 1 year)․ For children, use one or two hands for compressions, depending on the child’s size, aiming for roughly 5-6cm depth․

For infants, use two fingers (or thumbs encircling the chest) for compressions, compressing about 4cm․ The compression rate remains 100-120 per minute for both age groups․ Rescue breaths are gentler for infants, covering both the mouth and nose with your mouth․

The manual stresses that the initial call for help may be delayed in infants – perform 5 initial rescue breaths before commencing compressions if you are alone․ Always prioritize chest compressions, and continue until professional help arrives or the child/infant shows signs of recovery․

Dealing with Choking

The St․ John Ambulance First Aid Manual provides clear guidance on managing choking in adults, children, and infants․ For conscious adults and children, encourage forceful coughing first․ If coughing becomes ineffective, administer five back blows followed by five abdominal thrusts (Heimlich maneuver)․

Continue alternating back blows and abdominal thrusts until the object is dislodged or the person becomes unconscious․ For infants, deliver five back blows and five chest thrusts, using two fingers in the center of the chest․

If the person becomes unconscious, begin CPR, checking the mouth for the obstructing object before giving rescue breaths․ The manual emphasizes the importance of seeking medical attention even if the object is successfully removed, as internal injuries may have occurred․ Prompt action is crucial in choking emergencies․

Wound Management & Bleeding Control

The manual details how to manage cuts, abrasions, and punctures, emphasizing controlling bleeding through direct pressure and elevation․
It also covers dressing, bandaging, and recognizing infection signs․

Types of Wounds: Cuts, Abrasions, Punctures

Understanding wound types is crucial for effective first aid․ The St․ John Ambulance First Aid Manual comprehensively covers cuts, abrasions, and punctures, detailing specific care for each․ Cuts, resulting from sharp objects, require assessing depth and controlling bleeding immediately․ Abrasions, or scrapes, typically involve superficial damage but are prone to infection due to exposed skin․ Thorough cleaning is paramount․

Punctures, caused by penetrating objects, pose a higher risk of internal damage and infection․ The manual emphasizes the importance of not removing deeply embedded objects, instead stabilizing them and seeking medical attention․ Recognizing the mechanism of injury helps determine potential complications․ Proper wound assessment, cleaning, and dressing techniques, as outlined in the manual, are vital for promoting healing and preventing further harm․ The guide stresses the need for prompt medical evaluation for serious wounds․

Controlling Bleeding: Direct Pressure, Elevation

Effective bleeding control is a cornerstone of first aid, and the St․ John Ambulance Manual prioritizes swift action․ Direct pressure is the initial and most crucial step – applying firm, consistent pressure directly to the wound using a clean cloth․ This helps to encourage clotting․

Elevation, raising the injured limb above the heart, complements direct pressure by reducing blood flow to the area․ The manual details how to properly apply a pressure bandage to maintain consistent compression․ It also cautions against removing soaked dressings, instead adding more layers․ Recognizing signs of shock, potentially caused by significant blood loss, is emphasized․ The guide stresses the importance of continued pressure until professional medical help arrives, and provides clear instructions for managing various bleeding scenarios․

Dressing and Bandaging Wounds

The St․ John Ambulance First Aid Manual provides detailed guidance on protecting wounds from infection through proper dressing and bandaging․ It emphasizes the importance of cleaning the wound thoroughly before applying a sterile dressing – this minimizes the risk of complications․

Different types of dressings are explained, alongside techniques for securing them with various bandages․ The manual illustrates how to apply bandages firmly enough to provide support and maintain contact, but not so tightly as to restrict circulation․ It covers techniques for bandaging different body parts, including complex areas like joints․ Clear diagrams demonstrate correct application, and advice is given on recognizing signs that a bandage is too tight․ The guide also stresses the need for regular dressing changes and monitoring for infection․

Recognizing and Managing Infection

The St․ John Ambulance First Aid Manual dedicates significant attention to identifying potential wound infections․ It details key signs to watch for, including increased pain, redness, swelling, warmth around the wound, pus or discharge, and fever․ Early recognition is crucial for preventing complications․

The manual advises seeking medical attention if infection is suspected, but also outlines initial first aid steps․ These include thoroughly cleaning the wound, removing any debris, and applying a fresh, sterile dressing․ It stresses the importance of not attempting to treat a serious infection at home․ Guidance is provided on monitoring the wound for improvement or worsening symptoms, and when professional medical intervention is absolutely necessary․ The manual reinforces preventative measures, like proper wound care, to minimize infection risk․

Common Medical Emergencies

This section of the manual expertly covers critical situations like burns, fractures, strokes, and heart attacks․
It provides clear, concise first aid instructions,
empowering responders to act quickly and effectively in emergencies․

Burns and Scalds: Severity Assessment & Treatment

The St․ John Ambulance First Aid Manual provides comprehensive guidance on managing burns and scalds, emphasizing accurate severity assessment․ It details how to differentiate between first, second, and third-degree burns, crucial for determining the appropriate course of action․ Immediate cooling with cool (not ice-cold) running water for at least 20 minutes is a primary recommendation for minor burns․

The manual stresses the importance of removing any clothing or jewelry near the burn area, unless it’s stuck to the skin․ For significant burns, covering the area with a sterile, non-adhesive dressing is advised, and urgent medical attention is paramount․ The guide also highlights recognizing signs of shock and providing reassurance to the casualty․ Crucially, it cautions against applying creams, oils, or lotions to severe burns, as these can hinder medical assessment and potentially worsen the injury․

Fractures, Sprains, and Strains

The St․ John Ambulance First Aid Manual offers detailed instruction on differentiating between fractures, sprains, and strains – injuries often presenting with similar symptoms․ It emphasizes the ‘RICE’ protocol: Rest, Ice, Compression, and Elevation, as a foundational treatment for sprains and strains․ Immobilization is key; the manual advises supporting the injured limb with a sling or splint to prevent further damage․

Recognizing a potential fracture involves looking for deformity, swelling, and significant pain․ The guide stresses the importance of not attempting to realign a suspected fracture, but rather to immobilize it in the position found․ Seeking immediate medical attention is crucial for both fractures and severe sprains/strains․ The manual also provides guidance on assessing circulation beyond the injury site, ensuring adequate blood flow to the affected area, and monitoring for signs of shock․

Head Injuries and Concussion

The St․ John Ambulance First Aid Manual prioritizes careful assessment following any head injury, even if seemingly minor․ It details recognizing signs of concussion, including loss of consciousness (even brief), confusion, headache, dizziness, and nausea․ Immobilization of the neck is paramount, especially if a spinal injury is suspected, until qualified medical personnel arrive․

The manual stresses the importance of continuous monitoring for changes in the casualty’s condition, including pupil size, responsiveness, and breathing․ Do not move the casualty unless absolutely necessary to protect them from further danger․ It advises against giving anything to eat or drink, and emphasizes the need for prompt medical evaluation․ The guide highlights that symptoms of concussion can sometimes be delayed, requiring ongoing observation even after initial assessment․

Stroke Recognition and First Aid

The St․ John Ambulance First Aid Manual emphasizes the critical importance of rapid recognition of stroke symptoms, using the acronym FAST (Face, Arms, Speech, Time)․ Look for facial drooping, weakness in the arms, slurred speech, and immediately note the time symptoms began․ Quick action is vital as treatment is most effective within the first few hours․

The manual advises keeping the casualty calm and comfortable, preferably lying down with their head slightly raised․ Do not give them anything to eat or drink․ It stresses the need to call emergency services immediately, clearly stating a suspected stroke․ Continuous monitoring of breathing and responsiveness is crucial while awaiting medical assistance․ The guide underscores that even if symptoms resolve quickly, medical evaluation is essential to rule out a transient ischemic attack (TIA)․

Heart Attack Symptoms and Initial Response

The St․ John Ambulance First Aid Manual details recognizing heart attack symptoms, which can vary but often include chest pain (a crushing, tight feeling), pain radiating to the arm, jaw, neck, or back, shortness of breath, nausea, and dizziness․ Women may experience atypical symptoms like fatigue or indigestion․

Initial response prioritizes calling emergency services immediately․ The manual instructs the casualty to stop all activity and rest in a semi-sitting position to ease breathing․ If they have a prescribed medication like nitroglycerin, assist them in taking it․ Reassure the casualty and monitor their breathing and responsiveness continuously․ Do not allow them to drive themselves to the hospital․ The guide emphasizes that prompt medical attention is crucial for survival and minimizing heart damage․

Other Important First Aid Situations

The manual covers fainting, seizures, allergic reactions (including epinephrine auto-injector use), and poisoning․
It provides clear guidance for managing these diverse emergencies effectively and safely․

Fainting (Syncope)

Fainting, or syncope, is a temporary loss of consciousness usually caused by a sudden drop in blood flow to the brain․ The St․ John Ambulance First Aid Manual details a clear approach to assisting someone experiencing this․ First, ensure the area is safe․ Gently lower the person to the ground to prevent injury from a fall․ Elevate their legs above heart level to encourage blood flow back to the brain․

Loosen any tight clothing around the neck and waist․ Check for breathing; if absent, begin CPR․ If breathing, maintain an open airway and monitor closely․ Once consciousness returns, reassure the individual and advise them to sit quietly before standing․ The manual emphasizes the importance of identifying potential underlying causes and seeking medical advice if fainting is recurrent or accompanied by other symptoms like chest pain or shortness of breath․

Seizures: What to Do

The St․ John Ambulance First Aid Manual provides crucial guidance on managing seizures, emphasizing safety as the priority․ During a seizure, protect the person from injury by clearing the surrounding area of any hard or sharp objects․ Do not restrain them or attempt to stop the movements․ Instead, cushion their head with something soft, like clothing․

Time the seizure – note the start and end time․ After the seizure stops, gently place the person into the recovery position to keep their airway open and prevent choking․ Reassure them when they regain consciousness, as they may be confused or disoriented․ Call for emergency medical help if the seizure lasts longer than five minutes, if the person has multiple seizures in a row, or if they are injured during the seizure․ Avoid putting anything in their mouth․

Allergic Reactions (Anaphylaxis) & Epinephrine Auto-Injectors

The St․ John Ambulance First Aid Manual details how to respond to anaphylaxis, a severe and potentially life-threatening allergic reaction․ Recognize symptoms like difficulty breathing, swelling of the tongue or throat, hives, and dizziness․ Immediate action is critical․ If someone has a known allergy and carries an epinephrine auto-injector (like an EpiPen), assist them in using it․

Help them administer the auto-injector into their outer thigh, holding it in place for the recommended duration․ Even if symptoms improve after epinephrine, always call emergency services, as a second wave of reaction can occur․ Lay the person flat with their legs raised unless they are having breathing difficulties; in that case, allow them to sit․ Monitor their breathing and be prepared to start CPR if necessary․

Poisoning: General Guidelines

The St․ John Ambulance First Aid Manual emphasizes that poisoning requires swift assessment and action․ Do not induce vomiting unless specifically instructed by a medical professional or poison control center, as this can cause further harm․ Identify the substance involved, if possible, and the amount ingested․

Immediately call emergency services or your local poison control center for guidance․ Provide them with detailed information about the substance, the person’s condition, and any symptoms they are experiencing․ Keep the container or packaging of the poison available for identification․ Monitor the person’s breathing and level of consciousness, and be prepared to provide basic life support if needed․ Remain calm and reassure the individual while awaiting medical assistance․

Bytrace

nzxt h7 flow manual

NZXT H7 Flow Manual: A Comprehensive Guide

This manual details the H7 Flow’s features, offering guidance for building a modern gaming PC with expanded cooling support and competitive pricing.

The NZXT H7 Flow represents a significant update in the H-series case lineup, designed with a focus on optimized airflow and ease of building. This mid-tower case caters to enthusiasts seeking a balance between aesthetics, functionality, and affordability; It’s a fine pick for modern gaming PC builds, offering expanded cooling support to handle high-performance components.

The H7 Flow distinguishes itself through its emphasis on airflow, as the name suggests. NZXT has engineered this chassis to maximize air intake and exhaust, ensuring efficient thermal management. This is crucial for maintaining stable performance and preventing overheating, especially with demanding hardware. Beyond performance, the H7 Flow aims to contain noise, providing a quieter computing experience. It’s a competitively priced option, making it accessible to a wider range of builders.

Unboxing and Component Overview

Upon unboxing the NZXT H7 Flow, you’ll find a meticulously packaged mid-tower case designed for streamlined PC building. The package includes the case itself, a detailed manual, a hardware kit containing screws, standoffs, and cable ties, and potentially some NZXT branding elements. Inspect all components for any shipping damage before proceeding.

The case features a sleek, minimalist exterior with a tempered glass side panel showcasing your build. Key components include the front and rear panels, side panels, internal chassis, and pre-installed fans (typically two). The H7 Flow’s internal layout prioritizes airflow, with ample space for components and cable management. Familiarize yourself with the front panel I/O, including USB ports and audio jacks, and the locations of mounting points for radiators and storage devices. The included accessories aid in a clean and organized build process.

Building with the NZXT H7 Flow

This section guides you through the core build process, covering motherboard, CPU cooler, GPU, and storage installation within the H7 Flow chassis.

Motherboard Installation

Preparing for motherboard installation within the NZXT H7 Flow begins with identifying the correct mounting standoffs; ensure they align with your motherboard’s screw holes. Carefully position the motherboard into the case, aligning the I/O shield with the opening in the rear panel. Gently lower the motherboard onto the standoffs, avoiding any accidental shorts.

Secure the motherboard using screws – do not overtighten! The H7 Flow’s spacious interior accommodates various motherboard sizes, including ATX, Micro-ATX, and Mini-ITX. Double-check that all standoffs are properly engaged before proceeding. Proper installation is crucial for system stability and preventing potential damage. Take your time and ensure a snug, secure fit for optimal performance and longevity of your build.

CPU Cooler Installation (Air & AIO)

The NZXT H7 Flow offers excellent compatibility for both air coolers and All-in-One (AIO) liquid coolers; For air coolers, install the appropriate mounting bracket onto the motherboard before installing the motherboard into the case. Ensure the bracket aligns with the CPU socket. For AIOs, determine the radiator placement – top or front are common options.

Mount the radiator with the included screws, ensuring a secure fit. Connect the AIO pump to the CPU fan header on the motherboard. When installing either cooler, apply thermal paste to the CPU heat spreader. Secure the cooler firmly, following the manufacturer’s instructions. The H7 Flow’s design provides ample clearance for large coolers, maximizing cooling potential.

GPU Installation and Considerations

Installing your graphics card into the NZXT H7 Flow is straightforward, but requires attention to detail. First, locate the rear I/O shield cutouts corresponding to your GPU’s port configuration and remove the appropriate covers. Align the GPU with the top-most PCIe x16 slot and firmly press down until it clicks into place. Secure the card with screws to the case.

Consider the GPU’s length; the H7 Flow supports substantial cards, but verify compatibility with your specific model. Ensure adequate airflow around the GPU by managing cables effectively. The case’s airflow design facilitates efficient heat dissipation, crucial for high-performance GPUs. Monitor temperatures post-installation to confirm optimal cooling performance.

Storage Device Installation (SSD/HDD)

The NZXT H7 Flow offers versatile storage options for both SSDs and HDDs. Locate the designated drive bays – typically at the bottom or rear of the case. For 2.5” SSDs, utilize the dedicated mounting points, securing them with screws. 3.5” HDDs fit into the larger bays, often requiring tool-less mechanisms or screws for installation.

Ensure SATA data and power cables are connected securely to the storage devices and the motherboard/power supply. Proper cable management is key to maintaining airflow. Consider SSD placement for optimal cooling, as they can be sensitive to heat. The H7 Flow’s layout allows for flexible storage configurations, accommodating multiple drives.

Cooling System Management

Effectively managing the H7 Flow’s cooling involves strategic fan placement, radiator support, and airflow optimization for peak performance and component longevity.

Fan Configuration and Placement

The NZXT H7 Flow’s design prioritizes airflow, offering multiple mounting locations for optimal cooling configurations. Front panel placement typically accommodates up to two 140mm or three 120mm fans, drawing cool air into the chassis. The top panel supports similar configurations for exhaust, removing warm air efficiently.

Rear and bottom fan mounts further enhance airflow, allowing for customized setups based on component needs. Consider positive pressure – more intake than exhaust – to minimize dust buildup. Utilizing the included fan screws ensures secure mounting. Experiment with fan speeds via motherboard controls or an NZXT RGB & Fan Controller (sold separately) to balance cooling performance and noise levels. Proper fan orientation is crucial; ensure airflow direction aligns with the intended cooling path.

Radiator Support and Liquid Cooling

The NZXT H7 Flow provides extensive support for liquid cooling solutions, catering to both All-in-One (AIO) coolers and custom loops. The front panel accommodates radiators up to 360mm, while the top panel supports radiators up to 280mm, offering flexibility in cooler selection. Ensure sufficient clearance for components when installing larger radiators.

Mounting AIO coolers is straightforward, utilizing existing fan mounting points. Custom loops require careful planning and component selection, considering pump and reservoir placement. The case’s cable management channels assist in routing tubing neatly; Prioritize radiator placement to maximize airflow and heat dissipation. Compatibility with various radiator thicknesses should be verified before purchase.

Airflow Optimization Techniques

Maximizing airflow within the NZXT H7 Flow is crucial for optimal component cooling and system stability. Utilize the case’s perforated front panel to encourage unrestricted intake. Strategically position fans to create a positive pressure environment, minimizing dust accumulation. Consider a front intake, rear exhaust, and optional top exhaust configuration.

Ensure proper cable management to avoid obstructing airflow pathways. Components generating significant heat, like the CPU and GPU, should receive direct airflow. Experiment with fan curves in your BIOS or using NZXT’s CAM software to balance cooling performance and noise levels. Regularly clean dust filters to maintain optimal airflow efficiency. Prioritize unobstructed vents for effective heat expulsion.

Cable Management

Effective cable management within the H7 Flow enhances airflow and aesthetics, utilizing dedicated channels, Velcro straps, and ties for a clean build.

Routing and Concealing Cables

The NZXT H7 Flow prioritizes clean builds with a thoughtfully designed cable management system. Begin by routing major cables—like the 24-pin ATX and EPS—behind the motherboard tray, utilizing the generous space provided. This minimizes obstruction of airflow within the main chamber;

Take advantage of the numerous cutouts strategically placed around the motherboard to guide cables efficiently. For peripheral cables (SATA, fan headers), aim to run them along the edges of the case, keeping them tucked away from components. The H7 Flow’s side panel design allows for easy access and concealment;

Consider the path of cables before connecting them, planning for a tidy arrangement. Prioritize hiding cables behind the motherboard tray whenever possible, creating a visually appealing and functionally optimized interior.

Using the Cable Management Channels

The NZXT H7 Flow features dedicated cable management channels, crucial for achieving a clean and organized build. These channels run behind the motherboard tray and along the floor of the case, providing ample space to conceal excess cabling. Utilize these pathways to route cables away from critical components, maximizing airflow and improving thermal performance.

Start by feeding cables through the strategically placed rubber grommets in the motherboard tray. These grommets protect cables from sharp edges and provide a secure routing point. The channels are designed to accommodate multiple cables, but avoid overfilling them to maintain accessibility.

Remember to plan your cable runs before connecting everything, ensuring a smooth and efficient process. Proper use of these channels significantly enhances the aesthetic appeal of your build.

Velcro Straps and Cable Ties

To further refine cable management within the NZXT H7 Flow, utilize the included Velcro straps and consider additional cable ties. These tools are essential for bundling and securing cables within the designated management channels, preventing them from obstructing airflow or interfering with components.

The Velcro straps are reusable and gentle on cables, allowing for easy adjustments during the build process. Wrap them around groups of cables, tightening them securely but not excessively. Cable ties offer a more permanent solution for tidying up particularly unruly cables.

Focus on grouping cables logically, such as power cables together and signal cables separately. This approach simplifies troubleshooting and future upgrades. A well-managed cable system contributes to a cleaner, more efficient, and visually appealing PC build.

Front Panel I/O and Connectivity

Explore the H7 Flow’s front panel, understanding USB port functions, audio jack configurations, and the operation of the power and reset buttons.

USB Port Functionality

The NZXT H7 Flow’s front panel boasts a selection of USB ports designed for diverse connectivity needs. Typically, you’ll find USB 3.2 Gen 1 Type-A ports, offering rapid data transfer speeds for peripherals like keyboards, mice, and external storage devices.

These ports are backward compatible with USB 2.0 and 1.1 devices, ensuring broad compatibility. Additionally, the H7 Flow often includes a USB Type-C port, providing even faster data transfer rates and supporting Power Delivery (PD) for charging compatible smartphones and tablets.

Understanding the different USB standards is crucial for optimal performance. USB 3.2 Gen 1 offers speeds up to 5Gbps, while USB Type-C with PD can deliver significant power for quick charging. Refer to your motherboard manual to confirm the specific capabilities of each port connected to the front panel.

Audio Jack Configuration

The NZXT H7 Flow’s front panel audio jacks provide convenient connectivity for headphones, microphones, and speakers, enhancing your audio experience. Typically, you’ll find separate 3.5mm jacks for headphones and microphones, often color-coded for easy identification – usually green for headphones and pink for microphones.

These jacks are directly connected to your motherboard’s audio chipset, delivering high-quality sound. Ensure you plug your devices into the correct jacks to guarantee proper functionality; incorrect placement can result in muted audio or microphone issues.

For optimal audio performance, consult your motherboard manual to understand the specific audio capabilities and any supported enhancements. Some motherboards offer advanced audio features like impedance matching or noise cancellation, which can be configured through the BIOS or dedicated software.

Power Button and Reset Button

The NZXT H7 Flow features prominently placed front panel power and reset buttons, essential for controlling your system. The power button initiates the boot sequence, turning your computer on or off, while the reset button provides a quick way to restart the system without a full shutdown.

These buttons connect to your motherboard via designated pins; ensure these connections are secure during the build process. Incorrect connections can prevent the buttons from functioning correctly. Refer to your motherboard manual for the precise pin layout.

Beyond basic functionality, some motherboards allow customization of these buttons through the BIOS, enabling features like delayed shutdown or wake-on-LAN. Properly functioning buttons are crucial for troubleshooting and maintaining your system’s operational status.

Maintenance and Troubleshooting

Regular cleaning of the case and filters is vital, alongside addressing common issues and utilizing NZXT’s support resources for optimal performance.

Cleaning the Case and Filters

Maintaining a clean internal environment is crucial for optimal cooling and system longevity. Dust accumulation significantly restricts airflow, leading to increased component temperatures and potential performance throttling. Regularly inspect and clean the H7 Flow’s filters, located on the front, top, and bottom of the case.

These filters are easily removable for cleaning; gently wash them with lukewarm water and allow them to dry completely before reinstallation. Use a soft brush or compressed air to remove dust from the case’s interior, paying particular attention to fans, heatsinks, and radiators. Avoid using harsh chemicals or abrasive cleaners, as these can damage components.

A consistent cleaning schedule – every three to six months, depending on your environment – will ensure your H7 Flow continues to provide excellent cooling performance and protect your valuable hardware. Remember to power off and unplug the system before commencing any cleaning procedures.

Addressing Common Issues

If you encounter problems with your NZXT H7 Flow, several troubleshooting steps can resolve common issues. First, ensure all cables are securely connected, both internally and to the front panel I/O. Check fan operation; if a fan isn’t spinning, verify its connection to the motherboard or fan controller.

Overheating can often be traced to dust buildup – refer to the ‘Cleaning the Case and Filters’ section. If your system fails to power on, double-check the power supply connection and ensure the power supply switch is flipped to the ‘on’ position.

For USB or audio port malfunctions, confirm proper driver installation and compatibility. If issues persist, consult the NZXT support resources (see the final section) for detailed troubleshooting guides and potential solutions. Remember to document any error messages for efficient support assistance.

NZXT Support Resources

NZXT provides extensive support for the H7 Flow, ensuring a smooth building experience. The primary resource is the official NZXT website, featuring a comprehensive FAQ section addressing common queries and troubleshooting steps. Their support portal allows you to submit direct support tickets for personalized assistance with specific issues.

NZXT’s online knowledge base contains detailed articles, build guides, and compatibility information. Active community forums offer a platform to connect with other H7 Flow users, share experiences, and find solutions.

For visual learners, NZXT’s YouTube channel hosts numerous build guides and tutorials. Social media channels, like Twitter and Facebook, provide updates and quick responses to general inquiries. Don’t hesitate to leverage these resources for optimal support.

Bytrace

2016 subaru crosstrek manual

2016 Subaru Crosstrek Manual: A Comprehensive Guide

This comprehensive guide details the 2016 Subaru Crosstrek, offering access to owners manuals, multimedia system details, and technical service bulletins via PDF downloads.

Explore resources like Starlink information, repair manuals, and tire pressure guidance, ensuring a thorough understanding of your vehicle’s operation and maintenance.

The 2016 Subaru Crosstrek represents a versatile blend of practicality and capability, built upon the Impreza platform. This manual serves as your primary resource for understanding all facets of your vehicle, from routine maintenance to advanced technological features. Accessing the official Subaru owners manuals, available as PDF downloads, is crucial for maximizing your driving experience.

Information regarding the Starlink multimedia system, detailed within specific manuals, unlocks the full potential of in-car connectivity. Furthermore, understanding technical service bulletins ensures you’re aware of any updates or recommended procedures. This guide aims to empower you with the knowledge to confidently operate and maintain your 2016 Crosstrek.

Understanding the Owner’s Manual

Your 2016 Subaru Crosstrek’s owner’s manual is a vital document, offering comprehensive insights into your vehicle’s operation and maintenance. Available electronically and often as a downloadable PDF, it details everything from basic controls to complex systems like Subaru Starlink. Pay close attention to sections covering safety features, including the airbag system and anti-lock braking;

Understanding the dashboard symbols and recommended maintenance schedules is paramount. Familiarize yourself with technical service bulletins, accessible online, for crucial updates. The manual also provides guidance on tire pressure and fluid checks, ensuring optimal performance and longevity of your Crosstrek.

Vehicle Overview & Key Features

The 2016 Crosstrek blends versatility with Subaru’s renowned reliability, featuring symmetrical all-wheel drive and a user-friendly Starlink multimedia system.

Exterior Features and Functions

The 2016 Crosstrek’s exterior boasts practical features designed for adventure and everyday use. Standard equipment includes automatic headlights, while available options enhance visibility and style. Owners can find detailed information regarding exterior lighting operation, wiper functionality, and mirror adjustments within the comprehensive owner’s manual.

The manual also covers proper care for exterior components, including cleaning procedures and protective measures against environmental elements. Understanding these features ensures optimal performance and longevity of the vehicle’s exterior. Refer to the manual for specific instructions on utilizing features like the rear gate spoiler and roof rails, maximizing the Crosstrek’s utility.

Interior Features and Controls

The 2016 Crosstrek’s interior prioritizes comfort and functionality. The owner’s manual provides a detailed overview of all interior features, including seat adjustments, climate control operation, and the placement of various controls. Subaru Starlink multimedia system functionality is thoroughly explained, covering audio settings, Bluetooth pairing, and navigation system usage.

Learn about the operation of power windows, door locks, and the available sunroof. The manual also details the location and use of interior lighting, storage compartments, and other convenience features. Proper understanding of these controls enhances the driving experience and ensures safe operation of the vehicle’s interior systems.

Dashboard Symbols and Indicators

The 2016 Crosstrek’s instrument panel displays a variety of symbols and indicators crucial for monitoring vehicle status. The owner’s manual provides a comprehensive explanation of each symbol, categorizing them by severity – warning, indicator, and malfunction indicator lights. Understanding these signals is vital for proactive vehicle maintenance and safe driving practices.

Learn to differentiate between critical warnings, such as low oil pressure or engine temperature, and informational indicators like turn signal activation. The manual details the actions to take when specific symbols illuminate, ensuring prompt response to potential issues. Familiarity with these indicators promotes confident and informed vehicle operation.

Operating Your Vehicle

The 2016 Crosstrek manual details essential procedures, from starting and stopping the engine to driving modes and manual transmission operation for optimal performance.

Starting and Stopping the Engine

The 2016 Subaru Crosstrek manual provides detailed instructions for safely starting and stopping the engine. Before starting, ensure the parking brake is engaged and the gear selector is in neutral (manual transmission). Insert the key and turn it to the ‘ON’ position, then fully rotate to start;

Allow the engine to idle briefly before driving. To stop, gently apply the brakes to bring the vehicle to a complete halt, shift into neutral, and engage the parking brake. Turn the ignition key to the ‘LOCK’ position and remove it. Always follow these procedures to prevent unintended vehicle movement and ensure safe operation. Refer to the manual for specific warnings and precautions.

Driving Modes and Systems

The 2016 Subaru Crosstrek manual details the vehicle’s driving modes and systems, including Symmetrical All-Wheel Drive, which continuously distributes power for optimal traction. The manual explains how to utilize features like Vehicle Dynamic Control (VDC) for enhanced stability during challenging conditions.

It also covers the operation of systems like X-Mode, designed for improved performance on low-friction surfaces. Understanding these systems is crucial for maximizing the Crosstrek’s capabilities. The manual provides detailed explanations and warnings regarding the proper use of each system, ensuring safe and effective driving in various environments.

Transmission Operation (Manual)

The 2016 Subaru Crosstrek manual provides comprehensive instructions for operating the manual transmission. It details proper shifting techniques, emphasizing smooth clutch engagement and gear selection for optimal performance and longevity. The manual explains how to avoid common issues like stalling or harsh shifting.

Specific guidance is given on downshifting, hill starts, and utilizing the transmission’s full range. It also includes information regarding the transmission’s internal components and recommended fluid checks. Following these guidelines ensures efficient operation and helps prevent premature wear, maximizing the lifespan of the manual transmission.

Fueling and Range

The 2016 Subaru Crosstrek manual details the recommended fuel type – unleaded gasoline – and its octane rating. It explains the fuel tank capacity and provides guidance on locating the fuel filler door. The manual outlines the estimated driving range based on combined city and highway driving conditions, though actual range varies.

Factors influencing fuel economy, such as driving habits, cargo weight, and weather conditions, are discussed. It also includes information on the fuel consumption indicator and how to interpret it. Proper fueling practices, as outlined in the manual, contribute to optimal engine performance and efficiency.

Maintenance & Service

The 2016 Crosstrek manual outlines a recommended maintenance schedule, detailing oil changes (especially for manual transmissions), tire care, and essential fluid checks for longevity.

Recommended Maintenance Schedule

The 2016 Subaru Crosstrek’s maintenance schedule, detailed within the owner’s manual, is crucial for optimal performance and longevity. Regular inspections are recommended at every oil change, covering vital components like brakes, fluids, and belts.

Specifically, the manual advises oil and filter changes based on mileage or time intervals – whichever comes first. Tire rotations are essential for even wear, and coolant levels should be checked periodically. Furthermore, the schedule includes recommendations for air filter replacement, spark plug inspection, and fluid flushes, ensuring your Crosstrek remains reliable and efficient throughout its lifespan. Adhering to this schedule helps prevent costly repairs and maintains the vehicle’s value.

Oil Change Procedures (Manual Transmission)

For the 2016 Subaru Crosstrek with a manual transmission, oil changes require specific steps. Begin by warming the engine, then securely lift the vehicle. Locate the oil drain plug and carefully remove it, allowing the old oil to drain completely. Replace the drain plug with a new crush washer, tightening to the specified torque.

Next, remove the oil filter using a filter wrench, lubricating the new filter’s gasket before installation. Fill the engine with the recommended oil type and quantity, as outlined in the owner’s manual. Finally, check the oil level with the dipstick and properly dispose of the used oil.

Tire Pressure and Maintenance

Maintaining correct tire pressure is crucial for the 2016 Subaru Crosstrek’s performance and safety. The recommended pressure, typically found on a sticker inside the driver’s side door jamb, ensures optimal handling and fuel efficiency. Regularly check tire pressure, especially with temperature changes.

Inspect tires for wear and damage, including cuts or bulges. Rotate tires according to the recommended schedule in the owner’s manual to promote even wear. Proper tire maintenance extends tire life and contributes to overall vehicle safety, enhancing your driving experience.

Fluid Checks and Replacements

Regular fluid checks are vital for the 2016 Subaru Crosstrek’s longevity. Inspect engine oil, coolant, brake fluid, power steering fluid, and windshield washer fluid levels frequently. Refer to the owner’s manual for specific fluid types and capacities.

Scheduled fluid replacements, including oil changes (especially with manual transmissions – using the correct oil is key!), coolant flushes, and brake fluid exchanges, prevent component damage. Maintaining proper fluid levels ensures optimal performance and prevents costly repairs, contributing to a reliable driving experience.

Safety Features & Systems

The 2016 Crosstrek boasts advanced safety, including airbags, ABS, VDC, and potentially EyeSight driver assist, detailed within the owner’s manual.

Airbag System

The 2016 Subaru Crosstrek’s airbag system is a crucial safety component, designed to provide occupant protection during collisions. The owner’s manual thoroughly explains the system’s operation, including the locations of the various airbags – front, side, and curtain airbags.

Understanding the system’s limitations is vital; airbags supplement seatbelts, they do not replace them. Proper seatbelt usage is always paramount. The manual details specific warnings regarding airbag deployment and potential hazards, particularly for children. It also outlines procedures for inspecting the airbag system and addresses what to do after an airbag deployment event, emphasizing the need for professional servicing.

Anti-lock Braking System (ABS)

The 2016 Subaru Crosstrek features an Anti-lock Braking System (ABS), enhancing braking performance and control, especially on slippery surfaces. The owner’s manual provides a detailed explanation of how ABS functions, emphasizing that it prevents wheel lock-up during hard braking.

Drivers should understand that applying firm, continuous pressure to the brake pedal is crucial when ABS activates – you may feel a pulsing sensation. The manual cautions against pumping the brakes, as this can reduce ABS effectiveness. It also details the ABS warning light and what it indicates, advising immediate inspection if illuminated. Proper ABS function is vital for safe driving.

Vehicle Dynamic Control (VDC)

The 2016 Subaru Crosstrek’s Vehicle Dynamic Control (VDC) system enhances stability by detecting and mitigating skids. The owner’s manual explains VDC uses sensors to monitor steering angle and vehicle direction, selectively applying brakes to individual wheels to correct oversteer or understeer.

It’s crucial to understand VDC isn’t a substitute for careful driving. The manual details the VDC warning light, indicating system malfunction or activation. Drivers should avoid abrupt steering or braking maneuvers, even with VDC engaged. The system can be temporarily disabled, but the manual advises against prolonged operation without VDC assistance.

EyeSight Driver Assist Technology

The 2016 Subaru Crosstrek’s EyeSight Driver Assist Technology, detailed in the owner’s manual, utilizes stereo camera technology to enhance safety. It features Adaptive Cruise Control, maintaining a safe distance from preceding vehicles, and Pre-Collision Braking, alerting the driver and potentially applying brakes to mitigate or avoid collisions.

Lane Departure Warning alerts drivers if the vehicle drifts from its lane without signaling. The manual emphasizes EyeSight is an assistive system, not a replacement for attentive driving. Drivers must remain aware of surroundings and be prepared to take control. System limitations, like adverse weather, are also explained.

In-Car Technology

The 2016 Crosstrek manual details Subaru Starlink, Bluetooth connectivity, and the navigation system, offering comprehensive guides for utilizing these in-car features effectively.

Subaru Starlink Multimedia System

Subaru Starlink, featured in the 2016 Crosstrek, is a sophisticated multimedia system detailed extensively within the vehicle’s manual. This system provides access to various features, including smartphone integration, streaming audio, and available navigation. The manual offers step-by-step instructions for pairing devices via Bluetooth, utilizing the touchscreen interface, and understanding voice command functionality.

Users can explore detailed explanations of Starlink’s apps, including Aha and Pandora, enhancing the driving experience. The manual also covers troubleshooting common issues and provides guidance on software updates. A dedicated section explains how to access and utilize the system’s safety features, ensuring responsible use while driving. Refer to resources like the multimedia system manual for visual aids.

Bluetooth Connectivity

The 2016 Subaru Crosstrek’s manual provides comprehensive instructions for establishing and managing Bluetooth connections. Pairing your smartphone allows for hands-free calling, audio streaming, and access to voice-controlled features through the Subaru Starlink system. The manual details the pairing process, including entering PIN codes and resolving potential connection issues.

It explains how to manage multiple paired devices, switch between them seamlessly, and adjust audio settings for optimal sound quality. Troubleshooting tips address common problems like intermittent connectivity or difficulty recognizing devices. The manual emphasizes the importance of safe Bluetooth usage while driving, promoting responsible operation of the system. Detailed guidance ensures a user-friendly experience.

Navigation System

The 2016 Subaru Crosstrek manual thoroughly explains the operation of the vehicle’s navigation system, integrated within the Subaru Starlink multimedia platform. It details how to input destinations, search for points of interest, and utilize map features for efficient route planning. The manual covers voice command functionality, allowing for hands-free operation while driving.

Users will find instructions on updating map data, customizing display settings, and interpreting guidance cues. Troubleshooting sections address common issues like GPS signal loss or inaccurate routing. The manual emphasizes safe navigation practices, advising drivers to prioritize road conditions and traffic laws. Detailed diagrams and step-by-step instructions ensure ease of use.

Troubleshooting & Emergency Procedures

The 2016 Crosstrek manual provides guidance on jump starting, tire changes, and emergency contacts, ensuring driver preparedness for unexpected roadside situations.

Jump Starting Procedures

Safely jump starting your 2016 Subaru Crosstrek requires careful adherence to specific procedures outlined in the owner’s manual. First, position a functioning vehicle close enough for the jumper cables to reach, avoiding contact between the cars. Connect the positive (+) cable to the positive terminal of the discharged battery, then to the positive terminal of the good battery.

Next, connect the negative (-) cable to the negative terminal of the good battery, and finally, to a grounded metal surface on the disabled Crosstrek – not directly to the negative terminal. Start the functioning vehicle, let it run for a few minutes, and then attempt to start the Crosstrek. Disconnect the cables in the reverse order of connection.

Always consult the manual for detailed diagrams and safety precautions to prevent damage to the vehicle’s electrical system.

Flat Tire Changing

Changing a flat tire on your 2016 Subaru Crosstrek involves several crucial steps detailed in the owner’s manual. First, safely pull over to a level surface, away from traffic, and activate your hazard lights. Gather the spare tire, jack, and lug wrench from their designated storage locations. Loosen the lug nuts on the flat tire before jacking up the vehicle.

Position the jack correctly on the vehicle’s frame, as illustrated in the manual, and raise the vehicle until the flat tire is off the ground. Fully remove the lug nuts, carefully remove the flat tire, and mount the spare. Hand-tighten the lug nuts, lower the vehicle, and then fully tighten them in a star pattern.

Remember to stow the flat tire and tools securely.

Emergency Contact Information

In case of emergencies involving your 2016 Subaru Crosstrek, having readily available contact information is vital. The owner’s manual recommends keeping the following numbers accessible: your local emergency services (911 in the US), Subaru Roadside Assistance (check your manual for the specific number), and your insurance provider’s emergency claim line.

Additionally, it’s prudent to store contact details for trusted family members or friends. Consider programming these numbers into your Subaru Starlink system for quick access. Keep a physical list in your glove compartment as a backup.

Knowing these contacts can significantly reduce stress during unforeseen events.

Technical Specifications

The 2016 Crosstrek’s manual details engine specs, dimensions, weight, and towing capacity. Access PDF resources for precise data regarding your vehicle’s capabilities.

Engine Specifications

The 2016 Subaru Crosstrek primarily features a 2.0-liter FB20 four-cylinder engine, a horizontally opposed engine known for its balance and efficiency. This engine delivers 148 horsepower at 6,200 rpm and 145 lb-ft of torque at 4,200 rpm.

Manual transmission models utilize this engine configuration exclusively. The manual details the engine’s bore and stroke dimensions, compression ratio, and fuel injection system specifics. Owners manuals and technical service bulletins provide detailed insights into the engine’s performance characteristics and maintenance requirements, including recommended oil types for optimal operation.

Understanding these specifications is crucial for proper vehicle care and maximizing performance.

Dimensions and Weight

The 2016 Subaru Crosstrek boasts a compact footprint, measuring 176.9 inches in length, 70.1 inches in width, and 63.6 inches in height. Its wheelbase spans 105.1 inches, contributing to its agile handling. Owners manuals detail these dimensions for accessory compatibility and parking considerations.

Curb weight varies depending on the transmission; manual transmission models typically weigh around 3,120 pounds. This weight distribution impacts handling and fuel efficiency. Repair manuals often include detailed weight specifications for various components. Understanding these dimensions and weight figures is vital for safe operation and maintenance.

Towing Capacity

The 2016 Subaru Crosstrek is not generally recommended for regular towing due to its compact size and engine specifications. Owners manuals explicitly state a limited towing capacity, typically around 1,500 pounds with the proper equipment and precautions. Exceeding this limit can compromise vehicle stability and performance.

Repair manuals emphasize the importance of using a weight-distributing hitch and ensuring the trailer has its own independent braking system. Always consult your Crosstrek’s manual for specific guidelines and limitations. Prioritize safety and adhere to recommended weight limits to prevent damage and ensure a secure towing experience.

Warranty Information

The 2016 Crosstrek comes with a New Vehicle Limited Warranty; details are in the owners manual and service manual resources for comprehensive coverage information.

New Vehicle Limited Warranty

Subaru provides a comprehensive New Vehicle Limited Warranty for the 2016 Crosstrek, offering peace of mind to owners. This warranty covers defects in materials or workmanship under normal use and maintenance. Specific coverage durations apply to various components, including powertrain and emissions systems.

Detailed information regarding the warranty’s terms, conditions, exclusions, and claim procedures can be found within the official owners manual. It’s crucial to review this document to understand your rights and responsibilities. Service manual resources also offer insights into warranty-covered repairs and maintenance. Proper maintenance, as outlined in the manual, is essential for maintaining warranty validity.

Service Manual Resources

Accessing detailed service manuals is crucial for comprehensive 2016 Crosstrek maintenance and repair. Several online resources provide PDF versions of the factory repair manual, offering in-depth diagrams and procedures. Websites like sucross.com host valuable technical information and forums for Subaru enthusiasts.

These manuals cover everything from routine maintenance to complex repairs, aiding both DIY mechanics and professional technicians. Technical service bulletins (TSBs), like those available via NHTSA, provide updates and solutions to known issues. Utilizing these manuals ensures accurate diagnostics and effective repairs, maximizing vehicle longevity and performance.

Bytrace

glencoe algebra 2 pdf

Glencoe Algebra 2 PDF: A Comprehensive Guide

Glencoe Algebra 2 provides essential mathematical foundations, offering comprehensive coverage for students. Accessing the PDF version allows for convenient study and practice, supporting learning objectives effectively.

What is Glencoe Algebra 2?

Glencoe Algebra 2 is a widely-used high school mathematics textbook designed to build upon foundational algebraic concepts. It serves as a crucial stepping stone for students preparing for more advanced mathematics courses like pre-calculus and calculus. The curriculum comprehensively covers a broad spectrum of algebraic topics, extending beyond basic equation solving to encompass more complex functions, polynomials, and rational expressions.

This textbook isn’t merely about rote memorization; it emphasizes conceptual understanding and problem-solving skills. Students are encouraged to apply algebraic principles to real-world scenarios, fostering a deeper appreciation for the subject’s practical relevance. The Glencoe Algebra 2 program typically includes numerous examples, practice exercises, and assessments to reinforce learning and track student progress.

The availability of a PDF version of the textbook offers significant flexibility for students. It allows for convenient access on various devices, facilitating study anytime and anywhere. Furthermore, the digital format often includes interactive features and supplementary resources that enhance the learning experience, making it a valuable tool for both classroom instruction and independent study.

Availability of Glencoe Algebra 2 PDF

Finding a Glencoe Algebra 2 PDF requires navigating various online avenues. While a legal, free download directly from Glencoe/McGraw-Hill might be limited, several options exist. Often, schools and educational institutions provide students with access to the digital textbook through their learning management systems or online portals. These platforms usually require student login credentials for authorized access.

Numerous third-party websites claim to offer the PDF for download, but caution is paramount (discussed further in the ‘Risks’ section). Some sites may require registration or payment, while others may host unauthorized copies. Online bookstores sometimes sell digital versions of the textbook, offering a legitimate, albeit potentially costly, alternative.

It’s crucial to verify the source’s credibility before downloading any file. Searching for “Glencoe Algebra 2 PDF download” will yield numerous results, but discerning legitimate sources from potentially harmful ones is essential. Always prioritize official channels or reputable educational platforms to ensure a safe and legal download.

Legality of Downloading Glencoe Algebra 2 PDF

The legality of downloading a Glencoe Algebra 2 PDF is a significant concern. Downloading copyrighted material without authorization is generally illegal and constitutes copyright infringement. Glencoe/McGraw-Hill retains all rights to their textbooks, and unauthorized distribution violates these rights.

Accessing the PDF through official channels – such as a school-provided digital copy or purchasing it from a licensed online retailer – is perfectly legal. However, downloading from unofficial websites offering “free” copies often involves illegal distribution. This can expose users to legal repercussions, including fines and potential lawsuits.

Furthermore, these unofficial sources frequently bundle the PDF with malware or viruses, posing a security risk. Supporting legitimate avenues ensures that authors and publishers are compensated for their work, fostering continued educational resource development. Always prioritize legal and ethical access to educational materials like Glencoe Algebra 2.

Official Glencoe Website and PDF Access

The official Glencoe website (mheducation.com/math/algebra-2) is the primary and most reliable source for information regarding Glencoe Algebra 2. While a direct, free PDF download of the entire textbook isn’t typically offered, the website provides various digital resources.

These resources often include interactive eBooks, online homework platforms, and supplementary materials accessible with a valid registration code, usually obtained through school textbook purchases. Students and educators can often access a digital version of the textbook through these platforms, offering a legal and secure way to engage with the content.

Glencoe also provides sample chapters and practice quizzes on their website, allowing potential buyers to preview the material. Checking with your school or teacher is crucial, as they may have already secured digital access for the class. Utilizing the official website ensures you’re receiving authentic, up-to-date, and legally compliant Glencoe Algebra 2 resources.

Third-Party Websites Offering Glencoe Algebra 2 PDF

Numerous third-party websites claim to offer Glencoe Algebra 2 PDF versions for download. These platforms range from online libraries and file-sharing sites to educational resource aggregators. However, exercising extreme caution is paramount when considering these sources.

Many such websites operate in legally gray areas, potentially distributing copyrighted material without authorization. Downloading from these sites carries significant risks, including exposure to malware, viruses, and compromised personal data. The quality of the PDF itself can also be questionable, often containing incomplete chapters, formatting errors, or low resolution scans.

While some sites may appear legitimate, verifying their trustworthiness is crucial. Always prioritize official sources like the Glencoe/McGraw-Hill website or authorized educational platforms. Remember that accessing copyrighted material illegally can have legal consequences. Exploring legitimate digital textbook rental or purchase options is a safer and more ethical alternative to relying on unverified third-party downloads.

Potential Risks of Downloading from Unofficial Sources

Downloading a Glencoe Algebra 2 PDF from unofficial sources presents substantial risks. These websites frequently harbor malware, viruses, and spyware, which can compromise your device and steal personal information. The allure of a “free” download often masks hidden threats, potentially leading to identity theft or financial loss.

Furthermore, the PDF files themselves may be corrupted, incomplete, or contain inaccurate content. Relying on such materials can hinder your learning and negatively impact academic performance. Copyright infringement is another significant concern; downloading copyrighted material illegally carries legal ramifications.

Unofficial sources often lack the security measures of legitimate platforms, making them vulnerable to data breaches. Your browsing activity may also be tracked and shared with third parties without your consent. Prioritizing official channels, such as the Glencoe website or authorized retailers, ensures a safe, legal, and reliable access to the textbook. Protecting your digital security and respecting copyright laws are paramount.

Content Covered in Glencoe Algebra 2

Glencoe Algebra 2 comprehensively explores functions, polynomials, rational expressions, and radical equations. It builds upon foundational concepts, preparing students for advanced mathematical studies and problem-solving.

Key Topics in Glencoe Algebra 2

Glencoe Algebra 2 delves into a wide array of crucial mathematical concepts, building a strong foundation for future studies. A significant portion focuses on functions and their graphs, exploring various types like linear, quadratic, exponential, and logarithmic functions. Students learn to analyze their properties, transformations, and applications in real-world scenarios.

The curriculum extensively covers polynomials and polynomial functions, including operations, factoring, and solving polynomial equations. Understanding these concepts is vital for advanced algebra and calculus. Furthermore, rational expressions and equations are thoroughly examined, teaching students to simplify, solve, and apply them to practical problems.

Radical expressions and equations form another key component, enabling students to manipulate and solve equations involving roots and radicals. Beyond these core areas, the textbook also incorporates topics like complex numbers, matrices, sequences, and series, providing a holistic algebraic experience. The goal is to equip students with the skills and knowledge necessary to succeed in higher-level mathematics and related fields, fostering analytical thinking and problem-solving abilities.

Functions and Their Graphs

Glencoe Algebra 2 dedicates substantial coverage to functions and their graphs, a cornerstone of algebraic understanding. Students begin by defining what a function is – a relationship where each input has exactly one output – and explore different representations like equations, tables, and graphs.

The curriculum systematically examines various function types, including linear functions with their constant rate of change, quadratic functions characterized by parabolic graphs, and exponential functions demonstrating rapid growth or decay. Logarithmic functions, as inverses of exponential functions, are also thoroughly investigated.

A key focus is on analyzing function properties such as domain, range, intercepts, and asymptotes. Students learn to perform transformations – shifts, stretches, and reflections – on function graphs to understand their impact on the function’s behavior; Real-world applications of functions are emphasized, demonstrating their relevance in modeling various phenomena. Mastering these concepts is crucial for success in subsequent mathematical courses and problem-solving scenarios.

Polynomials and Polynomial Functions

Glencoe Algebra 2 provides a detailed exploration of polynomials and polynomial functions, building upon foundational algebraic skills. Students learn to identify polynomial expressions, classify them by degree and number of terms, and perform operations like addition, subtraction, and multiplication.

A significant portion focuses on factoring polynomials – a crucial skill for simplifying expressions and solving equations. Techniques covered include factoring out the greatest common factor, difference of squares, trinomial factoring, and grouping. Polynomial division, both long and synthetic, is also thoroughly explained.

The curriculum extends to understanding the Fundamental Theorem of Algebra and its implications for finding the roots (or zeros) of polynomial equations. Students learn to use the Rational Root Theorem and techniques for graphing polynomial functions, identifying end behavior, and locating local maxima and minima. Real-world applications, such as modeling volumes and optimizing designs, are often presented to illustrate the practical relevance of these concepts.

Rational Expressions and Equations

Glencoe Algebra 2 dedicates substantial coverage to rational expressions and equations, expanding students’ algebraic toolkit. This section begins with simplifying rational expressions by factoring both the numerator and denominator, identifying and noting any restrictions on the variable.

Students then progress to performing operations – addition, subtraction, multiplication, and division – with these expressions, requiring a strong understanding of least common denominators. Solving rational equations is a key focus, emphasizing the importance of checking for extraneous solutions that may arise from the simplification process.

Further topics include solving rational inequalities, applications involving proportions and variations (like direct, inverse, and joint variation), and exploring asymptotic behavior of rational functions. The material often connects to real-world scenarios, such as work-rate problems and analyzing rates of change. Mastering these concepts is vital for success in higher-level mathematics courses.

Radical Expressions and Equations

Glencoe Algebra 2 thoroughly explores radical expressions and equations, building upon prior knowledge of exponents. The section commences with simplifying radical expressions, including those with multiple radicals and variables, focusing on extracting perfect square factors and rationalizing denominators.

Students learn to perform arithmetic operations – addition, subtraction, multiplication, and division – with radical expressions, requiring careful attention to combining like radicals. Solving radical equations is a central skill, emphasizing the critical step of squaring both sides and subsequently verifying solutions to avoid extraneous roots.

The curriculum extends to simplifying rational exponents, converting between radical and exponential forms, and solving equations containing rational exponents. Applications often involve geometric problems, such as finding distances or areas. A solid grasp of these concepts is foundational for advanced algebraic manipulations and prepares students for precalculus topics.

Using the Glencoe Algebra 2 PDF Effectively

Glencoe Algebra 2’s PDF format enables flexible learning. Utilize features like search, highlighting, and annotation for focused study and efficient problem-solving practice.

Navigating the PDF Textbook

Glencoe Algebra 2’s PDF version offers a digital learning experience, but effective navigation is key. Most PDF readers, like Adobe Acrobat Reader, provide a table of contents for quick access to chapters and sections. Utilize the bookmarking feature to save frequently referenced pages for rapid retrieval during study sessions or when completing assignments.

The search function is invaluable for locating specific terms, theorems, or example problems within the textbook. Familiarize yourself with the PDF reader’s zoom capabilities to adjust the viewing size for comfortable reading on various devices. Hyperlinks within the PDF often connect to external resources or related concepts, enhancing understanding.

Pay attention to interactive elements, such as embedded videos or practice quizzes, if available. The PDF’s layer functionality can be used to highlight important information or add personal notes directly onto the pages. Regularly updating your PDF reader ensures optimal performance and access to the latest features. Mastering these navigation techniques will significantly improve your learning efficiency with the Glencoe Algebra 2 PDF.

Utilizing Practice Problems and Solutions

Glencoe Algebra 2’s PDF excels in providing ample practice opportunities. Regularly working through these problems is crucial for solidifying your understanding of algebraic concepts. Begin with examples worked out in the textbook, carefully analyzing each step to grasp the underlying principles. Then, tackle the end-of-section exercises, gradually increasing the difficulty level.

Don’t simply aim for the correct answer; focus on understanding why a particular method works. Utilize the provided solutions as a learning tool, not just a means to check your work. If you struggle with a problem, review the relevant section and examples before consulting the solution.

Attempting problems without immediately looking at the answer fosters critical thinking and problem-solving skills. The PDF format allows for easy annotation – mark challenging problems for later review. Consistent practice, combined with thoughtful analysis of solutions, will significantly enhance your mastery of Glencoe Algebra 2 material.

Supplemental Resources for Glencoe Algebra 2

While the Glencoe Algebra 2 PDF is a robust resource, supplementing it can greatly enhance your learning experience. Online platforms like Khan Academy offer video tutorials and practice exercises aligned with algebra concepts. These can provide alternative explanations and reinforce understanding.

Consider utilizing online graphing calculators, such as Desmos, to visualize functions and equations. This visual representation aids in grasping abstract concepts. Numerous websites offer additional practice problems and quizzes, allowing you to test your knowledge and identify areas needing improvement.

Furthermore, explore educational YouTube channels dedicated to algebra; These channels often present concepts in a clear and engaging manner. Don’t hesitate to form study groups with classmates to discuss challenging topics and share insights. Combining the Glencoe Algebra 2 PDF with these supplemental resources creates a well-rounded and effective learning strategy.