Category Archive Manuals

Bytrace

lionel instruction manuals

Lionel instruction manuals are comprehensive guides essential for understanding and operating Lionel train products. They provide detailed safety, assembly, and operating instructions, ensuring smooth functionality and user satisfaction.

1.1 Importance of Lionel Instruction Manuals

Lionel instruction manuals are vital for ensuring the proper setup, operation, and maintenance of Lionel train products. They provide clear, step-by-step guidance, helping users avoid errors and maximize their product’s performance. These manuals include essential safety precautions, assembly instructions, and troubleshooting tips, ensuring a smooth and enjoyable experience. By following the guidelines, users can prolong the lifespan of their trains and accessories. The manuals also serve as a reference for understanding advanced features and customization options, making them indispensable for both novice and experienced enthusiasts. They are a cornerstone for unlocking the full potential of Lionel trains and maintaining user satisfaction.

1.2 Brief Overview of Lionel Train Products

Lionel train products are iconic model trains and accessories that cater to hobbyists and collectors worldwide. The range includes locomotives, passenger cars, freight cars, and track systems. Lionel offers various product lines, from classic steam engines to modern diesel locomotives, ensuring diversity in design and functionality. Accessories like transformers, power packs, and control systems enhance the user experience. Lionel trains are known for their durability, intricate details, and realistic operation, making them a favorite among enthusiasts. Whether for casual enjoyment or intricate layouts, Lionel trains provide endless creativity and entertainment, supported by comprehensive instruction manuals for optimal performance and customization.

Key Components of Lionel Instruction Manuals

Lionel manuals include product specs, compatibility info, advanced features, and customer support details, ensuring comprehensive guidance for users.

2.1 Safety Guidelines and Precautions

Lionel instruction manuals emphasize safety guidelines to prevent accidents and ensure proper usage. They outline precautions for electrical components, battery handling, and equipment installation to avoid hazards. Users are advised to follow polarity guidelines for batteries and avoid improper installations that could cause interference. These manuals stress the importance of adhering to safety protocols to protect both the user and the product. Proper safety measures are highlighted to prevent damage and ensure longevity of Lionel train systems. Always refer to the manual for specific safety instructions tailored to your model.

2.2 Assembly and Installation Instructions

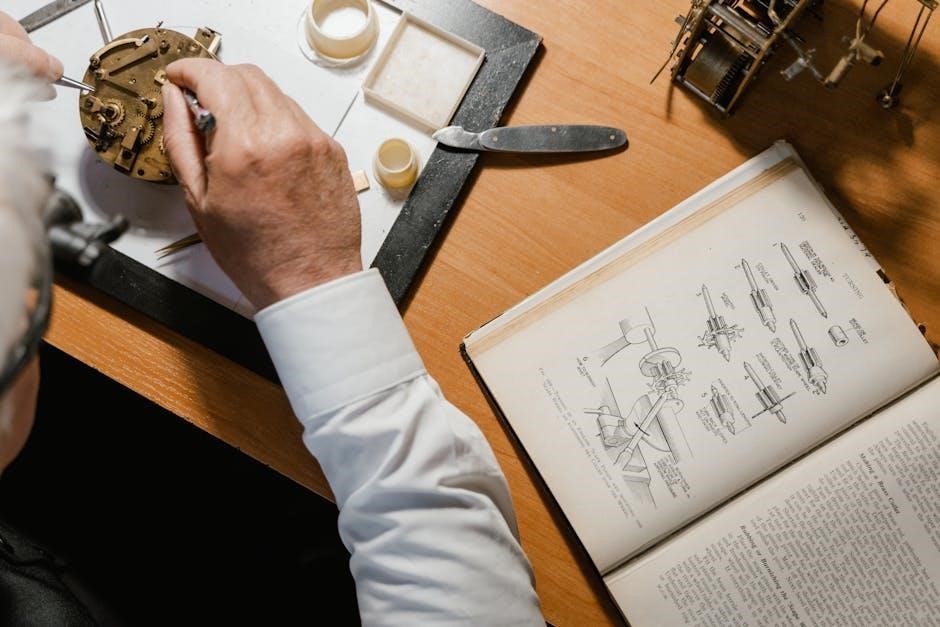
Lionel instruction manuals provide detailed assembly and installation instructions to ensure proper setup of train sets and accessories. Step-by-step guides outline the tools and materials required, while diagrams illustrate component connections. Instructions cover track layouts, transformer configurations, and accessory installations, such as switches and signals. Troubleshooting tips are often included to address common assembly issues. Clear instructions help users avoid errors, ensuring smooth operation. Specific models may have unique assembly steps, so manual adherence is crucial. These guides are designed to make setup straightforward for both novice and experienced users, fostering a seamless experience with Lionel train systems.

2.3 Operating Instructions for Lionel Trains

Lionel instruction manuals include detailed operating instructions to help users maximize their train sets’ performance. These guides explain how to power trains using transformers, adjust speed settings, and control accessories like switches and signals. Instructions often cover special features, such as whistle operations, smoke units, and lighting systems. Safety precautions are emphasized to prevent damage or injury. Troubleshooting tips are provided to address common issues like track connectivity or power supply problems. Additionally, manuals may include maintenance advice to ensure long-term functionality. By following these instructions, users can enjoy a seamless and rewarding experience with their Lionel trains;

Accessing Lionel Instruction Manuals

Lionel instruction manuals can be accessed through the official Lionel website, offering downloadable PDFs and instructional videos for easy reference and user-friendly guidance.

3.1 Official Lionel Website Resources

The official Lionel website is a primary source for accessing instruction manuals, offering a wealth of resources for users. Visitors can download PDF versions of manuals for various Lionel train models, ensuring easy access to detailed instructions. The website is user-friendly, with a dedicated section for support materials, including operating guides, assembly instructions, and troubleshooting tips; Additionally, Lionel provides instructional videos and customer service contact information to assist with any queries. This centralized hub ensures that users can quickly find the information they need, making it an invaluable resource for both new and experienced Lionel train enthusiasts.

3.2 Downloading Manuals from Trusted Sources

For users who prefer downloading Lionel instruction manuals from trusted sources beyond the official website, platforms like ManualsLib and Internet Archive offer free access to PDF versions. These sites host a wide range of Lionel manuals, ensuring compatibility with various train models. Users can easily search and download the specific manual they need, often with comprehensive libraries organized by product type. Additionally, these sources provide safety guidelines and troubleshooting tips, enhancing the overall user experience. Always verify the authenticity of the source to ensure the manual’s accuracy and avoid potential security risks associated with unofficial downloads.

3.3 Instructional Videos and Tutorials

Lionel offers instructional videos and tutorials to complement their manuals, providing visual guidance for assembling, operating, and maintaining train sets. These resources are available on Lionel’s official website and YouTube channel, covering topics like track layout, transformer setup, and accessory installation. Additionally, community forums and model train enthusiast groups share tutorials, offering tips for troubleshooting and customizing layouts. These videos are particularly helpful for new users, as they demonstrate complex procedures in an easy-to-follow format. By combining manuals with video tutorials, users gain a comprehensive understanding of their Lionel products, enhancing their overall experience and ensuring proper usage.

Historical Evolution of Lionel Manuals

Lionel instruction manuals have evolved significantly since their inception in the early 20th century. Early editions were simple, while later versions became more detailed. Design improvements and the shift to digital formats reflect their commitment to user accessibility and clarity.

4.1 Early Editions of Lionel Instruction Manuals

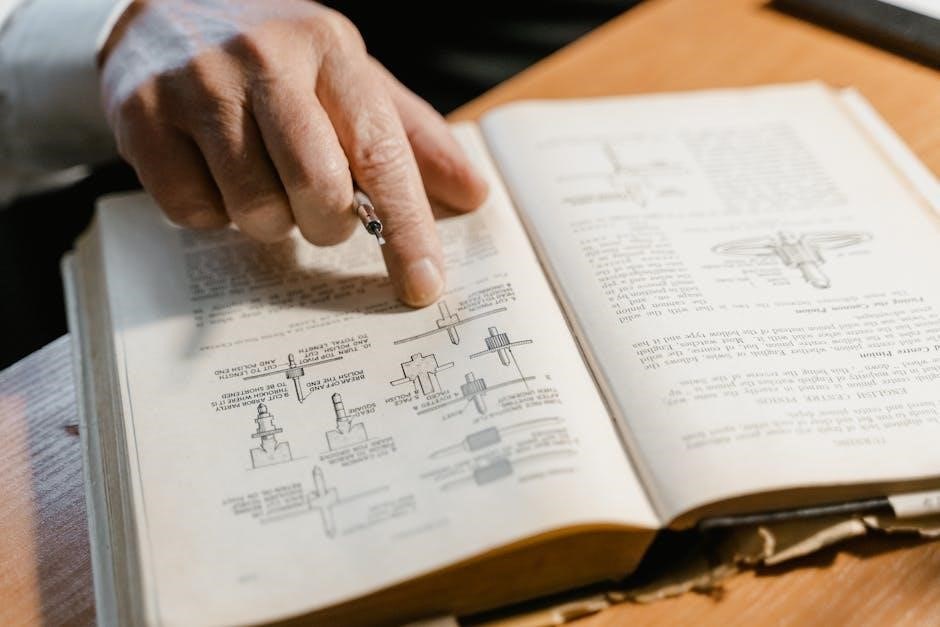
Early Lionel instruction manuals were simple, focusing on essential assembly and operation steps. The 1937 Lionel Train Catalog and 1965 Operating Manual exemplify this era, offering clear, concise instructions. These manuals were typically printed in black and white, with minimal illustrations, reflecting the era’s printing capabilities. They emphasized safety and basic functionality, catering to hobbyists and families. Over time, these early manuals have become sought-after collectibles, providing insight into Lionel’s evolution. Their straightforward approach laid the foundation for modern, detailed guides, showcasing Lionel’s commitment to user-friendly design from its inception.

4.2 Changes in Manual Design Over the Years

Lionel instruction manuals have evolved significantly in design and content. Early editions were basic, with minimal illustrations, while modern manuals feature full-color diagrams and detailed step-by-step guides. The addition of troubleshooting sections and maintenance tips reflects a focus on user convenience. Digital versions now complement physical manuals, offering easier access and updates. Enhanced visuals and organized layouts improve clarity, catering to both novice and experienced users. These changes highlight Lionel’s commitment to adapting to technological advancements and user needs, ensuring manuals remain relevant and effective tools for enthusiasts and collectors alike.

Troubleshooting Common Issues

Troubleshooting Lionel train issues often involves checking track connections, power supply, and proper assembly. Refer to manuals for detailed diagnostic steps and solutions to ensure smooth operation.

5.1 Diagnosing Problems with Lionel Trains

Diagnosing issues with Lionel trains involves identifying common problems like track obstructions, power supply malfunctions, or improper assembly. Start by inspecting the tracks for debris or misalignments and ensure all connections are secure. Check the transformer settings to verify proper voltage output. If trains stall, examine wheels and pickups for cleanliness and damage. Review the instruction manual for troubleshooting guides tailored to specific models. Pay attention to error codes or unusual noises that indicate mechanical issues. By systematically addressing these areas, users can pinpoint and resolve problems efficiently, ensuring their Lionel trains operate smoothly and reliably.

5.2 Repair Tips and Maintenance Advice

Regular maintenance is crucial for extending the lifespan of Lionel trains; Clean tracks and wheels to prevent dust buildup and ensure smooth operation. Lubricate moving parts like axles and gears with lightweight oil to reduce friction. For repairs, use authentic Lionel replacement parts to maintain performance. Inspect wires for damage and secure loose connections to prevent power issues. Refer to the instruction manual for specific repair guidance. For complex problems, contact Lionel’s customer support at 1-800-4-LIONEL for professional assistance. By following these tips, enthusiasts can keep their Lionel trains in excellent condition and enjoy uninterrupted operation.

Lionel Product Support and Customer Service

Lionel provides exceptional support through their toll-free number, 1-800-4-LIONEL, and online resources, ensuring assistance with manuals, repairs, and product inquiries.

6.1 Contact Information for Assistance

Lionel provides dedicated support through their toll-free number, 1-800-4-LIONEL, available Monday through Friday from 9 AM to 6 PM. Customers can also reach out via email or visit their official website at www.lionel.com for assistance. For further inquiries, their office is located at 3020 West Ave, Concord, NC. English-speaking representatives are available to address questions, concerns, or requests related to Lionel products, ensuring prompt and reliable service.

6.2 Warranty Service and Technical Help

Lionel offers comprehensive warranty service and technical support to ensure customer satisfaction. Their toll-free number, 1-800-4-LIONEL, is available Monday through Friday from 9 AM to 6 PM for assistance. Customers can also access product manuals, software upgrades, and instructional videos on www.lionel.com. Warranty service covers repairs and replacements for defective products, while technical help addresses troubleshooting and maintenance. Lionel’s dedicated team ensures that all inquiries are resolved promptly, providing detailed guidance to keep trains running smoothly and efficiently.

Lionel instruction manuals are invaluable resources, ensuring optimal use and maintenance of their train products. They provide clear guidance, fostering a seamless and enjoyable user experience.

7.1 Final Thoughts on Lionel Instruction Manuals

Lionel instruction manuals are indispensable for maximizing the enjoyment and functionality of Lionel train products. They provide clear, detailed guidance, ensuring users can safely assemble, operate, and maintain their trains. These manuals also serve as valuable resources for troubleshooting common issues, offering practical solutions to keep your trains running smoothly. Over the years, Lionel has consistently delivered high-quality manuals, reflecting their commitment to customer satisfaction. Whether you’re a seasoned collector or a new enthusiast, these guides are essential for enhancing your Lionel experience. Their availability online makes them easily accessible, ensuring everyone can benefit from Lionel’s expertise and passion for model trains.

7.2 Encouragement to Explore Lionel Products

Lionel’s legacy as a leader in model trains is a testament to their commitment to quality and innovation. Exploring their products offers a gateway to a world of creativity and nostalgia, perfect for hobbyists and collectors alike. With comprehensive manuals and instructional resources readily available, new enthusiasts can confidently dive into the Lionel universe. The sense of community and endless possibilities for customization make Lionel trains a rewarding and enjoyable hobby. Whether you’re reviving childhood memories or starting fresh, Lionel invites you to embark on a journey of discovery, creativity, and timeless fun with their iconic products.

Bytrace

worm factory 360 instruction manual

The Worm Factory 360 Instruction Manual provides a comprehensive guide to setting up and operating your vermicomposting system. It includes detailed steps, tips, and troubleshooting for optimal results.

Overview of the Worm Factory 360 and Its Benefits

The Worm Factory 360 is a highly efficient vermicomposting system designed to recycle organic waste into nutrient-rich compost. Its expandable design allows for vertical growth, making it ideal for small spaces while maintaining high composting capacity. The system is odor-free, easy to maintain, and requires minimal effort. It includes a built-in worm tea collector for liquid fertilizer and a worm ladder to assist worms in moving between trays. Each tray weighs only 12.5 pounds when full, ensuring easy handling. Made from recycled plastic, it supports eco-friendly living and sustainable gardening practices.

Components of the Worm Factory 360

The Worm Factory 360 includes a base with a spigot, multiple stacking trays, a worm ladder, and a built-in worm tea collector for efficient composting.

Understanding the Parts and Their Functions

The Worm Factory 360 consists of a base with a spigot for draining worm tea, multiple stacking trays for composting, and a worm ladder to assist worm movement. Each tray is designed to hold bedding material and organic waste, while the worm ladder helps worms migrate upward as composting progresses. The base also features a built-in worm tea collector, making it easy to harvest this nutrient-rich liquid fertilizer. Understanding these components ensures proper assembly and optimal functionality of the system.

Setting Up the Worm Factory 360

The Worm Factory 360 setup involves placing the base, adding trays, and incorporating bedding material. The system is expandable, allowing easy addition of trays as needed.

Quick Setup Guide for Beginners

Setting up the Worm Factory 360 is straightforward and user-friendly. Start by placing the base in a stable, comfortable location. Add the first tray and fill it with the provided bedding material. Place the worm ladder to assist worms in moving between trays. Add composting worms and introduce organic waste gradually. The system is expandable, allowing you to add trays as needed. Follow the manual’s step-by-step guide for a seamless setup. This quick process ensures a smooth start to your vermicomposting journey.

Step-by-Step Assembly Instructions

The Worm Factory 360 assembles easily by following the manual’s clear instructions. Begin by placing the base on a stable surface and attaching the spigot for worm tea collection. Next, insert the worm ladder to help worms move between trays. Stack the trays on the base, starting with the bottom tray. Add bedding material and worms to the first tray, then place additional trays as needed. Secure all parts tightly to ensure proper function. This step-by-step process ensures a sturdy and functional vermicomposting system.

Adding Worms to the System

Introducing composting worms to the Worm Factory 360 is a straightforward process. Start with one pound of worms and add them to the prepared bedding material in the bottom tray. This step is essential for initiating the vermicomposting cycle.

Composting worms, such as Red Wigglers, are essential for vermicomposting. They efficiently break down organic matter into nutrient-rich compost. These worms thrive in controlled environments like the Worm Factory 360, where they process kitchen scraps and paper waste; The manual provides guidelines for managing their population and maintaining optimal conditions. Proper care ensures they remain healthy and productive, transforming waste into a valuable resource for your garden. This step is crucial for initiating the vermicomposting process effectively.

Guidelines for Adding Worms to the Factory

The Worm Factory 360 manual recommends starting with 1 pound of composting worms, such as Red Wigglers, for optimal results. These worms are highly efficient at breaking down organic matter. When adding them, ensure the bedding material is moist and free of contaminants. Gently place the worms into the first tray, spreading them evenly. Avoid overloading the system initially, as this can stress the worms. Follow the manual’s guidelines for introducing worms to their new environment to ensure a smooth transition and healthy population growth.

Feeding the Worms

The Worm Factory 360 manual recommends feeding worms organic materials like fruits, vegetables, grains, and paper waste. Avoid meats, fats, and bones to maintain a balanced diet.

Recommended Foods for Composting Worms

The Worm Factory 360 manual recommends feeding worms organic materials like fruits, vegetables, grains, and paper waste. Avoid meats, fats, and bones to prevent odors and pests. Composting worms thrive on a balanced diet rich in nitrogen and carbon. Add materials like eggshells, coffee grounds, and cardboard for optimal results. Avoid overfeeding to maintain a healthy environment. This balanced approach ensures efficient composting and supports worm health.

Feeding Guidelines for Optimal Performance

The Worm Factory 360 manual outlines feeding guidelines to ensure optimal worm health and compost production. Start with small amounts of food and gradually increase as the worm population grows. Monitor moisture levels to avoid overfeeding, which can lead to odors. Add food in layers, ensuring it’s covered with bedding to maintain a balanced ecosystem. Avoid overloading the system, as this can stress the worms. Regularly check for uneaten food and adjust portions accordingly. Proper feeding balances nitrogen and carbon for efficient composting.

Maintaining the Worm Factory 360

Regularly check temperature, moisture, and cleanliness to maintain optimal conditions. Ensure proper airflow and monitor worm activity. Keep the system between 40-80°F for best results.

Monitoring Temperature and Moisture Levels

Maintaining proper temperature and moisture is crucial for optimal worm health and composting efficiency. The Worm Factory 360 should be kept in a location with temperatures between 40-80°F (4-27°C). Check moisture levels regularly to ensure the bedding remains damp but not soggy, as excessive moisture can lead to pests and odors. Use a spray bottle to add water if the bedding feels dry. Monitoring these conditions ensures a healthy environment for the worms and high-quality compost production.

Expanding the System for Increased Capacity

The Worm Factory 360 is designed to expand vertically, allowing you to increase composting capacity as needed. Simply add additional trays on top of the existing ones once they are full. This modular design makes it easy to scale your system without taking up extra floor space; Each tray is lightweight, weighing only 12.5 pounds when full, making it easy to lift and arrange. Expanding the system ensures continuous composting and maximizes efficiency while maintaining a compact footprint.

Troubleshooting Common Issues

The manual addresses common issues like pests, odors, and slow composting, providing practical solutions to maintain a healthy worm population and efficient vermicomposting process.

Identifying and Solving Potential Problems

The Worm Factory 360 manual offers practical solutions for common issues like pests, odors, and slow composting. It guides users in identifying problems through observation of worm behavior, moisture levels, and compost quality. Solutions include adjusting bedding, controlling food intake, and ensuring proper airflow. The manual also provides tips for managing pests and maintaining optimal conditions. Regular monitoring and timely interventions can prevent issues from escalating, ensuring a healthy worm population and efficient composting. This section is essential for troubleshooting and maintaining system performance.

Harvesting the Compost

The Worm Factory 360 simplifies compost harvesting with its vertical design. Add new trays to move worms upward, allowing easy collection of nutrient-rich compost below.

When and How to Harvest Compost

The Worm Factory 360 allows for easy compost harvesting once the trays are fully processed, typically every 1-3 months. When the compost is dark and crumbly, it’s ready. Add a new tray to the top, and the worms will migrate upward, leaving the finished compost in the lower tray. Use the spigot to drain worm tea for liquid fertilizer. Harvesting is straightforward, thanks to the system’s vertical design, ensuring a continuous supply of nutrient-rich compost for your plants. Regular harvesting maintains system efficiency and worm health.

Using the Compost for Your Plants

The nutrient-rich compost produced by the Worm Factory 360 is ideal for enhancing soil structure and promoting healthy plant growth. Mix the compost into potting soil, use it as a top dressing, or incorporate it into garden beds. The compost is packed with microbes and nutrients, creating a natural fertilizer that improves soil fertility; Additionally, the worm tea collected from the system can be used as a liquid fertilizer for plants. Regular use of this compost supports sustainable gardening and robust plant health.
The Worm Factory 360 simplifies vermicomposting, making it easy to recycle waste into nutrient-rich fertilizer. Follow the manual for optimal results and a sustainable gardening experience.

Final Tips for Successful Vermicomposting

For a thriving vermicomposting system, maintain optimal temperature (40–80°F) and moisture levels. Feed worms a balanced diet of organic materials, avoiding meats and fats.Monitor their activity regularly and harvest compost when it’s dark and crumbly. Expand the system as needed by adding trays, ensuring enough space for worms to work efficiently. Regularly drain worm tea for plant fertilization and troubleshoot any issues promptly to keep your Worm Factory 360 running smoothly and sustainably.

Bytrace

stihl service manual pdf free download

The Stihl Service Manual is a comprehensive guide designed to help users maintain and repair their equipment effectively. It provides detailed instructions, safety precautions, and parts diagrams to ensure optimal performance and longevity of Stihl products.

1.1 Overview of the Stihl Service Manual PDF

The Stihl Service Manual PDF is a detailed digital document designed to assist users in maintaining, repairing, and troubleshooting their Stihl equipment. It includes comprehensive guides, parts diagrams, and specifications for various models, ensuring proper handling and safety. The manual covers chainsaws, trimmers, and other equipment, providing essential information for DIY repairs and professional servicing. It’s a valuable resource for extending the lifespan of your Stihl tools.

1.2 Importance of Using the Service Manual

Using the Stihl Service Manual is crucial for ensuring safety, proper maintenance, and efficient repairs. It provides detailed guidelines, troubleshooting tips, and parts diagrams, enabling users to handle their equipment correctly. The manual helps extend the lifespan of Stihl tools and ensures compliance with manufacturer recommendations, making it an essential resource for both professionals and DIY enthusiasts.

Where to Find the Stihl Service Manual PDF for Free

The Stihl Service Manual PDF can be freely downloaded from official Stihl websites, trusted third-party platforms, or forums specializing in power tools and equipment maintenance.

2.1 Official Stihl Websites and Resources

Stihl’s official website offers a dedicated section for service manuals, providing free PDF downloads for various models. These resources are tailored for specific products, ensuring accuracy and reliability. Users can access detailed guides, safety information, and parts diagrams directly from the manufacturer. Official Stihl portals are the most trustworthy source for manuals, as they are regularly updated and verified for authenticity and completeness.

2.2 Reliable Third-Party Websites for Download

Several third-party websites offer free downloads of Stihl service manuals, such as ManualsLib, ManualsOnline, and WorldofTrainz. These platforms provide access to comprehensive guides, parts diagrams, and repair instructions for various Stihl models. While these sites are convenient, ensure the manual is authentic and compatible with your specific model. Always verify the source to avoid downloading incorrect or outdated information, ensuring safety and accuracy in repairs.

How to Download the Stihl Service Manual

Downloading a Stihl Service Manual involves visiting official or trusted third-party sites, selecting your model, and clicking the download link. Ensure compatibility and security during the process.

3.1 Step-by-Step Guide to Downloading the Manual

To download the Stihl Service Manual, visit the official Stihl website or a reliable third-party site. Navigate to the support or download section, select your model from the list, and click the download link. Ensure your device has enough storage and that the file is in PDF format for easy access. Always verify the source to avoid malicious files and ensure a safe download process.

3.2 Tips for Ensuring a Safe and Secure Download

Always download the Stihl Service Manual from official Stihl websites or trusted third-party sources to avoid malicious files. Use antivirus software to scan the download before opening. Ensure the website URL starts with “https” for a secure connection. Avoid downloading from unverified or suspicious sites, as they may contain harmful content. Verify the file format is PDF for compatibility and reliability. This ensures a safe and secure downloading experience.

Models Covered in the Stihl Service Manual

The Stihl Service Manual covers various models, including chainsaws like 021, 023, 025, and other equipment such as FS94, KM94, and SP92, ensuring comprehensive support.

4.1 Popular Chainsaw Models (021, 023, 025)

The Stihl Service Manual covers popular chainsaw models like the 021, 023, and 025, providing detailed repair and maintenance instructions. These models are known for their reliability and performance, and the manual ensures users can troubleshoot and fix common issues, such as engine problems and fuel system maintenance, with ease. It also includes diagrams for accurate parts identification and replacement.

4.2 Other Equipment Covered (FS94, KM94, SP92)

The Stihl Service Manual also covers other equipment such as the FS94, KM94, and SP92 models. These manuals provide detailed maintenance and repair instructions specific to these units, ensuring users can address issues efficiently. They include troubleshooting guides, parts diagrams, and repair procedures, making it easier to keep equipment in optimal condition. This comprehensive coverage ensures all Stihl products receive the care they need for long-term performance and reliability.

Safety Precautions in the Service Manual

The Stihl Service Manual includes detailed information for models FS94, KM94, and SP92. These guides provide specific maintenance and repair instructions, ensuring proper care for each unit. They cover troubleshooting, parts diagrams, and repair procedures, making it easier to maintain equipment performance and longevity. This section is essential for users needing precise guidance for these models.

5.1 Essential Safety Guidelines for Users

The Stihl Service Manual emphasizes wearing protective gear, including gloves, safety glasses, and sturdy footwear. It advises users to ensure proper tool handling, avoid loose clothing, and keep work areas clean. The manual also stresses the importance of following safety precautions to prevent accidents and injuries. Adhering to these guidelines ensures safe and effective operation of Stihl equipment, minimizing risks during maintenance and repair tasks.

5.2 Recommended Cutting Techniques

The Stihl Service Manual outlines proper cutting techniques to ensure efficiency and safety. It recommends maintaining a firm grip, using the correct stance, and aligning the chainsaw for precise cuts. Techniques include boring, snip, and pull cuts, emphasizing chain sharpness and proper angle usage. These methods minimize kickback risks and optimize performance, ensuring safe and effective results for various cutting tasks and materials. Proper technique enhances both safety and productivity.

Maintenance and Repair Instructions

The Stihl Service Manual provides detailed maintenance and repair guidelines, including routine checks, engine tuning, and fuel system cleaning. It ensures proper equipment function and longevity.

6.1 Engine and Fuel System Maintenance

The Stihl Service Manual provides detailed instructions for maintaining the engine and fuel system. Regular checks of the air filter, fuel lines, and carburetor ensure optimal performance. Cleaning or replacing these components as specified prevents engine issues. Proper fuel mixture ratios and spark plug maintenance are also emphasized to avoid engine damage and ensure efficient operation. Adhering to these guidelines extends the lifespan of your Stihl equipment and maintains its reliability.

6.2 Ignition System Repair and Troubleshooting

The Stihl Service Manual offers detailed guidance for repairing and troubleshooting the ignition system. It outlines steps to inspect and replace spark plugs, ensuring proper gap settings. Faulty ignition coils or modules are diagnosed through specific tests. Cleaning or replacing the ignition module and spark plug boot is also covered to restore proper engine operation. These procedures help prevent misfires and ensure reliable engine performance, extending the equipment’s service life effectively.

Parts Diagrams and Identification

The Stihl Service Manual includes detailed parts diagrams, enabling users to identify components easily. These diagrams guide repairs and maintenance, ensuring accurate part replacement for optimal performance.

7.1 Understanding Parts Diagrams for Easy Repair

The Stihl Service Manual includes detailed parts diagrams that simplify repair processes. These visual guides help users identify components, understand their assembly, and locate specific parts for replacement. By referencing these diagrams, users can accurately diagnose issues and ensure proper maintenance. The diagrams cover various models, including chainsaws and trimmers, making it easier for users to find and order the correct parts. This feature enhances repair efficiency and reduces downtime, ensuring equipment longevity and performance.

The diagrams are organized by model, with clear labels and exploded views, allowing users to visualize how components interact. This feature is particularly useful for DIY enthusiasts and professionals alike, as it minimizes errors during repairs. The manual also provides part numbers, enabling users to source replacements directly from Stihl or authorized dealers.

Understanding these diagrams empowers users to tackle repairs confidently, ensuring their equipment operates at peak performance. The combination of detailed visuals and part information makes the Stihl Service Manual an indispensable resource for anyone maintaining or repairing their tools.

By leveraging the parts diagrams, users can avoid costly mistakes and extend the lifespan of their equipment. The clear and concise layout of the diagrams ensures that even complex repairs are approached with clarity and precision; This makes the manual a valuable tool for both routine maintenance and unexpected fixes;

Overall, the parts diagrams in the Stihl Service Manual are designed to streamline the repair process, providing users with the confidence and knowledge to keep their equipment running smoothly.

7.2 Locating Parts for Your Specific Model

To locate parts for your Stihl equipment, refer to the model-specific sections in the service manual. Each model, such as chainsaws or trimmers, has a dedicated parts list with corresponding numbers. Use these numbers to identify and source the correct components from Stihl dealers or authorized retailers. This ensures compatibility and avoids errors during repairs. The manual also provides guidance on where to find parts diagrams for accurate identification and ordering.

By matching part numbers to your specific model, you can ensure proper fitment and functionality. This streamlined process helps users avoid purchasing incorrect parts, saving time and resources. The manual’s organized structure makes it easy to navigate and find the exact parts needed for your equipment.

Additionally, the service manual often includes links or references to Stihl’s official parts catalog, further simplifying the process. This ensures users can quickly access the necessary components to maintain or repair their tools effectively.

Overall, the manual’s detailed parts lists and model-specific guidance make it an essential tool for anyone looking to locate and replace parts accurately. This feature enhances the overall repair experience and ensures equipment longevity.

By leveraging the manual’s resources, users can efficiently find the right parts for their Stihl equipment, minimizing downtime and ensuring optimal performance. The clear instructions and organized format make the process straightforward, even for those new to repairs.

The manual’s focus on model-specific parts ensures that users can quickly and accurately identify what they need, streamlining the repair process and reducing frustration. This level of detail makes the manual an indispensable resource for Stihl equipment owners.

By following the manual’s guidance, users can extend the life of their tools and keep them functioning at their best. The ability to locate parts efficiently is just one of the many benefits offered by the Stihl Service Manual.

The Stihl Service Manual’s focus on model-specific parts ensures that users can quickly and accurately identify what they need, streamlining the repair process and reducing frustration. This level of detail makes the manual an indispensable resource for Stihl equipment owners.

By following the manual’s guidance, users can extend the life of their tools and keep them functioning at their best. The ability to locate parts efficiently is just one of the many benefits offered by the Stihl Service Manual.

Troubleshooting Common Issues

The Stihl Service Manual provides detailed troubleshooting guides for common issues like engine problems and fuel system malfunctions, offering step-by-step solutions to restore optimal performance.

8.1 Diagnosing and Fixing Engine Problems

The Stihl Service Manual offers detailed guidance for diagnosing and repairing engine issues, such as faulty ignition systems or carburetor malfunctions. It provides step-by-step instructions to identify the root cause of engine problems, ensuring precise and effective repairs. By following the manual, users can address common issues like poor engine performance or failure to start, restoring their equipment to optimal functionality. Safety guidelines and parts diagrams are included to aid in successful troubleshooting and repair.

and Final Thoughts

8.2 Solving Fuel and Ignition System Issues

The Stihl Service Manual provides expert guidance for resolving fuel and ignition system problems. It outlines step-by-step procedures for diagnosing issues like clogged fuel lines, faulty spark plugs, or malfunctioning carburetors. The manual includes detailed troubleshooting charts and repair instructions to ensure proper functionality. By following the recommended steps, users can restore their equipment’s performance and prevent future issues. Clear diagrams and safety tips are also included for accurate and secure repairs.

Bytrace

mazda 3 2010 owners manual

The Mazda 3 2010 Owners Manual is a comprehensive guide essential for understanding your vehicle’s operation, maintenance, and features. It ensures safe and efficient driving experiences.

Overview of the Manual

The Mazda 3 2010 Owners Manual serves as a detailed guide to understanding and maintaining your vehicle. It covers essential topics such as safety precautions, maintenance schedules, and operating instructions. The manual is structured to help owners optimize their driving experience, troubleshoot common issues, and access technical specifications. By following the guidelines outlined, drivers can ensure their Mazda 3 operates efficiently and safely. Regular reference to this manual is recommended for optimal performance and longevity of the vehicle.

Importance of Reading the Manual

Reading the Mazda 3 2010 Owners Manual is crucial for safe and efficient vehicle operation. It provides essential information on features, maintenance, and troubleshooting, helping you avoid costly repairs and ensure optimal performance. Understanding safety features and proper driving practices can enhance your driving experience and prevent potential hazards. Regular reference to the manual ensures you maximize your car’s longevity and functionality, making it a vital resource for every Mazda 3 owner.

Safety Guidelines and Precautions

Adhering to the Mazda 3 2010 Owners Manual’s safety guidelines ensures proper vehicle operation and minimizes risks. Always follow precautions for seat adjustments, seatbelt use, and avoiding distractions while driving.

General Safety Warnings

Always adhere to the Mazda 3 2010 Owners Manual’s safety guidelines to ensure a secure driving experience. Properly adjust seats, mirrors, and seatbelts before driving. Avoid distractions like using electronic devices while operating the vehicle; Never ignore warning lights or alarms, as they indicate potential issues. Follow recommended procedures for starting, stopping, and emergency situations. Regularly check tire pressure and brakes to maintain optimal safety conditions. Refer to the manual for detailed safety precautions and explanations.

Precautions for Proper Vehicle Operation

Ensure proper vehicle operation by following the Mazda 3 2010 Owners Manual’s guidelines. Always adjust seats, mirrors, and seatbelts before driving. Avoid distractions like using electronic devices while operating the vehicle. Never start the engine without ensuring all occupants are securely fastened. Follow recommended procedures for starting, stopping, and emergency situations. Regularly check tire pressure and brakes to maintain optimal safety conditions. Refer to the manual for detailed safety precautions and explanations.

Maintenance and Servicing

Regular maintenance is essential for optimal performance and longevity of your Mazda 3. Adhere to the manual’s scheduled intervals for oil changes, tire rotations, and inspections.

Scheduled Maintenance Intervals

Regular maintenance is crucial for your Mazda 3’s performance. Follow the manual’s schedule for oil changes every 5,000 to 7,500 miles, tire rotations every 5,000 miles, and inspections. More extensive services like spark plug replacements and belt checks are recommended at 30,000 and 105,000 miles. Adhering to these intervals ensures optimal fuel efficiency, prevents premature wear, and maintains warranty coverage. Neglecting scheduled maintenance can lead to reduced performance and potential engine damage over time.

DIY Maintenance Tips

Performing routine maintenance yourself can save time and money. Regularly check fluid levels, including coolant, brake, and transmission fluids, and top them off as needed. Inspect belts for cracks or wear and ensure proper tension. Check hoses for signs of leaks or damage. Consider replacing the cabin air filter for improved interior comfort. Always refer to the manual for specific guidelines and precautions to ensure safety and avoid potential damage to your vehicle.

Understanding Your Vehicle’s Instruments and Controls

The Mazda 3 2010 Owners Manual details the dashboard layout, instrument cluster, and control functions. It explains gauges, warning lights, and operational buttons for a smooth driving experience.

Dashboards and Instrument Cluster

The Mazda 3 2010 Owners Manual explains the dashboard layout, highlighting the instrument cluster’s essential components, such as the speedometer, tachometer, and fuel gauge. It details warning lights for system malfunctions and provides guidance on understanding the multi-information display. Drivers are instructed on how to interpret dashboard indicators for optimal vehicle monitoring. The manual also covers the location and function of key controls, ensuring intuitive operation of heating, cooling, and audio systems for a seamless driving experience.

Controls and Switches

The Mazda 3 2010 Owners Manual provides detailed information about the location and function of various controls and switches. It explains the operation of the steering wheel-mounted controls, audio system buttons, and climate control switches. The manual also covers the use of wiper and light controls, ensuring drivers can easily manage their vehicle’s features. Clear instructions are given for adjusting settings and understanding indicator lights, helping drivers customize their driving experience effectively.

Driving Tips and Best Practices

Smooth acceleration, maintaining safe following distances, and adjusting speed according to road conditions are key. Use cruise control on highways for efficiency and always follow traffic rules.

Optimizing Fuel Efficiency

  • Regularly check and maintain proper tire pressure to reduce rolling resistance.
  • Avoid aggressive driving; smooth acceleration and braking improve mileage.
  • Remove unnecessary weight from the vehicle to enhance fuel economy.
  • Use cruise control on highways to maintain a consistent speed.
  • Plan routes efficiently to minimize traffic and idling time.
  • Ensure regular servicing, including air filter and oil changes, to optimize engine performance.

Safe Driving Practices

  • Always wear a seatbelt and ensure all passengers do the same for optimal safety.
  • Adjust your seat, mirrors, and steering wheel to a comfortable position before driving.
  • Obey all traffic laws, including speed limits and right-of-way rules.
  • Avoid distractions like using a phone while driving to maintain focus on the road.
  • Check blind spots and mirrors frequently to stay aware of surrounding vehicles.
  • Maintain a safe following distance to allow time for sudden stops.
  • Exercise extra caution in poor weather conditions like rain or fog.

Troubleshooting Common Issues

Refer to the manual for guidance on identifying warning lights, addressing performance issues, and resolving electrical or mechanical faults. Detailed steps help resolve common problems efficiently.

Identifying Warning Lights

Understanding warning lights is crucial for safe operation. The Mazda 3 2010 manual details each light’s meaning, such as the check engine, oil, or battery symbols. Refer to the manual to identify and address issues promptly. Familiarize yourself with the dashboard indicators to recognize when attention is needed; Regular checks ensure proper vehicle function and prevent potential breakdowns. Always consult the manual for specific guidance on warning light diagnostics and recommended actions.

Basic Troubleshooting Steps

Start by reviewing the dashboard warning lights and manual guidance. Check basic systems like battery connections and fluid levels. Restart the engine after addressing potential issues. If problems persist, consult the troubleshooting section or contact an authorized Mazda service center. Always follow the manual’s instructions for safe and effective diagnostics. Regular checks can prevent minor issues from becoming major concerns. Keep the manual handy for quick reference and guidance.

Technical Specifications

The Mazda 3 2010 features a 2.0L or 2.5L engine, available manual or automatic transmissions, and front-wheel drive. It offers a fuel capacity of 15.1 gallons, with a maximum horsepower of 167-170 depending on the engine. The manual provides detailed specs for optimal performance and customization, ensuring drivers understand their vehicle’s capabilities and limitations for enhanced driving experiences.

Engine and Transmission Details

The 2010 Mazda 3 offers two engine options: a 2.0L DOHC inline-4, producing 148 horsepower, and a 2.5L DOHC inline-4, delivering 167 horsepower. Both engines feature variable valve timing for optimal performance. Transmission choices include a 5-speed manual, 6-speed manual, or 5-speed automatic with Sport mode. Fuel efficiency varies by engine and transmission, ensuring a balance between power and economy. Proper maintenance, as outlined in the manual, ensures longevity and peak performance of these components.

Performance and Capability

The 2010 Mazda 3 combines agility with power, offering sport-tuned suspension and precise steering for responsive handling. The advanced braking system ensures reliable stopping power. With a choice of engines, the Mazda3 delivers balanced performance, whether navigating city streets or highways. The manual highlights features like Sport mode in automatic transmissions and the vehicle’s stability control system, ensuring optimal driving dynamics. Proper maintenance, as detailed, maximizes performance and capability for a thrilling driving experience.

Warranty and Service Information

Your Mazda 3 2010 is backed by a comprehensive warranty covering parts and labor. Schedule regular maintenance at authorized service centers for optimal performance and warranty compliance.

Understanding Your Warranty

Your Mazda 3 2010 warranty provides comprehensive coverage for parts and labor under specified conditions. The warranty period typically lasts for a certain duration or mileage, ensuring protection against defects. It covers repairs and replacements for factory-installed components, excluding normal wear items. Regular maintenance by authorized Mazda service centers is essential to maintain warranty validity. Refer to the manual for detailed terms, conditions, and exclusions to ensure full understanding and compliance with warranty requirements for your vehicle.

Locating Authorized Service Centers

To ensure your Mazda 3 2010 receives proper care, use authorized Mazda service centers. These centers are equipped with trained technicians and genuine parts. The manual provides contact information and locations for authorized dealerships. Regular maintenance at these centers ensures compliance with warranty terms and optimal vehicle performance. Visit Mazda’s official website or refer to the manual for a detailed list of nearby service centers to schedule appointments and maintain your car’s health effectively.

Accessories and Customization

Explore genuine Mazda 3 accessories for enhanced functionality and style. Customize your vehicle with approved parts for optimal compatibility and performance, ensuring reliability and durability over time.

Factory-Approved Accessories

Factory-approved accessories for the Mazda 3 2010 are specifically designed to enhance your driving experience. These include seat covers, cargo trays, and roof racks, ensuring perfect fitment and functionality. They are rigorously tested to meet Mazda’s quality standards, providing durability and reliability. By choosing genuine parts, you maintain your vehicle’s warranty and ensure optimal performance. Accessories are available through Mazda dealerships or online platforms, making customization easy and convenient for owners.

Aftermarket Modifications

Aftermarket modifications allow Mazda 3 2010 owners to personalize their vehicle beyond factory settings. Popular upgrades include performance-enhancing parts like engine tunings, exhaust systems, and suspension kits. Aesthetic modifications such as body kits, alloy wheels, and interior upgrades are also common. When installing aftermarket parts, ensure compatibility with your Mazda 3 to maintain safety and performance. Always consult the owner’s manual or a professional to avoid voiding warranties or causing system malfunctions. Research reputable brands for reliability and durability.

Downloading and Referencing the Manual

The Mazda 3 2010 Owners Manual is available for free download online as a PDF. It ensures easy access to essential information for proper vehicle operation and maintenance.

Online Resources for the Manual

Various websites offer the Mazda 3 2010 Owners Manual for free download. Platforms like ManualsLib and Mazda’s official site provide easy access to the PDF version. Ensure to verify the source’s reliability for accurate information. Additionally, forums and automotive communities often share links to the manual, making it convenient for owners to reference or print specific sections as needed. Always download from trusted sources to avoid incorrect or outdated content.

Storing the Manual for Future Use

Store the Mazda 3 2010 Owners Manual in a safe, dry place, such as the glove box, to ensure easy access. Protect it from damage or wear to maintain its readability. For convenience, consider downloading a digital copy and saving it to your device or cloud storage. This ensures the manual remains available for future reference or if the physical copy is misplaced. Keeping it organized helps preserve its value for years to come.

Bytrace

freestyle comfort oxygen concentrator manual

Welcome to the FreeStyle Comfort Oxygen Concentrator Manual. This guide provides essential information for safe and effective use‚ covering setup‚ operation‚ and maintenance to ensure optimal performance and user comfort.

1.1 Overview of the Freestyle Comfort Oxygen Concentrator

The FreeStyle Comfort is a portable oxygen concentrator designed for maximum portability and ease of use. It combines advanced oxygen concentrator and conserving technologies to deliver pulse flow oxygen‚ ensuring efficient therapy during inhalation. Lightweight and ergonomic‚ it offers enhanced mobility for active lifestyles.

1.2 Importance of the User Manual for Safe and Effective Use

The user manual is crucial for ensuring the FreeStyle Comfort operates safely and effectively. It provides detailed instructions on setup‚ operation‚ and maintenance‚ helping users understand features like pulse flow delivery and oxygen conserving technology. Adhering to the manual minimizes risks and optimizes therapy outcomes.

Key Features of the Freestyle Comfort Oxygen Concentrator

The FreeStyle Comfort boasts portability‚ advanced pulse flow delivery‚ oxygen conserving technology‚ and extended battery life‚ making it a versatile and efficient solution for oxygen therapy needs.

2.1 Portability and Design

The FreeStyle Comfort is designed for ultimate portability‚ weighing just 5 pounds‚ with an ergonomic design that allows for easy transport and use during daily activities‚ enhancing user mobility and comfort without compromising performance or therapy effectiveness.

2.2 Advanced Pulse Flow Delivery Technology

The FreeStyle Comfort features advanced pulse flow delivery technology that detects the user’s breathing pattern and delivers a precise pulse of oxygen at the start of each inhalation‚ optimizing oxygen therapy efficiency and conserving oxygen flow‚ making it highly effective for portable use.

2.3 Oxygen Conserving Technology

The FreeStyle Comfort incorporates oxygen-conserving technology that delivers oxygen only during inhalation‚ significantly extending battery life and reducing oxygen waste‚ ensuring efficient therapy while maintaining portability and user freedom.

2.4 Battery Life and Power Options

The FreeStyle Comfort offers an impressive battery life of up to 8 hours on a single charge‚ with dual charging options via AC and DC power sources. The device automatically switches between power sources‚ ensuring uninterrupted therapy during travel or at home‚ enhancing user convenience and mobility.

User Controls and Display

The FreeStyle Comfort features an intuitive control panel and LCD display‚ allowing users to easily manage settings‚ monitor oxygen flow‚ and receive clear notifications for optimal therapy management and device monitoring.

3.1 Understanding the Control Panel

The control panel offers straightforward buttons for adjusting settings and monitoring the device. LED indicators provide visual feedback on oxygen flow levels‚ battery status‚ and alarm conditions. An integrated alarm system alerts users to issues like low oxygen levels or high flow rates‚ ensuring safe and effective therapy. Refer to the manual for detailed operation guides and troubleshooting steps.

3.2 LCD Display and Indicators

The LCD display shows real-time information‚ including oxygen flow levels‚ battery life‚ and operational status. Color-coded indicators provide clear visual feedback‚ while audible alerts notify users of system changes or potential issues. Refer to the manual for a detailed explanation of all symbols and their meanings to ensure proper device monitoring and adjustment.

3.3 Alarm Systems and Notifications

The FreeStyle Comfort features an advanced alarm system that alerts users to low oxygen flow‚ high temperature‚ low battery‚ or system errors. Audible notifications and visual indicators ensure prompt attention to issues. Refer to the manual for a detailed list of alarms and instructions for resolving them effectively;

Operating Instructions

Unpack and connect power‚ then adjust flow settings and ensure proper inhalation. Regularly maintain the device and monitor alarms for optimal performance and safety.

4.1 Setting Up the Device

Unpack the FreeStyle Comfort and ensure all components are included. Connect the power source‚ check for damage‚ and secure the nasal cannula. Follow manual instructions for proper setup and initial operation to ensure safety and functionality.

4.2 Adjusting Flow Settings

Turn the flow control dial to select the prescribed setting (1-5). The device delivers oxygen pulses triggered by your breath. Use the control panel to adjust settings‚ ensuring proper oxygen delivery. The FreeStyle Comfort features advanced pulse flow technology for efficient therapy.

4.3 Proper Inhalation Techniques

Insert the nasal cannula snugly into your nostrils‚ ensuring a proper seal. Breathe naturally; the FreeStyle Comfort detects inhalation and delivers oxygen pulses. Avoid exhaling through the nose or blocking the cannula. Maintain steady breathing for optimal oxygen delivery and effectiveness of therapy.

Power Options and Battery Management

The FreeStyle Comfort operates on AC/DC power and has a rechargeable battery. Charge the battery using the provided adapter‚ ensuring optimal performance and extended portability for uninterrupted therapy.

5.1 AC and DC Power Sources

The FreeStyle Comfort supports both AC and DC power sources‚ offering versatility for home and mobile use. Use the provided AC adapter for stationary power or the DC adapter for vehicles. Ensure the device is securely fastened in vehicles to maintain proper function and safety during travel. Always keep the battery charged when using DC power for uninterrupted therapy.

5.2 Charging the Battery

To charge the battery‚ connect the FreeStyle Comfort to an AC or DC power source using the provided adapters. The battery charges automatically when the device is plugged in. A built-in indicator shows the charging status‚ ensuring you know when the battery is fully charged and ready for portable use.

5.3 Maximizing Battery Life

To maximize battery life‚ charge the battery using the provided AC/DC adapters. Avoid overcharging‚ as this can reduce battery capacity. Store the FreeStyle Comfort in a cool‚ dry place when not in use. Regularly clean the battery contacts and ensure proper charging cycles to maintain optimal performance and longevity of the battery.

Maintenance and Cleaning

Regular maintenance and cleaning are crucial for ensuring the FreeStyle Comfort operates efficiently. Clean the exterior with a damp cloth and avoid harsh chemicals. Replace or clean filters as recommended to maintain optimal oxygen flow and device performance. Proper storage in a dry‚ cool environment is also essential.

6.1 Cleaning the Device

Use a soft‚ damp cloth to wipe the FreeStyle Comfort exterior‚ avoiding harsh chemicals. Regularly inspect and clean the air inlet and cannula to ensure proper airflow. Never submerge the device in water or use abrasive cleaners‚ as this may damage internal components. Cleaning helps maintain optimal performance and longevity.

6.2 Filter Maintenance

Regular filter maintenance is crucial for optimal performance. Check and clean the air filter every 1-2 weeks‚ or as indicated by visible dust buildup. Replace the filter every 6-12 months or when damaged. Using a damaged filter can reduce oxygen output and affect therapy effectiveness. Always refer to the user manual for correct replacement procedures.

6.3 Storage Guidelines

Store the FreeStyle Comfort in a cool‚ dry‚ well-ventilated area‚ away from direct sunlight and flammable materials. Avoid storing in airtight containers or extreme temperatures. Keep the device upright and ensure all accessories are securely packed. Proper storage ensures longevity and maintains the concentrator’s performance when not in use.

Safety Precautions and Warnings

Always follow safety guidelines to avoid hazards. Ensure the device is not damaged or exposed to water. Keep it away from flammable materials and secure it during use for optimal safety.

7.1 General Safety Guidelines

Ensure the device is used as intended and in good condition. Avoid exposure to water or extreme temperatures. Keep it away from flammable materials and secure it during transport. Regularly inspect for damage and follow all manufacturer recommendations to ensure safe operation and effectiveness.

7.2 Operating in Different Environments

The FreeStyle Comfort is designed for use in various settings‚ including home‚ car‚ or outdoor activities. Always ensure the device is securely positioned and protected from extreme temperatures or moisture. When using in a vehicle‚ connect to a DC power source and ensure proper ventilation for safe operation.

7.3 Handling Damaged or Malfunctioning Units

If the FreeStyle Comfort is damaged‚ discontinue use immediately. Contact your healthcare provider for inspection or repair. Avoid using a damaged power cord or exposing the unit to water. Do not attempt to repair the device yourself‚ as this may void the warranty or compromise safety.

Troubleshooting Common Issues

Refer to the troubleshooting section in the manual for guidance on resolving alarms‚ low oxygen flow‚ and battery issues. Follow steps to restore normal operation safely and effectively.

8.1 Identifying and Resolving Alarms

The FreeStyle Comfort features an advanced alarm system to alert users of issues like low oxygen levels or high temperature. Check the LCD display for error codes‚ refer to the troubleshooting table in the manual‚ and follow steps to resolve issues‚ such as resetting the device or charging the battery.

8.2 Addressing Low Oxygen Flow

If experiencing low oxygen flow‚ check the cannula for kinks or blockages and ensure proper fit. Clean or replace the cannula if necessary. Verify the flow setting matches your prescription and consult the manual for troubleshooting steps. If issues persist‚ contact your healthcare provider or CAIRE support for assistance.

8.3 Battery and Charging Problems

If experiencing battery or charging issues‚ ensure the power cord is secure‚ the battery is properly inserted‚ and the charging indicator lights are on. Check for loose connections and verify the power source. Consult the manual for troubleshooting steps. If problems persist‚ contact CAIRE support.

Accessories and Additional Equipment

This section details included accessories like protective bags‚ power blocks‚ and nasal cannulas‚ as well as optional mobility equipment for enhanced portability.

9.1 Included Accessories

The FreeStyle Comfort comes with essential accessories‚ including a protective carry bag‚ power block‚ DC power adapter‚ and nasal cannula. These items ensure convenient portability and proper operation. Additional components like a user manual and warranty information are also provided for easy reference.

9.2 Optional Accessories for Enhanced Mobility

Enhance your mobility with optional accessories like a lightweight backpack or cart for easy transport. Additional battery packs extend usage away from power sources‚ while extra nasal cannulas and power adapters ensure convenience. These accessories are designed to complement your FreeStyle Comfort experience‚ offering greater freedom and flexibility on the go;

Technical Specifications

The FreeStyle Comfort delivers up to 5 LPM with high oxygen purity. Weighing just 5 pounds‚ it offers a compact design‚ low noise level‚ and efficient operation for portable use.

10.1 Flow Rate and Oxygen Purity

The FreeStyle Comfort delivers oxygen at flow rates of 1 to 5 LPM‚ ensuring high purity levels. Its advanced technology maintains consistent oxygen concentration‚ providing reliable therapy across all settings for optimal patient comfort and effectiveness.

10.2 Weight and Dimensions

The FreeStyle Comfort weighs just 5 pounds‚ making it highly portable. Its compact design measures 8.25 inches x 6.75 inches x 4.75 inches‚ ensuring easy mobility and convenience for users requiring oxygen therapy on the go.

10.3 Noise Level and Operational Modes

The FreeStyle Comfort operates at a quiet 40 decibels‚ ensuring minimal disruption. It features both pulse flow and continuous flow modes‚ catering to different oxygen therapy needs. This versatility‚ combined with its portability‚ makes it ideal for use at home‚ in vehicles‚ or while traveling‚ enhancing user convenience and comfort significantly.

The FreeStyle Comfort Oxygen Concentrator Manual provides comprehensive guidance for optimal use. Its portability‚ advanced features‚ and ease of operation make it a reliable choice for oxygen therapy needs‚ ensuring user comfort and independence in daily life.

11.1 Summary of Key Points

The FreeStyle Comfort Oxygen Concentrator offers advanced features like pulse flow delivery and oxygen-conserving technology‚ ensuring efficient therapy. Its portability‚ user-friendly controls‚ and robust battery life enhance mobility. Always follow safety guidelines and maintenance tips for optimal performance and longevity of the device.

11.2 Encouragement for Continued Use and Reference

Regular use of the FreeStyle Comfort enhances your independence and well-being. Refer to this manual for troubleshooting and maintenance tips to ensure optimal performance. By following the guidelines‚ you can maximize the device’s benefits and enjoy improved oxygen therapy outcomes with confidence and convenience.

Bytrace

cftss manual

The CFTSS Manual serves as a comprehensive guide for providers, outlining the framework, policies, and procedures for delivering Children and Family Treatment and Support Services effectively.

1.1 Overview of Children and Family Treatment and Support Services (CFTSS)

Children and Family Treatment and Support Services (CFTSS) are Medicaid-covered interventions designed to support children, youth, and families with emotional, behavioral, or mental health challenges. These services, part of New York State’s Medicaid redesign, aim to provide trauma-informed, evidence-based care in home or community settings, fostering resilience and promoting long-term well-being.

1.2 Purpose and Scope of the CFTSS Manual

The CFTSS Manual provides clear guidelines and standards for delivering Children and Family Treatment and Support Services. Its purpose is to ensure consistent, high-quality care by outlining policies, procedures, and best practices for providers. The scope includes eligibility criteria, service delivery, documentation, and billing processes, ensuring compliance with state regulations and promoting effective outcomes for children, youth, and families.

Eligibility Criteria for CFTSS

Eligibility for CFTSS requires providers to meet state licensure and certification standards, while children, youth, and families must be enrolled in Medicaid and demonstrate medical necessity for services.

2.1 Eligibility for Providers

Providers must meet specific criteria to deliver CFTSS, including state licensure, certification, and compliance with Medicaid standards. They must also adhere to internal agency policies and procedures. Eligibility ensures providers are qualified to offer high-quality services, aligning with state and federal regulations. Proper designation and certification are essential for reimbursement and service delivery under the CFTSS program.

2.2 Eligibility for Children, Youth, and Families

Eligibility for CFTSS is determined by Medicaid enrollment, age requirements, and medical necessity. Children, youth, and families must meet specific criteria, including clinical need for services and approval from authorized professionals. Services are designed to address behavioral, emotional, or developmental challenges, ensuring access to tailored support for eligible individuals.

Services Offered Under CFTSS

CFTSS provides therapy, counseling, and evidence-based interventions like Functional Family Therapy (FFT) to support children, youth, and families with tailored, goal-oriented treatment plans.

3;1 Therapy and Counseling Services

Therapy and counseling services under CFTSS are designed to address the emotional, behavioral, or mental health challenges of children, youth, and families. These services are provided in a trauma-informed, goal-oriented manner, focusing on improving functioning and well-being. They include individual, family, or group sessions, leveraging evidence-based practices to support recovery and resilience.

3.2 Functional Family Therapy (FFT)

Functional Family Therapy (FFT) is an evidence-based intervention focusing on family dynamics to address behavioral and emotional challenges in children and adolescents. It aims to improve communication, reduce conflict, and enhance problem-solving skills within families. FFT is typically short-term, involving the entire family, and emphasizes relational interventions to foster positive change and resilience.

3.3 Psychosocial Rehabilitation Services

Psychosocial Rehabilitation Services focus on helping children, youth, and families develop skills for daily living and social interactions. These services aim to promote independence, resilience, and community integration. They are tailored to individual needs, addressing personal goals and functioning. Services often involve collaboration with families and caregivers to create a supportive environment, complementing other therapies and interventions for holistic care.

Documentation and Supervisory Review

Thorough documentation is required for accountability, ensuring services are delivered as planned. Supervisors review records to maintain compliance and support staff in providing effective care.

4.1 Requirements for Documentation

Accurate and comprehensive documentation is essential for tracking progress and ensuring compliance. Providers must maintain detailed records, including treatment plans, progress notes, and outcomes. Documentation must align with state and Medicaid guidelines. Specific forms, such as the Medical Necessity/LPHA Recommendation Form, may be required. Regular audits ensure adherence to these standards, supporting transparency and accountability in service delivery.

4.2 Role of Supervision in Service Delivery

Supervision plays a vital role in ensuring the quality and consistency of services provided under the CFTSS program. It involves regular oversight and guidance to support providers in delivering effective care. Through supervision, providers receive feedback and training to enhance their skills and stay compliant with program standards. This process fosters accountability and continuous improvement in service delivery.

Service Delivery Guidelines

Services must be delivered in non-school settings, avoiding routine schedules in schools. Providers must adhere to internal policies and state licensure requirements for effective service implementation.

5.1 Settings for Service Delivery

Services under CFTSS are delivered in various settings, including home, community, and school environments. However, services cannot be based in schools or follow a regular schedule targeting multiple students. Settings must align with the individual’s needs, ensuring services are provided in natural, non-institutional environments to promote effective treatment and support outcomes for children, youth, and families.

5.2 Frequency and Duration of Services

The frequency and duration of CFTSS services are tailored to meet the individual needs of children, youth, and families. Services are delivered based on treatment plans and clinical assessments. Providers must ensure services are provided regularly, with adjustments made as needed. Documentation must reflect the rationale for service frequency and duration, aligning with clinical standards and guidelines.

Billing and Reimbursement Procedures

Providers must adhere to specific billing requirements and documentation standards to ensure timely and accurate reimbursement for CFTSS services, as outlined in the updated manual guidelines.

6.1 Billing Requirements for CFTSS Services

Billing for CFTSS Services requires adherence to specific guidelines, including accurate coding, detailed documentation, and timely submission. Providers must ensure compliance with NYS Medicaid Regulations and maintain records for audit purposes. Billing must reflect services delivered, with clear documentation of medical necessity and service details. Providers are encouraged to review updates in the CFTSS Provider Manual for the latest billing requirements and reimbursement processes.

6.2 Reimbursement Processes and Timelines

Reimbursement for CFTSS services follows specific processes and timelines. Providers must submit claims within 90 days of service delivery. Claims are processed within 30 days of receipt, adhering to Medicaid guidelines. Denied claims require corrective action within 15 days. Providers must maintain detailed documentation for audit purposes. Timely submission ensures uninterrupted funding and compliance with state regulations.

Quality Improvement and Monitoring

Quality improvement ensures adherence to standards, enhancing service delivery and outcomes. Monitoring involves regular assessments and feedback to maintain compliance and effectiveness in CFTSS programs.

7.1 Quality Assurance Standards

Quality assurance standards ensure CFTSS services meet regulatory and ethical benchmarks. These standards include regular monitoring of service delivery, staff training, and adherence to state guidelines. They promote consistency, accountability, and continuous improvement in care provision, ensuring optimal outcomes for children, youth, and families. Compliance with these standards is mandatory for all designated providers.

7.2 Monitoring and Evaluation Processes

Monitoring and evaluation processes ensure compliance with quality standards and effectiveness of service delivery. Regular audits, performance reviews, and feedback mechanisms are utilized to assess provider adherence to guidelines. These processes align with Medicaid standards, fostering continuous improvement and accountability, ensuring optimal outcomes for children, youth, and families served under the CFTSS program.

Family and Caregiver Involvement

Families and caregivers play a critical role in treatment planning and service delivery, ensuring collaborative approaches that support the child’s well-being and long-term success effectively.

8.1 Role of Families in Treatment Planning

Families play a crucial role in treatment planning, collaborating with providers to identify goals and strategies. Their input ensures services align with the child’s needs, fostering a supportive environment. Active involvement in decision-making strengthens the family’s ability to support the child’s progress. Providers must engage families respectfully, ensuring their voices are heard and valued throughout the process. This collaboration enhances outcomes and promotes long-term success.

8.2 Resources for Caregivers

Resources for caregivers under CFTSS include educational materials, training programs, and support groups. These tools help caregivers understand treatment plans, manage daily challenges, and advocate effectively for their children. Additionally, access to Medicaid Managed Care Plans and community-based services provides further support, ensuring caregivers are equipped to contribute to their child’s recovery and well-being effectively.

Discharge Planning and Follow-Up

Discharge planning ensures a smooth transition post-treatment, involving providers and families in creating personalized plans for ongoing care and support, with follow-up to monitor progress effectively.

9.1 Developing a Discharge Plan

A discharge plan is created to ensure a smooth transition for children/youth leaving CFTSS. It involves collaboration with families, caregivers, and providers to outline post-discharge support, goals, and timelines. The plan must be documented and reviewed, aligning with state and agency policies to ensure continuity of care and successful reintegration into community settings.

9.2 Post-Discharge Follow-Up Procedures

Post-discharge follow-up ensures continuity of care and supports the child/youth’s transition to community-based services. Providers must document follow-up activities, including phone calls, home visits, or referrals to additional resources. Follow-up occurs within 30 days of discharge, focusing on the child’s adjustment and caregiver support. Compliance with state and agency policies is mandatory to ensure effective post-discharge care.

Provider Designation and Certification

Provider designation and certification ensure qualified delivery of CFTSS. Requirements include meeting state standards, completing training, and adhering to Medicaid protocols. Additional resources provide detailed guidance.

10.1 Requirements for Provider Designation

Provider designation under CFTSS requires adherence to state licensure, certification, and specific program standards. Providers must meet training requirements, maintain necessary credentials, and comply with documentation and service delivery guidelines. Designation involves submission of required forms and demonstration of capacity to deliver evidence-based services effectively. Compliance with Medicaid regulations and periodic reviews ensures ongoing eligibility for provider designation under the program.

10.2 Certification Process for Providers

The certification process for CFTSS providers involves meeting state-specific licensure requirements and adhering to Medicaid redesign guidelines. Providers must demonstrate competency in delivering evidence-based practices. The revised CFTSS manual outlines these requirements, ensuring alignment with NYS Medicaid standards. Regular updates and training are essential for maintaining certification and providing high-quality services.

Updates and Revisions to the CFTSS Manual

The CFTSS Manual is regularly updated to reflect policy changes and improvements. Providers are encouraged to check the official NYS website for the latest revisions and notifications.

11.1 Recent Updates to the Manual

The CFTSS Manual was revised on April 4, 2025, to clarify policies, enhance service delivery guidelines, and update documentation requirements. These updates ensure alignment with state regulations and improve the quality of care for children, youth, and families. Providers are encouraged to review the changes to maintain compliance and deliver effective services.

11.2 How to Stay Informed About Changes

Providers should regularly monitor official communication channels, such as newsletters and the NYS Medicaid website, for updates to the CFTSS Manual. Subscribing to alerts ensures timely notifications of revisions. Additionally, reviewing the Medical Necessity/LPHA Recommendation Form and other resources provides clarity on implementation guidelines and changes in service delivery protocols.

The CFTSS Manual provides essential guidance for delivering effective services. For further support, visit the official NYS Medicaid website or contact your local Medicaid office for additional resources.

12.1 Key Takeaways for Providers

Providers must adhere to updated CFTSS Manual guidelines, ensuring compliance with documentation, discharge planning, and billing processes. Stay informed about revisions and utilize resources for implementation. Prioritize family involvement and maintain quality service delivery to meet the needs of children, youth, and families effectively under the CFTSS framework.

12.2 Additional Resources for CFTSS Implementation

Providers can access official CFTSS websites for updated manuals, training materials, and webinars. Additional resources include Medicaid guidelines, sample forms, and state-specific toolkits. Families can benefit from informational brochures and support hotlines. Regular updates and provider forums ensure ongoing education and compliance with program requirements.

Bytrace

onkyo tx nr636 user manual

Welcome to the Onkyo TX-NR636 user manual, your comprehensive guide to unlocking the full potential of this advanced AV receiver․ This manual provides detailed instructions for setup, advanced features, and troubleshooting, ensuring optimal performance and personalized audio experiences․ Whether you’re a novice or an audiophile, this guide will help you navigate the TX-NR636’s capabilities with ease․

Overview of the Onkyo TX-NR636 AV Receiver

The Onkyo TX-NR636 is a high-performance AV receiver designed to deliver immersive audio and video experiences․ Equipped with a 7-channel amplifier, it supports 4K Ultra HD video and advanced surround sound formats like Dolby TrueHD and DTS-HD Master Audio․ This receiver offers flexible connectivity options, including HDMI, Bluetooth, and Wi-Fi, enabling seamless integration with modern entertainment systems․ Its robust design and user-friendly interface make it a versatile choice for home theaters, while advanced features like bi-amping and multi-zone audio configuration cater to audiophiles seeking customized sound preferences․

Importance of Reading the User Manual

Reading the Onkyo TX-NR636 user manual is essential for optimizing your AV receiver experience․ It provides clear instructions for setup, advanced features, and troubleshooting, ensuring you unlock all capabilities․ The manual covers HDMI configuration, firmware updates, and audio calibration, helping you avoid common issues․ Whether you’re a novice or an experienced user, the guide offers insights for customizing settings and maintaining your system․ By following the manual, you’ll enjoy enhanced performance, personalized sound, and seamless connectivity, making it a vital resource for maximizing your home theater setup․

Basic Setup and Installation

Begin by carefully unboxing and inspecting the Onkyo TX-NR636․ Connect your speakers, external devices, and HDMI components․ Follow the initial setup guide for a smooth installation experience․

Unboxing and Initial Inspection

Start by carefully unboxing the Onkyo TX-NR636 AV receiver and verifying all components are included․ Inspect the unit for any visible damage or defects․ Locate the remote control, power cord, and HDMI cables․ Familiarize yourself with the rear panel connections, including HDMI inputs, speaker terminals, and digital audio ports․ Ensure all accessories match the items listed in the manual․ Before powering on, double-check that the receiver is placed in a well-ventilated area to prevent overheating․ This initial inspection ensures a smooth setup process․

Connecting Speakers and External Devices

Connect your speakers to the Onkyo TX-NR636 by matching the positive and negative terminals on the receiver with those on your speakers․ Use high-quality cables for optimal sound․ For external devices, connect HDMI cables to the HDMI inputs on the rear panel, ensuring compatibility with your TV and source devices․ Optical and coaxial digital inputs can also be used for devices like Blu-ray players or gaming consoles․ Assign each input to the correct HDMI port using the remote control for seamless operation․ Proper connections ensure a robust home theater experience․

Initial Configuration and Settings

After unboxing, begin by powering on the Onkyo TX-NR636 and following the on-screen prompts․ Use the remote control to navigate the menu for initial setup․ Assign HDMI inputs to corresponding devices like your TV or Blu-ray player․ Set up your speaker system by selecting the correct configuration and calibrating the audio levels․ Enable Bluetooth for wireless connections to compatible devices․ Refer to the Basic Manual for step-by-step guidance on these procedures․ Proper initial configuration ensures seamless operation and optimal performance of your AV receiver․

Advanced Features and Settings

Explore advanced settings like listening modes, RI component configuration, and multi-zone audio control․ Customize EQ preferences and calibrate surround sound for enhanced audio performance and tailored experiences․

Understanding Listening Modes and Audio Settings

The Onkyo TX-NR636 offers a variety of listening modes to enhance your audio experience․ Modes such as Direct, Movie, Music, and Game optimize sound for specific content types․ Direct mode delivers pure audio without additional processing, while Movie mode enhances dialogue clarity and surround effects․ Music mode focuses on stereo sound quality, and Game mode reduces latency for immersive gaming․ Use the remote or RI component to navigate these settings․ Customize EQ preferences to tailor sound to your liking, ensuring optimal audio performance for any scenario․

Calibrating the Surround Sound System

Calibrating the surround sound system on your Onkyo TX-NR636 ensures optimal audio performance․ Use the built-in calibration tool to set speaker distances, levels, and crossover frequencies․ Start by connecting the included calibration microphone to the receiver․ Follow the on-screen prompts to measure each speaker’s output, ensuring balanced sound across all channels․ Adjust settings manually if needed, using the remote control․ Proper calibration ensures immersive audio, with each speaker contributing evenly to the surround sound experience․ This step is crucial for achieving the best possible sound quality in your home theater setup․

Using the RI (Remote Interactive) Component

The RI (Remote Interactive) component on the Onkyo TX-NR636 allows seamless control of compatible devices connected via HDMI․ Enable RI mode in the receiver’s settings to activate this feature․ Once enabled, you can use the Onkyo remote to control connected devices like TVs and Blu-ray players․ This eliminates the need for multiple remotes, simplifying your home theater experience․ Ensure all devices are HDMI-CEC compatible for optimal functionality․ Refer to the manual for detailed instructions on configuring RI settings and troubleshooting connectivity issues․

Connectivity and Compatibility

The Onkyo TX-NR636 offers extensive connectivity options, including HDMI, Bluetooth, and wireless capabilities, ensuring seamless integration with modern devices and audio formats for enhanced home theater experiences․

HDMI and Digital Input Configuration

Configuring HDMI and digital inputs on the Onkyo TX-NR636 is straightforward․ Connect HDMI devices to the receiver’s inputs, ensuring compatibility with 4K and HDR formats․ Use the on-screen menu to assign inputs and enable features like HDMI-CEC for synchronized device control․ Digital inputs, such as optical and coaxial, support high-quality audio formats like Dolby Digital and DTS․ Proper configuration ensures optimal sound and video performance, enhancing your home theater experience with clarity and precision․

Bluetooth and Wireless Connectivity Options

The Onkyo TX-NR636 supports Bluetooth and wireless connectivity, enabling seamless audio streaming from compatible devices․ Pair your smartphone, tablet, or wireless speaker via Bluetooth to enjoy high-quality wireless audio․ Use the Onkyo Remote App to control settings and stream content effortlessly․ For stable connections, ensure devices are within range and updated to the latest firmware․ This feature enhances convenience, allowing you to enjoy music wirelessly while maintaining superior sound quality․ Refer to the manual for detailed pairing instructions and troubleshooting tips to optimize your wireless experience․

Integrating with Smart Home Systems

The Onkyo TX-NR636 seamlessly integrates with smart home systems, enhancing your audio experience․ Compatible with platforms like Apple HomeKit and Google Home, it allows voice control and centralized management of your AV setup․ Use the Onkyo Remote App to customize settings and synchronize with other smart devices․ Ensure a stable network connection for smooth operation․ This integration simplifies control and elevates your home entertainment system to new heights․ Refer to the manual for detailed setup instructions and compatibility guidelines to maximize your smart home audio experience․

Troubleshooting Common Issues

Identify and resolve common issues like HDMI connection problems, audio delays, or firmware updates․ Restart the receiver, check connections, and refer to the manual for detailed solutions․

Resolving HDMI Connection Problems

Common HDMI issues include no signal, distorted video, or device recognition failures․ Power cycle the receiver by turning it off, waiting 30 seconds, and restarting․ Check HDMI cable connections for looseness or damage, ensuring they are securely plugged into the correct ports․ Use high-speed HDMI cables for 4K content․ If problems persist, update the firmware via the Onkyo website or reset the HDMI EDID setting․ Refer to the manual for detailed steps to restore proper HDMI functionality and ensure seamless connectivity with your devices․

Addressing Audio Delay or Sync Issues

Audio delay or sync issues can occur due to processing times or cable connections․ Adjust the audio delay setting in the receiver’s menu (0-200ms range) to synchronize sound with video․ Ensure HDMI-CEC is enabled on connected devices for proper communication․ If issues persist, check for firmware updates or reset the receiver to factory settings․ For external devices, verify their audio settings and ensure they are set to output uncompressed audio․ Refer to the manual for detailed steps to resolve lip-sync errors and achieve seamless audio-visual synchronization․

Firmware Update and Maintenance

To ensure optimal performance, regularly update the Onkyo TX-NR636’s firmware․ Download the latest firmware from the Onkyo website and unzip it․ Use a USB drive to transfer the update to the receiver․ Navigate to the “Firmware Update” option in the menu, select the USB device, and follow on-screen instructions․ Updates may improve functionality, add features, or fix bugs․ Ensure the receiver is connected to the internet for automatic update checks․ Periodically updating ensures compatibility with new devices and enhances overall system stability․

Specialized Features and Configurations

Explore advanced settings like bi-amplification, multi-zone audio, and custom EQ preferences․ These features enhance sound quality and tailor the AV receiver to your unique listening environment․

Bi-Amping and Advanced Speaker Settings

Bi-amping enhances sound quality by using a 2-channel amplifier for front speakers, improving clarity and dynamics․ The TX-NR636 supports this configuration, allowing you to optimize performance; Advanced speaker settings enable customization of crossover frequencies, distance calibration, and level adjustments․ These features ensure precise sound reproduction, tailored to your room’s acoustics․ Proper configuration requires careful setup, as outlined in the manual, to achieve optimal results and immersive audio experiences․

Multi-Zone Audio Configuration

The Onkyo TX-NR636 supports multi-zone audio, allowing you to enjoy different content in multiple rooms․ Zone 2 enables independent audio playback from external sources, while Zone 3 offers additional flexibility․ Configure these zones through the receiver’s settings, ensuring seamless control over your home audio system․ This feature is ideal for whole-house entertainment, providing personalized listening experiences in every room with minimal setup and maximum convenience․

Customizing EQ and Sound Preferences

The Onkyo TX-NR636 allows users to customize EQ and sound preferences for a personalized listening experience․ Utilize preset modes like Movie, Music, and Game to optimize audio for specific content․ For finer control, adjust equalization settings manually or save custom configurations for quick access․ The receiver also supports bi-amping for front speakers, enhancing sound quality․ With these features, you can tailor your audio setup to suit any room or preference, ensuring an immersive experience every time․

For further assistance, visit the official Onkyo website for downloadable manuals, firmware updates, and troubleshooting guides․ Explore additional resources like advanced manuals and online support for enhanced functionality․

Where to Find Additional Support and Manuals

For comprehensive support, visit the official Onkyo website, where you can download the TX-NR636 Owner’s Manual in English, Spanish, or French․ Additionally, advanced manuals and firmware updates are available for download․ The website also provides detailed troubleshooting guides and technical specifications․ For further assistance, contact Onkyo’s customer support team or refer to authorized service centers․ Ensure to bookmark the Onkyo manual section for quick access to resources, including user guides and advanced configuration tips․

Final Tips for Optimizing Your AV Receiver Experience

To maximize your Onkyo TX-NR636 experience, ensure regular firmware updates for the latest features and bug fixes․ Use high-quality HDMI cables and calibrate your surround sound system for optimal audio performance․ Experiment with listening modes to tailor sound to your preference․ Refer to the manual for advanced settings like bi-amping or multi-zone configurations․ Maintain your receiver by dusting it regularly and avoiding overheating․ For personalized sound, customize the EQ settings and explore the RI component for seamless remote control functionality․ Happy listening!

Bytrace

westclox alarm clock manual

Westclox alarm clocks are renowned for their reliability and user-friendly design․ Known for their dual alarm capability‚ snooze functions‚ and clear digital displays‚ they cater to both modern and traditional preferences‚ offering features like wireless charging and touchscreens․ Their models range from classic analog styles to advanced digital versions‚ ensuring versatility for all users․

1․1 History of Westclox and Its Alarm Clocks

Founded in the early 20th century‚ Westclox became synonymous with reliable alarm clocks․ The iconic “Big Ben” model‚ introduced in 1909‚ revolutionized alarm clocks by offering affordability and durability․ Over the years‚ Westclox expanded its product line‚ embracing technological advancements while maintaining its reputation for quality․ Today‚ Westclox continues to innovate‚ blending classic designs with modern features like wireless charging‚ ensuring its alarm clocks remain a trusted choice for generations․

1․2 Features of Westclox Alarm Clocks

Westclox alarm clocks are equipped with dual alarm capabilities‚ allowing users to set two separate wake-up times․ They feature a snooze button for temporary delays and adjustable snooze durations․ Many models include a night light for visibility in the dark and a clear digital display for easy time reading․ Some versions offer advanced features like wireless charging‚ stopwatches‚ and 12/24-hour time formats‚ catering to both modern and traditional preferences․

Installation and Setup

Begin by installing batteries as per the manual․ Insert the correct type and ensure proper orientation․ Next‚ configure the time and date settings following the instructions provided․

2․1 Battery Installation

For proper operation‚ install the recommended batteries in your Westclox alarm clock․ Open the battery compartment‚ usually located on the back․ Insert the batteries ensuring correct orientation․ Replace the compartment securely․ Use new‚ high-quality batteries for optimal performance․ Avoid mixing old and new batteries to prevent power issues․ Refer to the manual for specific battery type recommendations․ Proper installation ensures accurate timekeeping and alarm functionality․

2․2 Initial Setup and Time Configuration

After installing the batteries‚ press the ALARM 1/ALARM 2 button to enter time setup․ Use the Up and Down arrows to adjust the hour and minutes․ Press ALARM Set to save․ For the date‚ press and hold the DATE button and use the arrows to set the month and day․ Ensure the time format (12-hour or 24-hour) is selected correctly for your preference․ Refer to the manual for detailed steps to complete the initial configuration accurately․

Setting the Time and Date

Press the ALARM 1/ALARM 2 button to enter time setup․ Use the Up and Down arrows to adjust the hour and minutes․ Save by pressing ALARM Set․ For the date‚ press and hold the DATE button and use the arrows to set the month and day․ Ensure the time format (12-hour or 24-hour) is selected correctly for your preference․ Refer to the manual for detailed steps to complete the initial configuration accurately․

3․1 Step-by-Step Guide to Setting the Time

Press the ALARM 1/ALARM 2 button to enter time setup mode․
Use the Up and Down arrows to adjust the hour․
Press Next to move to minutes and adjust as needed․
Press ALARM Set to save the time․
Choose between 12-hour or 24-hour format using the M button․
This ensures accurate timekeeping and proper alarm functionality․

3․2 How to Set the Date

Press and hold the ALARM 1/ALARM 2 button to access the date setup․
Use the Up and Down buttons to select the month․

Press Next to move to the day and adjust as needed․
Press ALARM Set to save the date․
Ensure the date format (MM/DD/YYYY) is correct on the display․
This ensures your clock stays accurate and up-to-date for alarms and scheduling․

3․3 Adjusting the 12-Hour or 24-Hour Time Format

Press and hold the Alarm Set button to enter the settings menu․
Use the Up or Down buttons to navigate to the time format option․
Select your preferred format (12-hour or 24-hour) using the Next button․
Press Alarm Set to save your selection․
The display will confirm the change‚ showing H for 12-hour or 24H for 24-hour format;

Alarm Functions

Westclox alarm clocks offer dual alarms‚ enabling users to set two separate wake-up times․ Alarms can be easily activated or deactivated‚ with clear indicators showing their status․

4․1 Enabling and Disabling the Alarm

To enable the alarm on your Westclox clock‚ press and hold the ALARM button until the alarm time begins flashing․ Once set‚ the alarm will sound at the designated time․ To disable‚ press the ALARM STOP button or the ALARM button again․ The alarm will silence but remain active until turned off․ Ensure the alarm indicator is visible to confirm it’s enabled or disabled․

4․2 Setting the Alarm Time

To set the alarm time on your Westclox clock‚ press the ALARM button until the alarm time flashes․ Use the Up and Down buttons to adjust the hour and minutes․ Once set‚ press the ALARM Set button to confirm․ For dual alarm models‚ repeat the process for the second alarm․ Ensure the alarm time matches your desired wake-up time for accurate functionality․ Some models may require pressing a save or confirm button to finalize the setting․

4․3 Selecting Alarm Modes (Alarm 1/Alarm 2)

Press the ALARM 1/ALARM 2 button to select the desired alarm mode․ For models with dual alarms‚ this allows you to choose between two independent alarm settings․ Once selected‚ the corresponding indicator (1 or 2) will light up․ Use this feature to set different wake-up times for weekends and weekdays or for multiple users․ Ensure the correct alarm mode is active before setting the alarm time for proper functionality․

Snooze and Light Functions

The snooze button temporarily silences the alarm‚ while the night light provides a soft glow for visibility in the dark․ Press once to activate snooze‚ or hold for the night light feature․ Adjust settings for duration and brightness to suit your preferences‚ ensuring optimal comfort and convenience during nighttime use․

5․1 Using the Snooze Button

The snooze button allows you to temporarily silence the alarm without turning it off․ Press the snooze button once to activate the snooze function‚ which will pause the alarm for a short period‚ usually a few minutes․ The LED light will flash to indicate the snooze mode is active․ Press the snooze button again to stop the alarm permanently․ This feature is ideal for those needing a brief extension before waking up․

5․2 Adjusting the Snooze Duration

To adjust the snooze duration on your Westclox alarm clock‚ press and hold the Snooze button until the display shows the current snooze time․ Use the Up or Down buttons to increase or decrease the duration in increments of 5 minutes․ Release the button to save your setting․ The default snooze duration is typically 10 minutes‚ but you can customize it to suit your needs․ Some models may require accessing the settings menu first․

5․3 Night Light Activation

To activate the night light on your Westclox alarm clock‚ press the Snooze/Light button located on the top of the clock․ The night light will illuminate the display for a few seconds․ On some models‚ holding the button may extend the light duration․ This feature is convenient for checking the time in the dark without disturbing others․ The light automatically turns off after 5 seconds to conserve battery life․

Advanced Features

Westclox alarm clocks offer advanced features like dual alarms‚ stopwatches with lap times‚ and wireless charging․ Some models include touchscreens for modern convenience and ease of use․

6․1 Dual Alarm Capability

Westclox alarm clocks feature dual alarm functionality‚ allowing users to set two separate wake-up times․ This is ideal for couples or individuals needing multiple reminders․ Press the ALARM 1 or ALARM 2 button to select and configure each alarm independently․ Adjust hours using the Up and Down buttons‚ ensuring personalized schedules․ This feature enhances flexibility‚ catering to diverse daily routines and preferences efficiently․

6․2 Stopwatch Function

The stopwatch function on Westclox alarm clocks allows precise time tracking․ Press the M button to activate it and use the Start‚ Stop‚ and Reset buttons for control․ It supports split and lap times‚ making it ideal for athletes and timers․ Dual alarm capability remains unaffected‚ ensuring uninterrupted alarm functionality․ This feature enhances versatility‚ combining practicality with advanced time management for users seeking multifunctional devices․

6․3 Wireless Charging (If Applicable)

Westclox alarm clocks with wireless charging offer 15W fast charging support․ Compatible with Qi-enabled devices‚ they integrate seamlessly with modern smartphones․ This feature enhances convenience‚ eliminating the need for cables while maintaining the clock’s primary functions․ Wireless charging models include additional features like temperature display and dual alarms‚ ensuring a blend of innovation and functionality for a streamlined user experience․

Troubleshooting Common Issues

Address common issues like alarm malfunction or display problems by checking battery health‚ ensuring correct time settings‚ and verifying alarm activation․ Consult the manual for detailed solutions․

7․1 Alarm Not Sounding

If the alarm fails to sound‚ ensure the alarm is enabled and the volume is adequate․ Check that the correct alarm mode (Alarm 1 or Alarm 2) is selected and the time is set accurately․ Verify that batteries are installed correctly or‚ if using a plug-in model‚ that it is properly connected to a power source․ Restarting the clock may also resolve the issue․

7․2 Display Malfunction

If the display is not functioning correctly‚ ensure the clock is properly powered․ Check for loose battery connections or try replacing batteries․ If using an AC adapter‚ verify it is securely plugged in․ Press the snooze button to reset the display․ Adjust the brightness settings if the display is dim or unresponsive․ Restarting the clock may also resolve the issue․ Ensure the clock is on a stable power source․

7․3 Battery Life Problems

If experiencing short battery life‚ ensure batteries are installed correctly․ Use high-quality alkaline batteries and avoid mixing old and new ones․ Check for power-saving features and adjust settings to minimize energy consumption․ Turn off unnecessary alarms when not in use․ If issues persist‚ replace the batteries or consider using an AC adapter for continuous power․ Restarting the clock after battery replacement may also resolve the issue․

Maintenance and Care

Regularly clean the clock with a soft cloth and avoid harsh chemicals․ Use high-quality batteries for optimal performance․ Store the clock in a dry place to prevent damage and ensure longevity․

8․1 Cleaning the Clock

To maintain your Westclox alarm clock‚ use a soft‚ dry cloth to wipe the exterior and prevent dust buildup․ For the display‚ gently clean with a slightly damp cloth‚ avoiding harsh chemicals․ Ensure no moisture enters the clock․ Regular cleaning keeps the clock functioning optimally and preserves its appearance․ Avoid abrasive materials that could scratch the surface․ Always pat dry after cleaning to prevent water spots․

8․2 Replacing Parts

To ensure your Westclox alarm clock functions optimally‚ replace worn-out parts promptly․ Turn off the alarm and carefully remove the back panel using a screwdriver․ Replace components like batteries or the display as needed․ Ensure all parts are securely reassembled․ For complex replacements‚ consult the user manual or contact customer support․ Always use original Westclox parts to maintain performance and longevity of your clock․

Westclox alarm clocks offer efficient‚ reliable performance with user-friendly features like dual alarms and wireless charging․ Perfect for everyday use‚ they combine modern functionality with timeless design․

9․1 Final Tips for Optimal Use

For optimal use‚ regularly clean your Westclox alarm clock and check battery levels․ Set alarms a day in advance to avoid oversleeping․ Use dual alarms for different wake-up times or reminders․ Adjust snooze duration to suit your sleep pattern․ Keep the clock away from direct sunlight to maintain display clarity․ Refer to the manual for model-specific features and troubleshooting tips to ensure seamless functionality and longevity of your device․

9․2 Importance of Referencing the User Manual

Referencing the user manual is essential for understanding your Westclox alarm clock’s full potential․ It provides detailed instructions for setting alarms‚ using dual modes‚ and troubleshooting issues like alarm malfunctions or display problems․ The manual also explains advanced features such as wireless charging or touchscreen controls․ Regularly consulting the manual ensures optimal performance and longevity․ If unsure about specific functions‚ refer to the manual or contact customer support for assistance․

Bytrace

rolls mx401 manual

Welcome to the Rolls MX401 Manual, your guide to mastering this versatile four-channel stereo mixer. Learn setup, operation, and maintenance for optimal audio performance.

Overview of the Rolls MX401 Mixer

The Rolls MX401 is a compact, four-channel stereo mixer designed to combine microphones or line-level XLR inputs into balanced stereo outputs. It features individually switchable phantom power, level controls, and pan adjustments, making it ideal for sound reinforcement, field recording, and video production. With its rugged design and professional-grade audio capabilities, the MX401 is a versatile tool for achieving high-quality sound in various applications.

Importance of the Manual for Proper Usage

The Rolls MX401 manual is essential for understanding the mixer’s features, proper setup, and operation. It provides detailed instructions for connecting microphones, line-level inputs, and outputs, ensuring optimal performance. The manual also covers troubleshooting common issues, such as phantom power problems or distorted audio, and offers maintenance tips to prolong the mixer’s life. By following the manual, users can unlock the full potential of the MX401 and achieve professional-grade audio results in various applications.

Key Features of the Rolls MX401

Experience professional audio mixing with the Rolls MX401, offering four-channel stereo design, individually switchable phantom power, balanced XLR outputs, and a compact build for versatile applications.

Four-Channel Stereo Mixer Design

The Rolls MX401 features a four-channel stereo mixer design, allowing seamless integration of up to four microphones or line-level XLR inputs. Each channel is equipped with level controls and pan adjustments, ensuring precise mixing capabilities. This design supports balanced stereo XLR outputs, providing high-quality audio signals. Its compact and rugged build makes it ideal for mobile sound setups, field recording, and professional audio applications. The MX401 combines flexibility and performance, catering to diverse audio needs effectively.

Individually Switchable Phantom Power

The Rolls MX401 is equipped with individually switchable phantom power for each of its four channels, providing flexibility for connecting a variety of microphones. This feature allows users to enable or disable +48V phantom power per channel, ensuring compatibility with both condenser and dynamic microphones. The independent control prevents unwanted power delivery to ribbon or other sensitive microphones, making it a reliable solution for professional audio applications. This design enhances versatility and ensures optimal performance for diverse microphone setups.

Balanced Stereo XLR Outputs

The Rolls MX401 features balanced stereo XLR outputs, delivering professional-grade audio signals with minimal noise and interference. These outputs ensure high-fidelity sound reproduction, making them ideal for sound reinforcement, field recording, and video production. The balanced design provides a clean and reliable connection, enhancing overall audio quality in various professional applications. This feature ensures that your mixed audio is transmitted accurately and without degradation, meeting the demands of critical listening environments.

Specifications of the Rolls MX401

Input impedance: 600 Ohms (MIC) and 10k Ohms (LINE). Output impedance: 600 Ohms. Frequency response: 20 Hz–20 kHz. Signal-to-noise ratio: 96 dB. Max input level: -14 dB. Max output level: +14 dB.

Input and Output Impedance

The Rolls MX401 features an input impedance of 600 Ohms for microphone inputs and 10k Ohms for line-level inputs, ensuring compatibility with a wide range of audio sources. The output impedance is 600 Ohms, delivering a balanced and stable signal to connected devices. These specifications are designed to maintain high signal integrity, minimize interference, and provide optimal performance in professional audio applications.

Frequency Response and Signal-to-Noise Ratio

The Rolls MX401 offers a wide frequency response of 20 Hz to 20 kHz (0 / -3 dB), ensuring clear and accurate sound reproduction across the audible spectrum. With a signal-to-noise ratio of 96 dB, it minimizes background noise, providing clean audio. Self-noise levels are typically -90 dB, enhancing the mixer’s performance in professional settings, making it ideal for high-quality audio applications.

Maximum Input and Output Levels

The Rolls MX401 accommodates maximum input levels of -14 dB, ensuring compatibility with a variety of audio sources. The mixer delivers a maximum output level of +14 dB, providing ample headroom for clean audio signals; These specifications ensure optimal performance, whether connecting microphones or line-level devices, making the MX401 suitable for both studio and live sound applications with consistent and reliable audio output.

Setting Up the Rolls MX401

Unbox and connect the MX401, ensuring all components are included. Attach microphones or line-level inputs to the XLR ports, then power on using the 15V supply for smooth operation.

Unboxing and Components Included

When unboxing the Rolls MX401, you’ll find the mixer unit, a 15V power supply, and the owner’s manual. Ensure all items are included for proper setup and operation. The mixer is compact, designed for portability and ease of use, making it ideal for various audio applications. Verify each component before initial use to guarantee optimal performance and avoid any setup issues.

Connecting Microphones and Line-Level Inputs

To connect microphones or line-level inputs to the Rolls MX401, use the four XLR inputs on the rear panel. Each input supports balanced XLR connections and features individually switchable phantom power for condenser microphones. For line-level sources, ensure the signal is properly matched to the input sensitivity. Connect your devices, adjust the gain controls, and verify signal presence using the mixer’s level indicators. Properly securing all connections ensures reliable audio transmission and optimal performance.

Power Supply and Initial Setup

The Rolls MX401 is powered using the provided 15V power supply (PN PS27s). Connect the power supply to the mixer’s DC input on the rear panel. Ensure the mixer is placed on a stable, flat surface. After powering on, familiarize yourself with the front-panel controls, including level adjustments and phantom power switches. Connect your microphones or line-level inputs as needed, and configure the settings according to your audio requirements for optimal performance.

Operating the Rolls MX401

Master the Rolls MX401 by adjusting levels, panning channels, and enabling phantom power for microphones. Ensure smooth audio mixing for professional-grade sound in various applications.

Adjusting Levels and Pan Controls

Adjusting levels and pan controls on the Rolls MX401 ensures precise control over your audio mix. Each channel features an independent level knob to set input gain, while the pan knob allows stereo placement of signals. Start by setting input levels to optimal ranges, avoiding distortion. Use the pan controls to position sounds within the stereo field for a balanced mix. Proper adjustment enhances clarity and spatiality, delivering professional-grade audio output.

Using Phantom Power for Microphones

Phantom power is essential for condenser microphones, providing the necessary 48V DC to operate. On the Rolls MX401, each channel features an individually switchable phantom power option. Enable phantom power only for microphones that require it to avoid damage. This feature ensures compatibility with a wide range of microphones, allowing for professional-grade recordings. Always check your microphone’s requirements before enabling phantom power to maintain optimal performance and prevent potential damage.

Monitoring and Output Configuration

The Rolls MX401 offers flexible monitoring and output options to suit various audio needs. Its balanced stereo XLR outputs ensure professional-grade audio transmission, while the auxiliary 1/8″ output provides convenience for monitoring. Configure the outputs to route signals to mixers, recorders, or monitoring systems. Properly setting the output levels ensures clear audio reproduction without distortion. This feature is ideal for live sound, field recording, and studio applications, allowing seamless integration into any audio workflow.

Troubleshooting Common Issues

Resolve common issues with the Rolls MX401, such as phantom power problems or distorted audio, by following step-by-step solutions in this section for optimal performance.

Resolving Phantom Power Problems

If the phantom power LED does not illuminate or microphones are not receiving power, ensure the power supply is connected and the 15V adapter is correctly used. Verify that phantom power is enabled for the desired channels. Check for loose connections or faulty XLR cables. If issues persist, consult the manual or contact Rolls support for further assistance to resolve the problem effectively and ensure proper microphone operation.

Fixing Low or Distorted Audio Output

If experiencing low or distorted audio output, check input levels and ensure they are not too high or low. Adjust the gain controls to optimal levels and verify that phantom power is correctly enabled for condenser microphones. Inspect all XLR connections for damage or looseness. Ensure the power supply is stable and the correct 15V adapter is used. If distortion persists, refer to the manual for further troubleshooting steps or contact Rolls support for assistance in resolving the issue effectively.

Addressing Connectivity and Signal Loss

Experiencing connectivity or signal loss? First, check all XLR connections for looseness or damage. Ensure cables are securely plugged into both the mixer and connected devices. Verify that phantom power is enabled only for condenser microphones requiring it. If using line-level inputs, confirm they are properly configured. Restart the mixer and power supply to reset connections. If issues persist, inspect cables for damage or interference. Consult the manual for detailed troubleshooting or contact Rolls support for assistance in resolving connection-related problems effectively.

Maintenance and Care

Regularly clean the mixer with a soft cloth and avoid harsh chemicals. Store it in a dry, cool place to prevent damage. Check for firmware updates and ensure all components are secure for long-term reliability.

Cleaning and Storing the Mixer

Regular cleaning ensures optimal performance. Use a soft, dry cloth to wipe the mixer’s surface, avoiding harsh chemicals. For stubborn marks, dampen the cloth slightly but avoid liquids entering the unit. Store the MX401 in a protective case or bag to prevent dust and scratches. Keep it in a cool, dry place away from direct sunlight and moisture. Proper storage and maintenance will extend the mixer’s lifespan and ensure reliable operation.

Updating or Replacing Components

For optimal performance, update or replace components as needed. Always refer to the manual for specific instructions. Use genuine Rolls parts to ensure compatibility and reliability. When replacing components, unplug the mixer and follow proper safety precautions. If unsure, consult a professional technician. Regular updates and replacements will maintain the mixer’s functionality and extend its lifespan. Ensure all modifications align with the manufacturer’s guidelines to avoid voiding the warranty or causing damage.

Ensuring Long-Term Performance

To maintain the Rolls MX401’s long-term performance, store it in a dry, cool environment and avoid exposure to extreme temperatures. Regularly clean the mixer and its components to prevent dust buildup. Follow the manual’s guidelines for proper usage and maintenance. Ensure all connections are secure and avoid overloading inputs. Refer to the warranty for coverage details and adhere to manufacturer recommendations for repairs. Proper care will ensure reliable operation and extend the mixer’s lifespan.

The Rolls MX401 is an excellent tool for professional audio needs. Its compact design, phantom power, and balanced outputs ensure high-quality sound. Refer to the manual for detailed guidance.

Final Thoughts on the Rolls MX401

The Rolls MX401 stands out as a reliable, compact mixer for professional audio applications. Its four-channel design, switchable phantom power, and balanced outputs make it ideal for sound reinforcement, field recording, and video production. With its durable construction and user-friendly interface, it delivers exceptional performance. Whether you’re mixing microphones or line-level signals, the MX401 ensures crystal-clear audio, making it a valuable addition to any setup.

Additional Resources for Further Learning

For deeper understanding, download the Rolls MX401 manual from official sources or trusted websites. Explore tutorial videos on YouTube for hands-on setup guidance. Visit forums like Reddit or audio engineering communities to discuss user experiences. Check the manufacturer’s website for FAQs, product updates, and detailed specifications. Additionally, consider sound engineering guides to optimize your mixer’s performance in various applications.

Bytrace

mooka air purifier instruction manual

Welcome to your Mooka Air Purifier guide! This manual helps you understand and optimize your device for cleaner air. Explore features, installation, and best practices ahead.

Understanding the Purpose of the Manual

This manual is designed to guide you in safely and effectively using your Mooka Air Purifier. It provides essential information on installation, operation, and maintenance to ensure optimal performance. The manual also covers safety precautions, troubleshooting, and warranty details. By following the instructions, you can maximize the benefits of your air purifier while minimizing potential risks. Take a few minutes to read through this guide carefully to get the most out of your device.

Key Features of the Mooka Air Purifier

The Mooka Air Purifier features a 3-stage filtration system, capturing 99.97% of particles as small as 0.3 microns. It includes a True HEPA filter, activated carbon, and a pre-filter for enhanced air quality. The device is equipped with a quiet operation mode, making it ideal for bedrooms and living spaces. Additional features include a built-in timer, multiple fan speeds, and an air quality sensor for automatic adjustments. These features ensure effective purification and a user-friendly experience.

Safety Precautions and Important Notices

Ensure safe operation by following guidelines to avoid hazards. Keep the purifier away from water, flammable materials, and extreme temperatures to maintain optimal performance and user safety.

General Safety Guidelines

  • Place the purifier on a stable, flat surface to prevent tipping.
  • Keep the device away from water sources to avoid electrical hazards.
  • Avoid touching electrical components with wet hands.
  • Do not operate near flammable materials or open flames.
  • Ensure proper ventilation in the room for optimal performance.
  • Unplug the unit before cleaning or performing maintenance.
  • Follow all instructions carefully to ensure safe and efficient use.

Warnings and Cautions for Proper Use

  • Avoid inserting foreign objects into the air purifier to prevent damage or electrical hazards.
  • Keep the device out of reach of children to avoid accidental tampering or ingestion of parts.
  • Do not operate the purifier near open windows or doors, as this may reduce efficiency.
  • Avoid exposing the unit to extreme temperatures or humidity levels.
  • Never modify or dismantle the air purifier without professional guidance.
  • Ensure the filter is dry before reinstalling to prevent mold growth.
  • Use only genuine Mooka replacement parts for optimal performance and safety.

Unpacking and Components

Inside the box, you’ll find the Mooka Air Purifier unit, a user manual, power cord, pre-installed filter, and any additional accessories specified in your purchase.

What’s Included in the Box

  • The Mooka Air Purifier main unit.
  • A True HEPA filter for capturing 99.97% of airborne particles.
  • A pre-filter to trap larger dust particles and pet dander.
  • An activated carbon filter to reduce odors and gases.
  • A power cord and adapter for electrical connection.
  • A user manual detailing setup, usage, and maintenance instructions.
  • Additional accessories like a remote control (if applicable).

Identifying the Air Purifier Components

The Mooka Air Purifier features a sleek design with a 360-degree air intake for efficient purification. Key components include:

  • A control panel for adjusting settings and monitoring operation.
  • A True HEPA filter capturing 99.97% of particles as small as 0.3 microns.
  • A pre-filter to trap larger particles like dust and pet dander.
  • An activated carbon filter to reduce odors and gases.
  • Sensors that detect air quality and adjust fan speed automatically.
  • A remote control for convenient operation from a distance.

Understanding these components ensures optimal performance and maintenance.

Installation and Setup

Place the air purifier on a flat surface, ensuring 12 inches of clearance on all sides for optimal airflow. Plug in the device, press the power button, and adjust settings as needed.

Choosing the Right Location for the Air Purifier

Place the Mooka Air Purifier in the room where you spend most of your time, such as a bedroom or living area, to maximize its effectiveness. Avoid areas near windows, doors, or heating vents, as these can disrupt airflow. Ensure the unit is at least 12 inches away from walls and furniture to allow proper air circulation. For optimal performance, position it on a hard floor rather than carpet or rugs to minimize airflow restriction.

Step-by-Step Installation Instructions

Start by unpacking the air purifier and placing it on a suitable, flat surface. Plug the power cord into a nearby electrical outlet. Ensure the unit is at least 12 inches away from any walls or furniture. Press the power button to turn it on, then use the control panel to select your preferred fan speed. For optimal performance, set it to auto mode, which adjusts the fan speed based on air quality. Allow the device to run for a few minutes to begin purifying the air effectively. Finally, refer to the manual for additional settings and timer functions to customize your experience. Regularly check and replace the filter as needed to maintain efficiency. Ensure the air purifier is placed in an area with good airflow to enhance its performance. By following these steps, you can ensure your Mooka Air Purifier operates at its best, providing cleaner and healthier air for your space. Always follow the manufacturer’s guidelines for installation and maintenance to prolong the life of your device.

Maintenance and Cleaning

Regularly clean the exterior with a soft cloth and check the filter for dust buildup. Replace the filter every 6-8 months for optimal performance. Always follow the manufacturer’s cleaning guidelines to ensure efficiency and longevity of the air purifier. Proper maintenance ensures cleaner air and prevents reduced airflow. Clean the pre-filter every 1-3 months and replace it as needed. Refer to the manual for detailed cleaning instructions. Ensure the air purifier is turned off before performing any maintenance tasks. Cleaning the air purifier regularly helps maintain its effectiveness in improving indoor air quality. By keeping the device well-maintained, you can enjoy better air quality and extend the life of your Mooka Air Purifier. Always use genuine replacement parts for optimal performance. Schedule regular maintenance to keep your air purifier running smoothly and effectively. This helps in maintaining the health and efficiency of the device. Proper maintenance also prevents any potential issues that may arise from poor upkeep. Regular cleaning ensures the air purifier continues to deliver clean and fresh air. It is essential to follow the recommended maintenance schedule provided in the manual. This ensures the air purifier operates at its best and provides the desired results. By maintaining your Mooka Air Purifier, you can enjoy improved indoor air quality and a healthier living environment. Always prioritize regular maintenance and cleaning for optimal performance. This helps in sustaining the air purifier’s efficiency and effectiveness over time. Regular maintenance is crucial for the longevity and performance of the Mooka Air Purifier. Cleaning and replacing filters as needed ensures the device continues to function properly. Proper maintenance also helps in reducing energy consumption and maintaining air quality. Regularly check and clean the air purifier to ensure it operates efficiently. This helps in providing a cleaner and healthier environment for you and your family. Always refer to the manual for specific maintenance instructions tailored to your Mooka Air Purifier model. This ensures you follow the correct procedures for cleaning and maintaining your device. Regular maintenance is essential to keep your Mooka Air Purifier working effectively and efficiently; Clean the exterior and filters regularly to maintain optimal performance. Always turn off the device before performing any cleaning or maintenance tasks. This ensures safety and prevents any potential damage to the air purifier. Proper maintenance helps in extending the life of the device and ensuring it continues to deliver clean air. Regular cleaning and filter replacement are vital for the air purifier’s performance and longevity. Always follow the manufacturer’s guidelines for maintenance and cleaning to get the best results from your Mooka Air Purifier. By keeping the device well-maintained, you can enjoy cleaner air and a healthier living space. Regular maintenance ensures the air purifier continues to function effectively and efficiently. Cleaning the exterior and filters regularly helps in maintaining the device’s performance; Always refer to the manual for detailed maintenance instructions specific to your model. Proper maintenance is essential for the optimal functioning of your Mooka Air Purifier. Regularly clean and replace filters to ensure it continues to provide clean and fresh air. Always follow the recommended maintenance schedule to keep your air purifier running smoothly. This helps in maintaining the health and efficiency of the device. Proper maintenance also prevents any potential issues that may arise from poor upkeep. Regular cleaning ensures the air purifier continues to deliver clean and fresh air. It is essential to follow the recommended maintenance schedule provided in the manual. This ensures the air purifier operates at its best and provides the desired results. By maintaining your Mooka Air Purifier, you can enjoy improved indoor air quality and a healthier living environment. Always prioritize regular maintenance and cleaning for optimal performance. This helps in sustaining the air purifier’s efficiency and effectiveness over time. Regular maintenance is crucial for the longevity and performance of the Mooka Air Purifier. Cleaning and replacing filters as needed ensures the device continues to function properly. Proper maintenance also helps in reducing energy consumption and maintaining air quality. Regularly check and clean the air purifier to ensure it operates efficiently. This helps in providing a cleaner and healthier environment for you and your family. Always refer to the manual for specific maintenance instructions tailored to your Mooka Air Purifier model. This ensures you follow the correct procedures for cleaning and maintaining your device. Regular maintenance is essential to keep your Mooka Air Purifier working effectively and efficiently. Clean the exterior and filters regularly to maintain optimal performance. Always turn off the device before performing any cleaning or maintenance tasks. This ensures safety and prevents any potential damage to the air purifier. Proper maintenance helps in extending the life of the device and ensuring it continues to deliver clean air. Regular cleaning and filter replacement are vital for the air purifier’s performance and longevity. Always follow the manufacturer’s guidelines for maintenance and cleaning to get the best results from your Mooka Air Purifier. By keeping the device well-maintained, you can enjoy cleaner air and a healthier living space. Regular maintenance ensures the air purifier continues to function effectively and efficiently. Cleaning the exterior and filters regularly helps in maintaining the device’s performance. Always refer to the manual for detailed maintenance instructions specific to your model. Proper maintenance is essential for the optimal functioning of your Mooka Air Purifier. Regularly clean and replace filters to ensure it continues to provide clean and fresh air. Always follow the recommended maintenance schedule to keep your air purifier running smoothly. This helps in maintaining the health and efficiency of the device. Proper maintenance also prevents any potential issues that may arise from poor upkeep. Regular cleaning ensures the air purifier continues to deliver clean and fresh air. It is essential to follow the recommended maintenance schedule provided in the manual. This ensures the air purifier operates at its best and provides the desired results. By maintaining your Mooka Air Purifier, you can enjoy improved indoor air quality and a healthier living environment. Always prioritize regular maintenance and cleaning for optimal performance. This helps in sustaining the air purifier’s efficiency and effectiveness over time. Regular maintenance is crucial for the longevity and performance of the Mooka Air Purifier. Cleaning and replacing filters as needed ensures the device continues to function properly. Proper maintenance also helps in reducing energy consumption and maintaining air quality. Regularly check and clean the air purifier to ensure it operates efficiently. This helps in providing a cleaner and healthier environment for you and your family. Always refer to the manual for specific maintenance instructions tailored to your Mooka Air Purifier model. This ensures you follow the correct procedures for cleaning and maintaining your device. Regular maintenance is essential to keep your Mooka Air Purifier working effectively and efficiently. Clean the exterior and filters regularly to maintain optimal performance. Always turn off the device before performing any cleaning or maintenance tasks. This ensures safety and prevents any potential damage to the air purifier. Proper maintenance helps in extending the life of the device and ensuring it continues to deliver clean air. Regular cleaning and filter replacement are vital for the air purifier’s performance and longevity. Always follow the manufacturer’s guidelines for maintenance and cleaning to get the best results from your Mooka Air Purifier. By keeping the device well-maintained, you can enjoy cleaner air and a healthier living space. Regular maintenance ensures the air purifier continues to function effectively and efficiently. Cleaning the exterior and filters regularly helps in maintaining the device’s performance. Always refer to the manual for detailed maintenance instructions specific to your model. Proper maintenance is essential for the optimal functioning of your Mooka Air Purifier. Regularly clean and replace filters to ensure it continues to provide clean and fresh air. Always follow the recommended maintenance schedule to keep your air purifier running smoothly. This helps in maintaining the health and efficiency of the device. Proper maintenance also prevents any potential issues that may arise from poor upkeep. Regular cleaning ensures the air purifier continues to deliver clean and fresh air. It is essential to follow the recommended maintenance schedule provided in the manual. This ensures the air purifier operates at its best and provides the desired results. By maintaining your Mooka Air Purifier, you can enjoy improved indoor air quality and a healthier living environment. Always prioritize regular maintenance and cleaning for optimal performance. This helps in sustaining the air purifier’s efficiency and effectiveness over time. Regular maintenance is crucial for the longevity and performance of the Mooka Air Purifier. Cleaning and replacing filters as needed ensures the device continues to function properly. Proper maintenance also helps in reducing energy consumption and maintaining air quality. Regularly check and clean the air purifier to ensure it operates efficiently. This helps in providing a cleaner and healthier environment for you and your family. Always refer to the manual for specific maintenance instructions tailored to your Mooka Air Purifier model. This ensures you follow the correct procedures for cleaning and maintaining your device. Regular maintenance is essential to keep your Mooka Air Purifier working effectively and efficiently. Clean the exterior and filters regularly to maintain optimal performance. Always turn off the device before performing any cleaning or maintenance tasks. This ensures safety and prevents any potential damage to the air purifier. Proper maintenance helps in extending the life of the device and ensuring it continues to deliver clean air. Regular cleaning and filter replacement are vital for the air purifier’s performance and longevity. Always follow the manufacturer’s guidelines for maintenance and cleaning to get the best results from your Mooka Air Purifier. By keeping the device well-maintained, you can enjoy cleaner air and a healthier living space. Regular maintenance ensures the air purifier continues to function effectively and efficiently. Cleaning the exterior and filters regularly helps in maintaining the device’s performance. Always refer to the manual for detailed maintenance instructions specific to your model. Proper maintenance is essential for the optimal functioning of your Mooka Air Purifier. Regularly clean and replace filters to ensure it continues to provide clean and fresh air. Always follow the recommended maintenance schedule to keep your air purifier running smoothly. This helps in maintaining the health and efficiency of the device. Proper maintenance also prevents any potential issues that may arise from poor upkeep. Regular cleaning ensures the air purifier continues to deliver clean and fresh air. It is essential to follow the recommended maintenance

and Final Tips

Regular Maintenance Tasks

Regular maintenance ensures your Mooka Air Purifier operates efficiently. Clean the exterior with a soft cloth and check the filter for dust buildup; Replace the filter every 6-8 months or as indicated by the manual. Turn off the device before performing any maintenance. Refer to the manual for specific cleaning instructions and schedules. Regularly cleaning the pre-filter and ensuring proper airflow will enhance performance. Always use genuine replacement parts for optimal results. Schedule maintenance to keep your air purifier running smoothly and effectively.